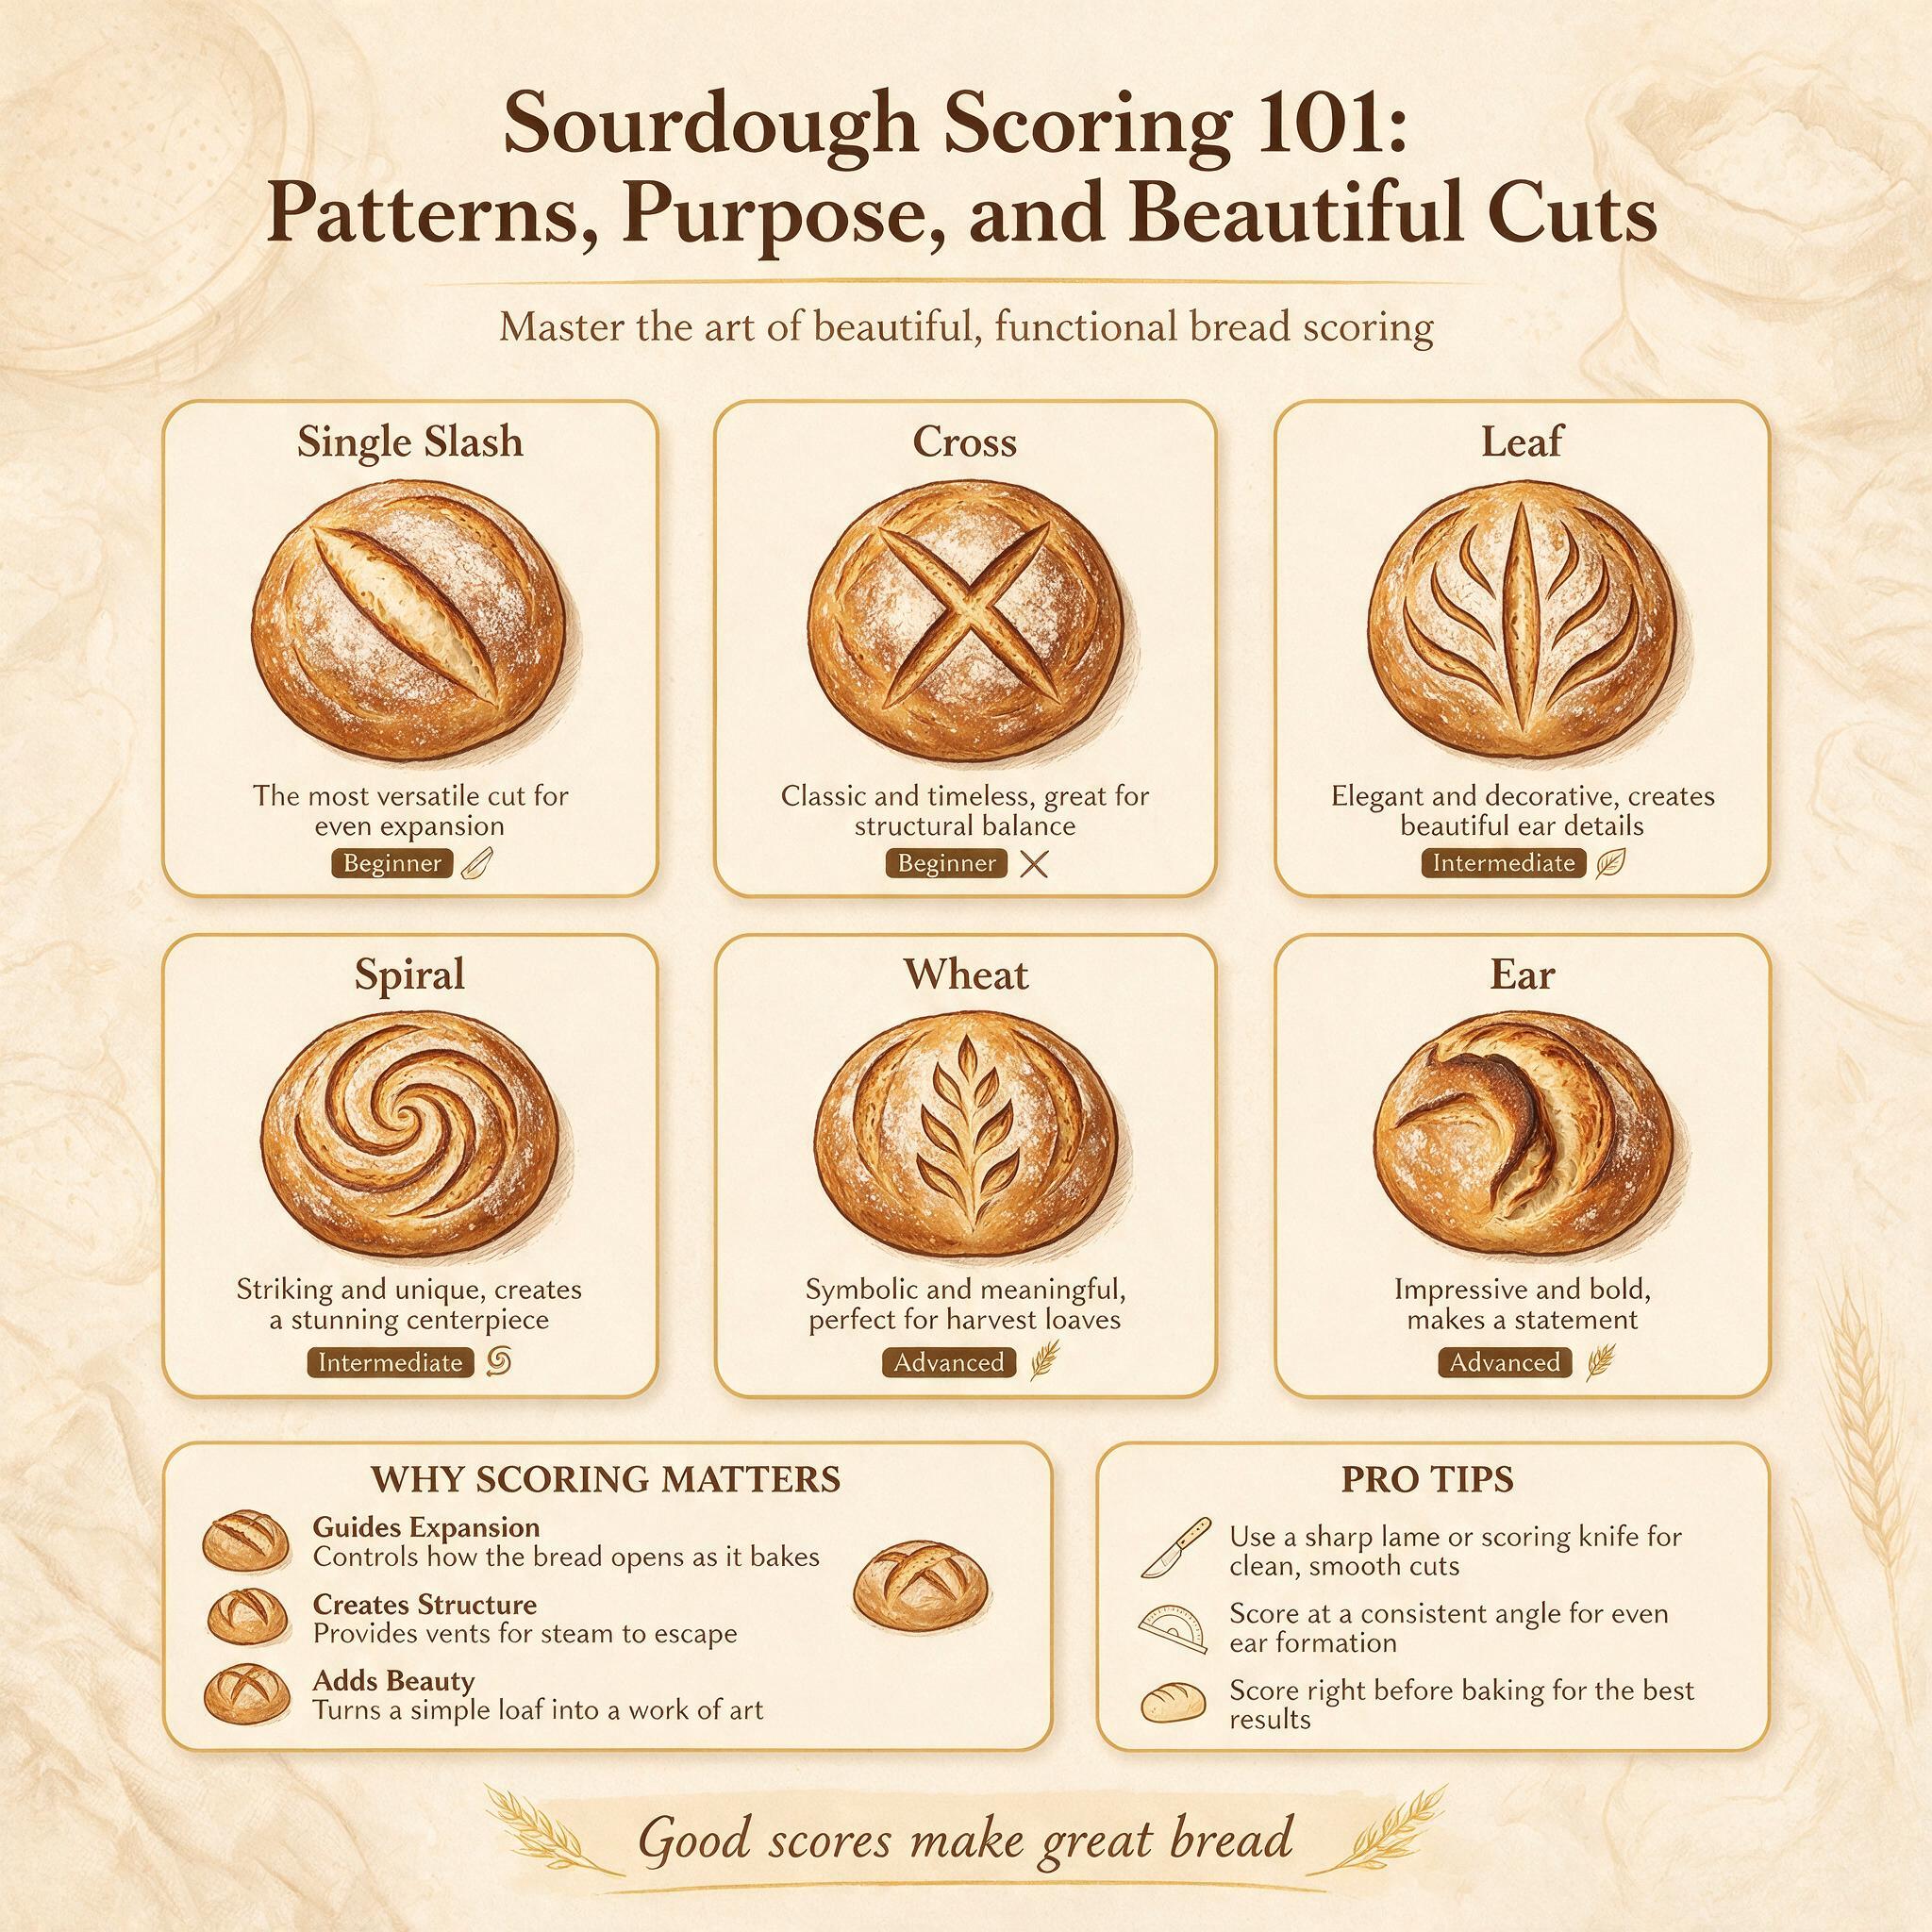
Scoring isn't just decoration — it controls where your bread expands in the oven. Without a score, dough bursts open wherever it's weakest (usually the bottom or sides), producing an ugly, lopsided loaf. With a good score, you direct expansion upward through a controlled weak point, creating that beautiful ear and dramatic bloom that makes sourdough look like it came out of a bakery.
But scoring has a reputation for being intimidating — sharp blades, precise angles, confident motions required. Many bakers avoid scoring altogether (result: side blowouts), or score so timidly that nothing happens in the oven (result: barely-opened scores). Both are fixable with practice and understanding the mechanics behind what you're doing.
This guide covers the tools you need, blade angle and depth, basic patterns, how scoring direction relates to shaping tension, and why a well-fermented loaf with a simple cut beats an under-proofed fancy pattern every time.
What You'll Learn
By the end of this post, you'll understand:
- •Which tool to use for scoring (and why a lame is better than a knife)
- •The ideal blade angle and depth for clean ear formation
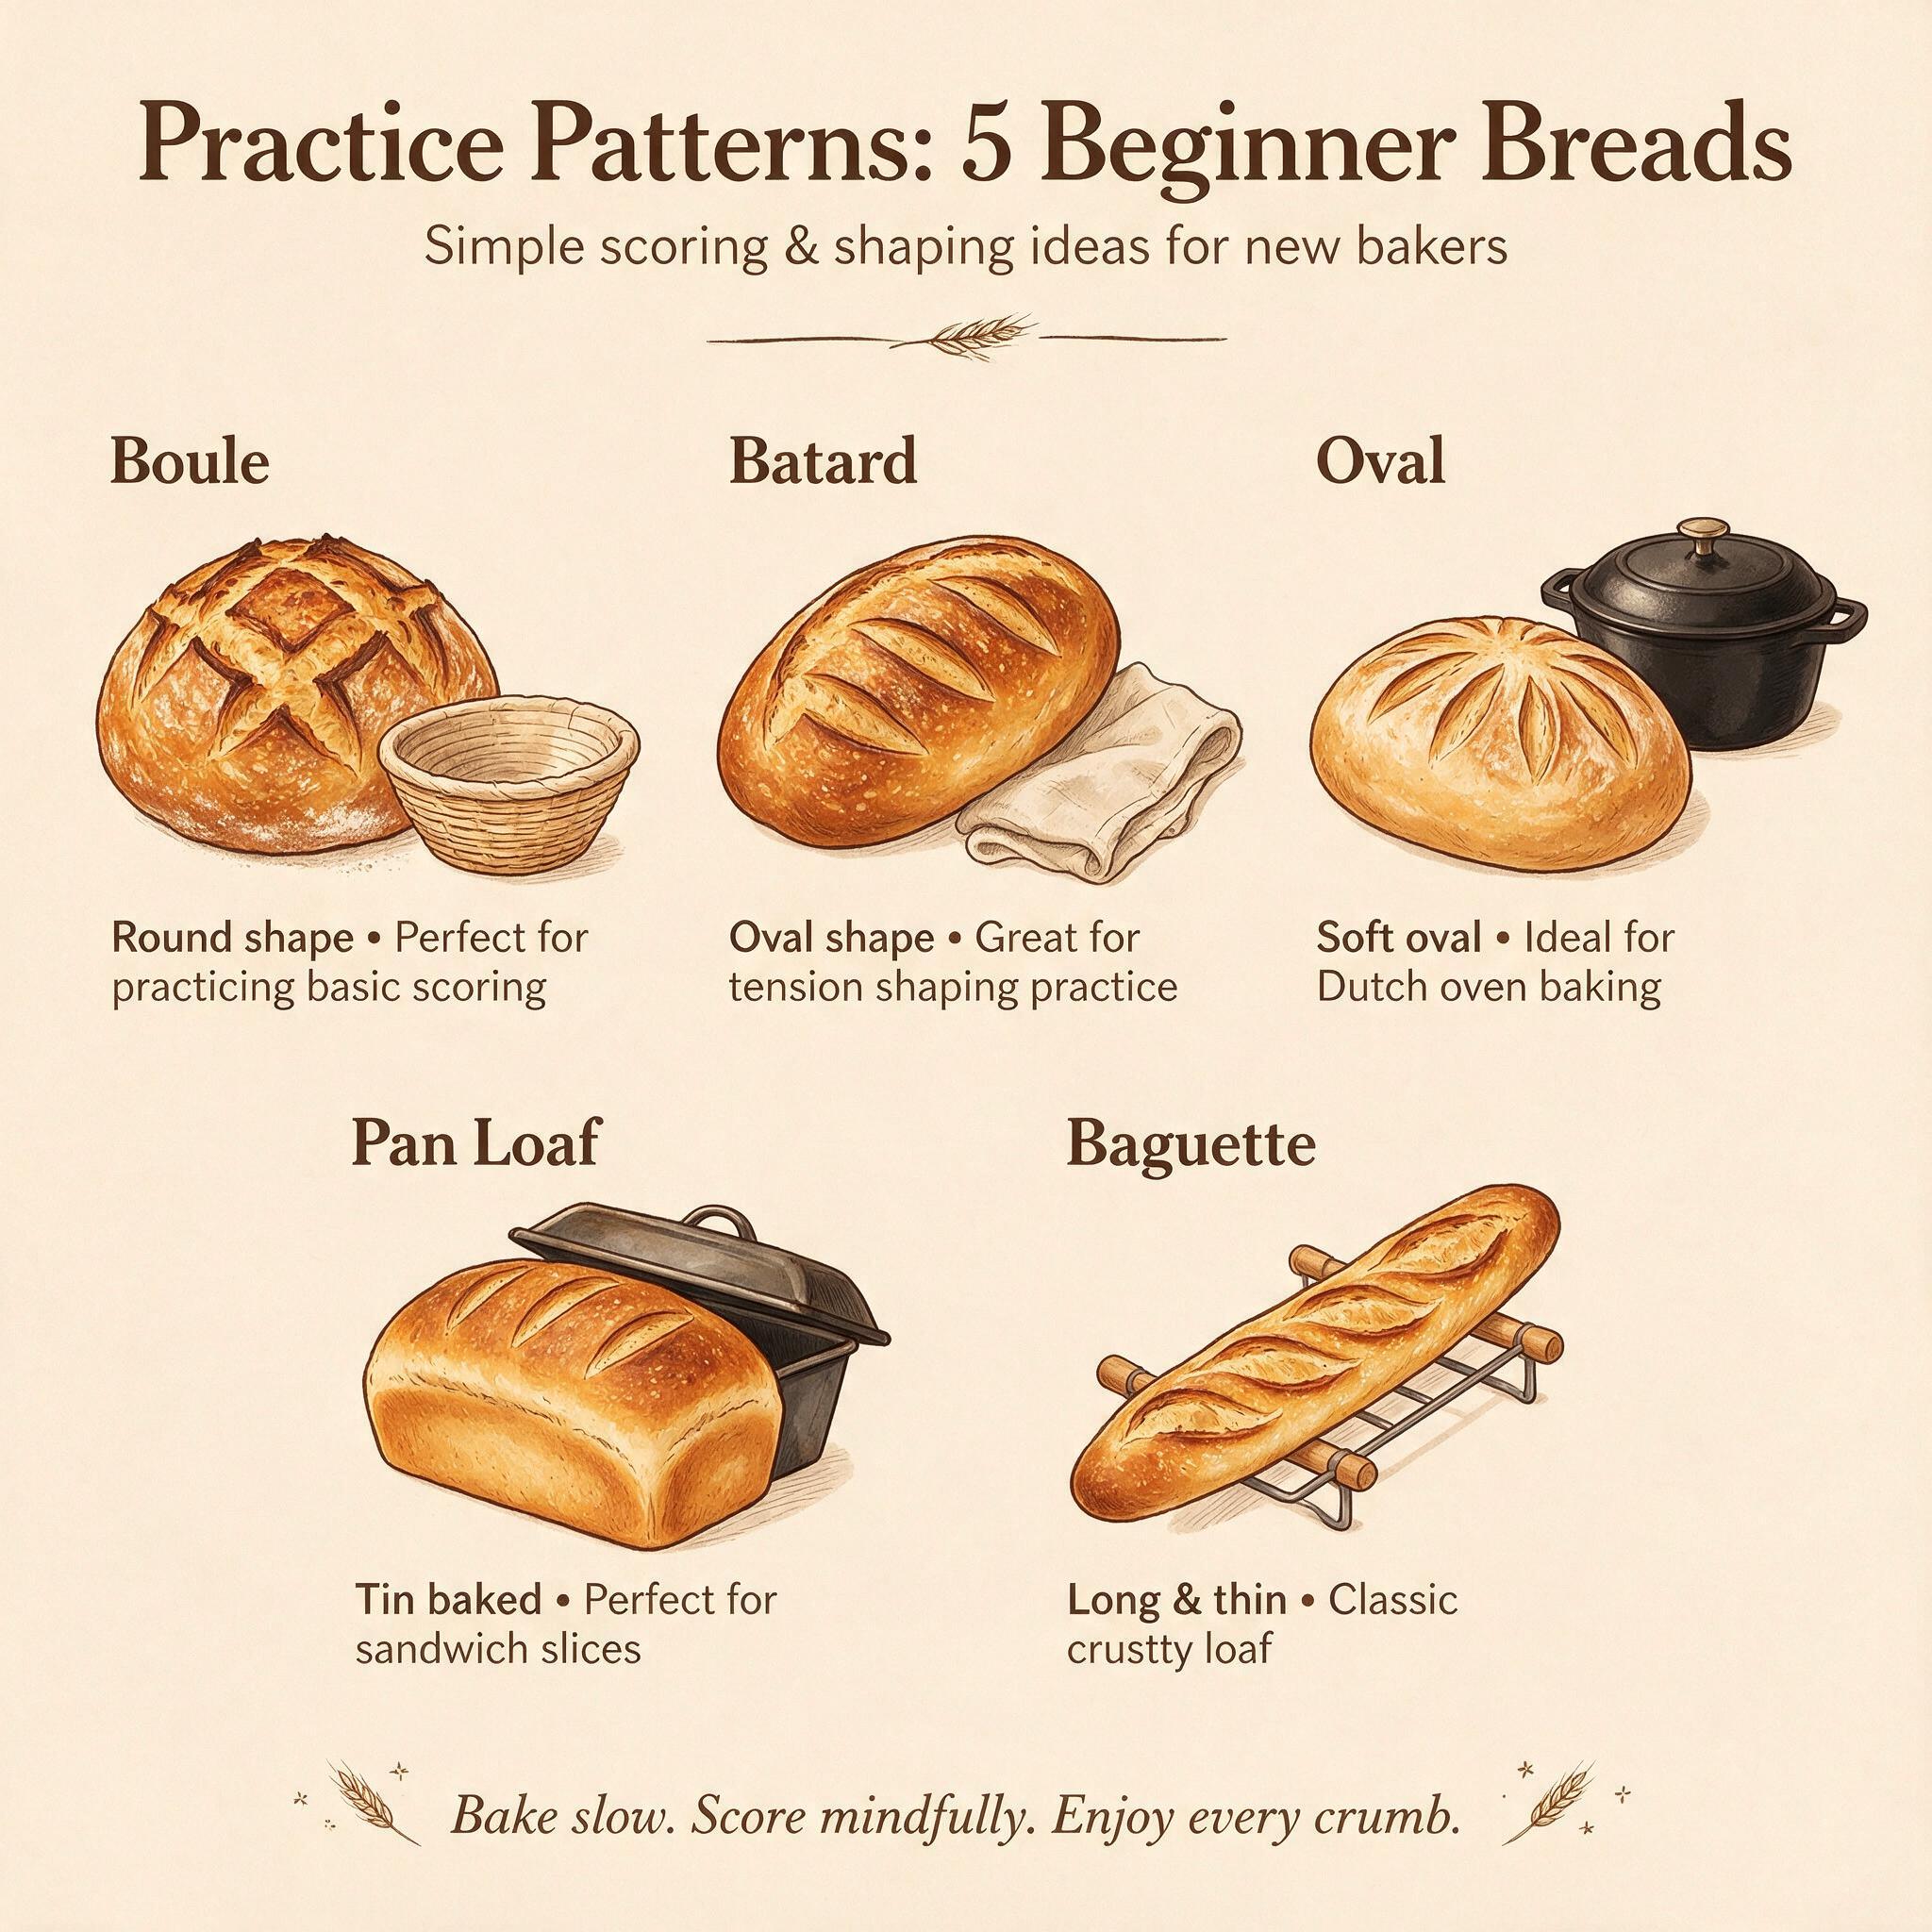
- •Basic scoring patterns from single slash to wheat stalk to basket weave
- •How scoring direction relates to shaping tension
- •Why fermentation level matters more than pattern complexity
- •Troubleshooting common scoring mistakes
Let's break down the art (and science) of scoring.
The Tools: Lame vs. Razor vs. Knife
Bread Lame (The Right Tool)
A bread lame is a handheld holder for a razor blade, designed specifically for scoring sourdough. It gives you control over angle and depth with minimal drag on the dough surface.
Best picks:
- •Budget: KneadAce Bread Lame (~$8–10) — holds standard double-edge razor blade securely
- •Mid-range: Wire Monkey UFO bread lame (straight edge, easy control for designs)
- •Premium: Mure & Peyrot lame (made in France), curved version for sourdough ears
Key tip: Keep blades sharp. A dull blade is worse than no blade — it drags and deflates the dough rather than cutting cleanly. Swap every 3–4 bakes. Feather Razor Blades are surgical-sharp and cheap in bulk.
Single-Edge Razor Blade
A single-edge razor held at an angle works fine if you don't own a lame. It gives you more control over angle but requires steadier hands — there's no handle to stabilize the blade. Good for experienced bakers who want maximum precision.
Kitchen Knife (The Emergency Option)
A sharp kitchen knife can score sourdough in a pinch, but it pulls dough more than a lame because of its thicker blade edge and longer cutting surface. The result is less clean cuts with more drag — your loaf will still bake fine, just with slightly less precise bloom. Use this only if you don't have any other option.
Rice Flour Dusting
Dust the surface lightly with rice flour before scoring. This reduces blade drag and makes cuts cleaner. All-purpose flour works too but absorbs into wet dough surfaces more readily; rice flour stays on top where it's needed for scoring grip.
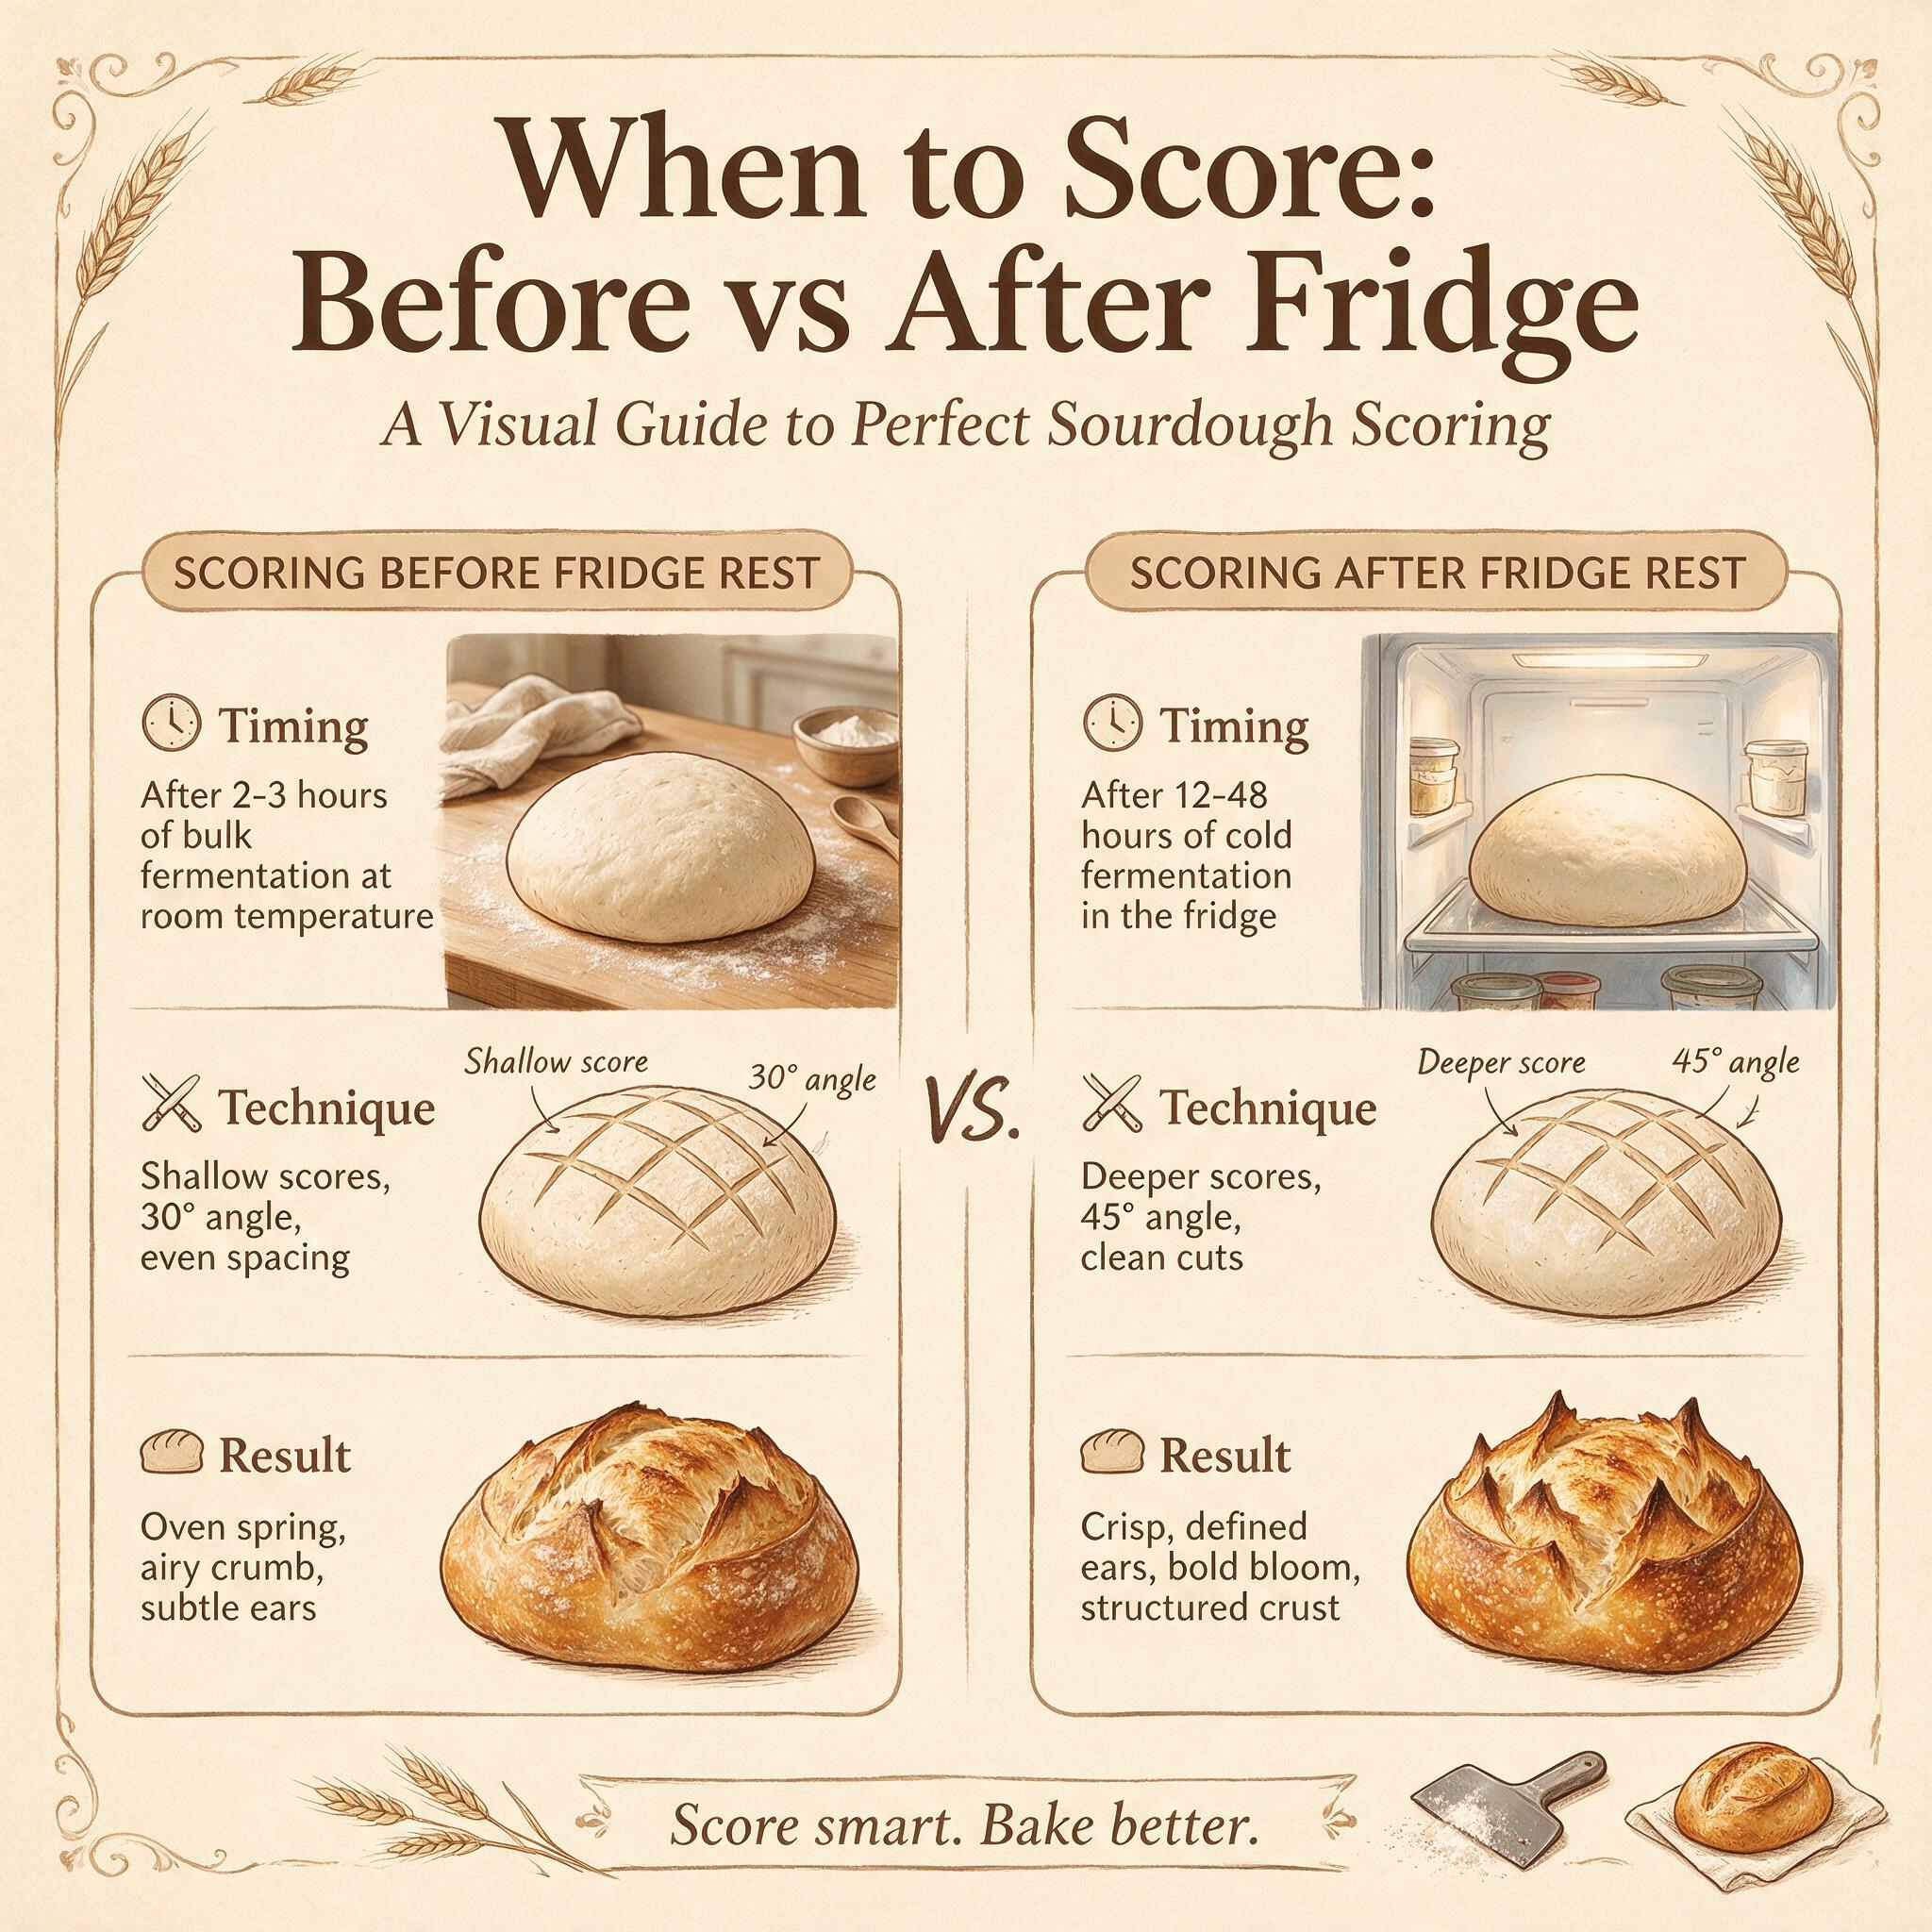
Blade Angle and Depth: The Physics of Ear Formation
Scoring creates a controlled weak point in the dough's surface tension membrane. Where you cut and how deep determines whether the loaf opens dramatically through that cut or bursts open somewhere else entirely.
The 30–45 Degree Rule
A shallow angled cut (30–45° to the dough surface) is essential for ear formation. Here's why: an angled cut creates an asymmetric wound where one side of the blade passes under the surface layer, creating a thin flap of dough that peels back during expansion — this is your "ear." A vertical (90°) cut opens but produces no ear because both sides are symmetrical; there's nothing to peel back.
Think of it like slicing through a layer cake: hold your lame at roughly 30 degrees and slice through the surface, letting the blade pass beneath the top layer rather than straight down into the dough body. The thinner that surface flap, the more dramatic the ear.
Depth: Half an Inch Minimum
Score must penetrate through the surface skin into the dough body — at least ½ inch (1.3 cm) deep. Too shallow and the cut seals shut before blooming during oven spring. You're not scoring the surface; you're cutting through it.
How to judge depth: If your lame is shorter than ½ inch, angle it more shallowly so the blade travels deeper into the dough. Don't press harder — let the angle do the work.
One Confident Motion
Hesitant, multiple passes produce ragged cuts and gas loss. One confident slash is better than three timid ones. Move decisively — your lame should feel like it's slicing through butter, not sawing wood. If you need to "saw" through the dough, your blade is dull or your angle is wrong.
Basic Scoring Patterns
Single Slash (The Foundation)
A single diagonal cut across the top of your loaf — simple, effective, and the foundation for all other patterns. This is the best pattern for beginners because it has one clear weak point that directs expansion in a predictable direction.
How to do it:
- Hold lame at 30–45° angle
- Position blade near one edge of the loaf (not centered — offset toward one side)
- Slice confidently from near the edge across the top, ending near the opposite edge
- One smooth motion, no pausing
Why it works: The angled cut creates an ear on one side while directing expansion upward through the scored area. This is the pattern most professional bakers use for everyday boules and batards — simple, reliable, beautiful.
Wheat Stalk (Gheat)
Multiple parallel slashes arranged like wheat stalks — classic French pattern that's both decorative and functional. Each cut directs expansion independently, creating a series of ears along the scored area.
How to do it:
- Score 3–5 parallel cuts across the top of your loaf at 30–45° angle
- Space cuts approximately ½ inch apart
- All cuts should go in the same direction (not crisscross)
- Each cut is a single confident motion
Why it works: Multiple weak points allow controlled expansion across the entire top surface rather than just one area. This distributes gas release more evenly and creates a dramatic, textured crust pattern.
Diamond Pattern
Cross-hatched cuts creating diamond shapes on the loaf surface — visually striking and structurally sound if done with proper depth. Each diamond corner becomes an expansion point, producing multiple ears around each cut intersection.
How to do it:
- Score 2–3 parallel diagonal cuts in one direction at 30–45° angle
- Rotate loaf (or your wrist) and score 2–3 parallel cuts perpendicular to the first set
- All cuts should be at same depth and angle for uniform results
Why it works: The cross-hatching creates multiple expansion points that open simultaneously, producing a complex crust pattern with dramatic bloom in every direction. Works best on round boules; less effective on elongated batards where parallel cuts are preferred.
Basket Weave
Overlapping diagonal cuts creating a woven pattern — more advanced technique that requires steady hands and practice. The result is intricate but the bread expands through all cuts simultaneously, so fermentation level matters especially here.
How to do it:
- Score 4–6 parallel cuts in one direction at shallow angle (20–30°)
- Rotate loaf 90° and score perpendicular cuts at same shallow angle
- Use very sharp blade — multiple passes through dough increase drag risk
Why it works: Creates maximum surface disruption for dramatic expansion, producing a textured crust that looks like woven basket work. Best for special occasion loaves where presentation matters. Requires well-fermented dough because each cut competes with neighbors for expansion space.
The Simple Slash (When to Keep It Simple)
Sometimes the best pattern is just one confident slash across the top — no fancy designs, no wheat stalks, no diamonds. A single well-executed cut on a perfectly fermented loaf will always outperform an under-proofed fancy pattern. Don't overcomplicate scoring before you've mastered fermentation timing and shaping tension.
Scoring Direction and Shaping Tension
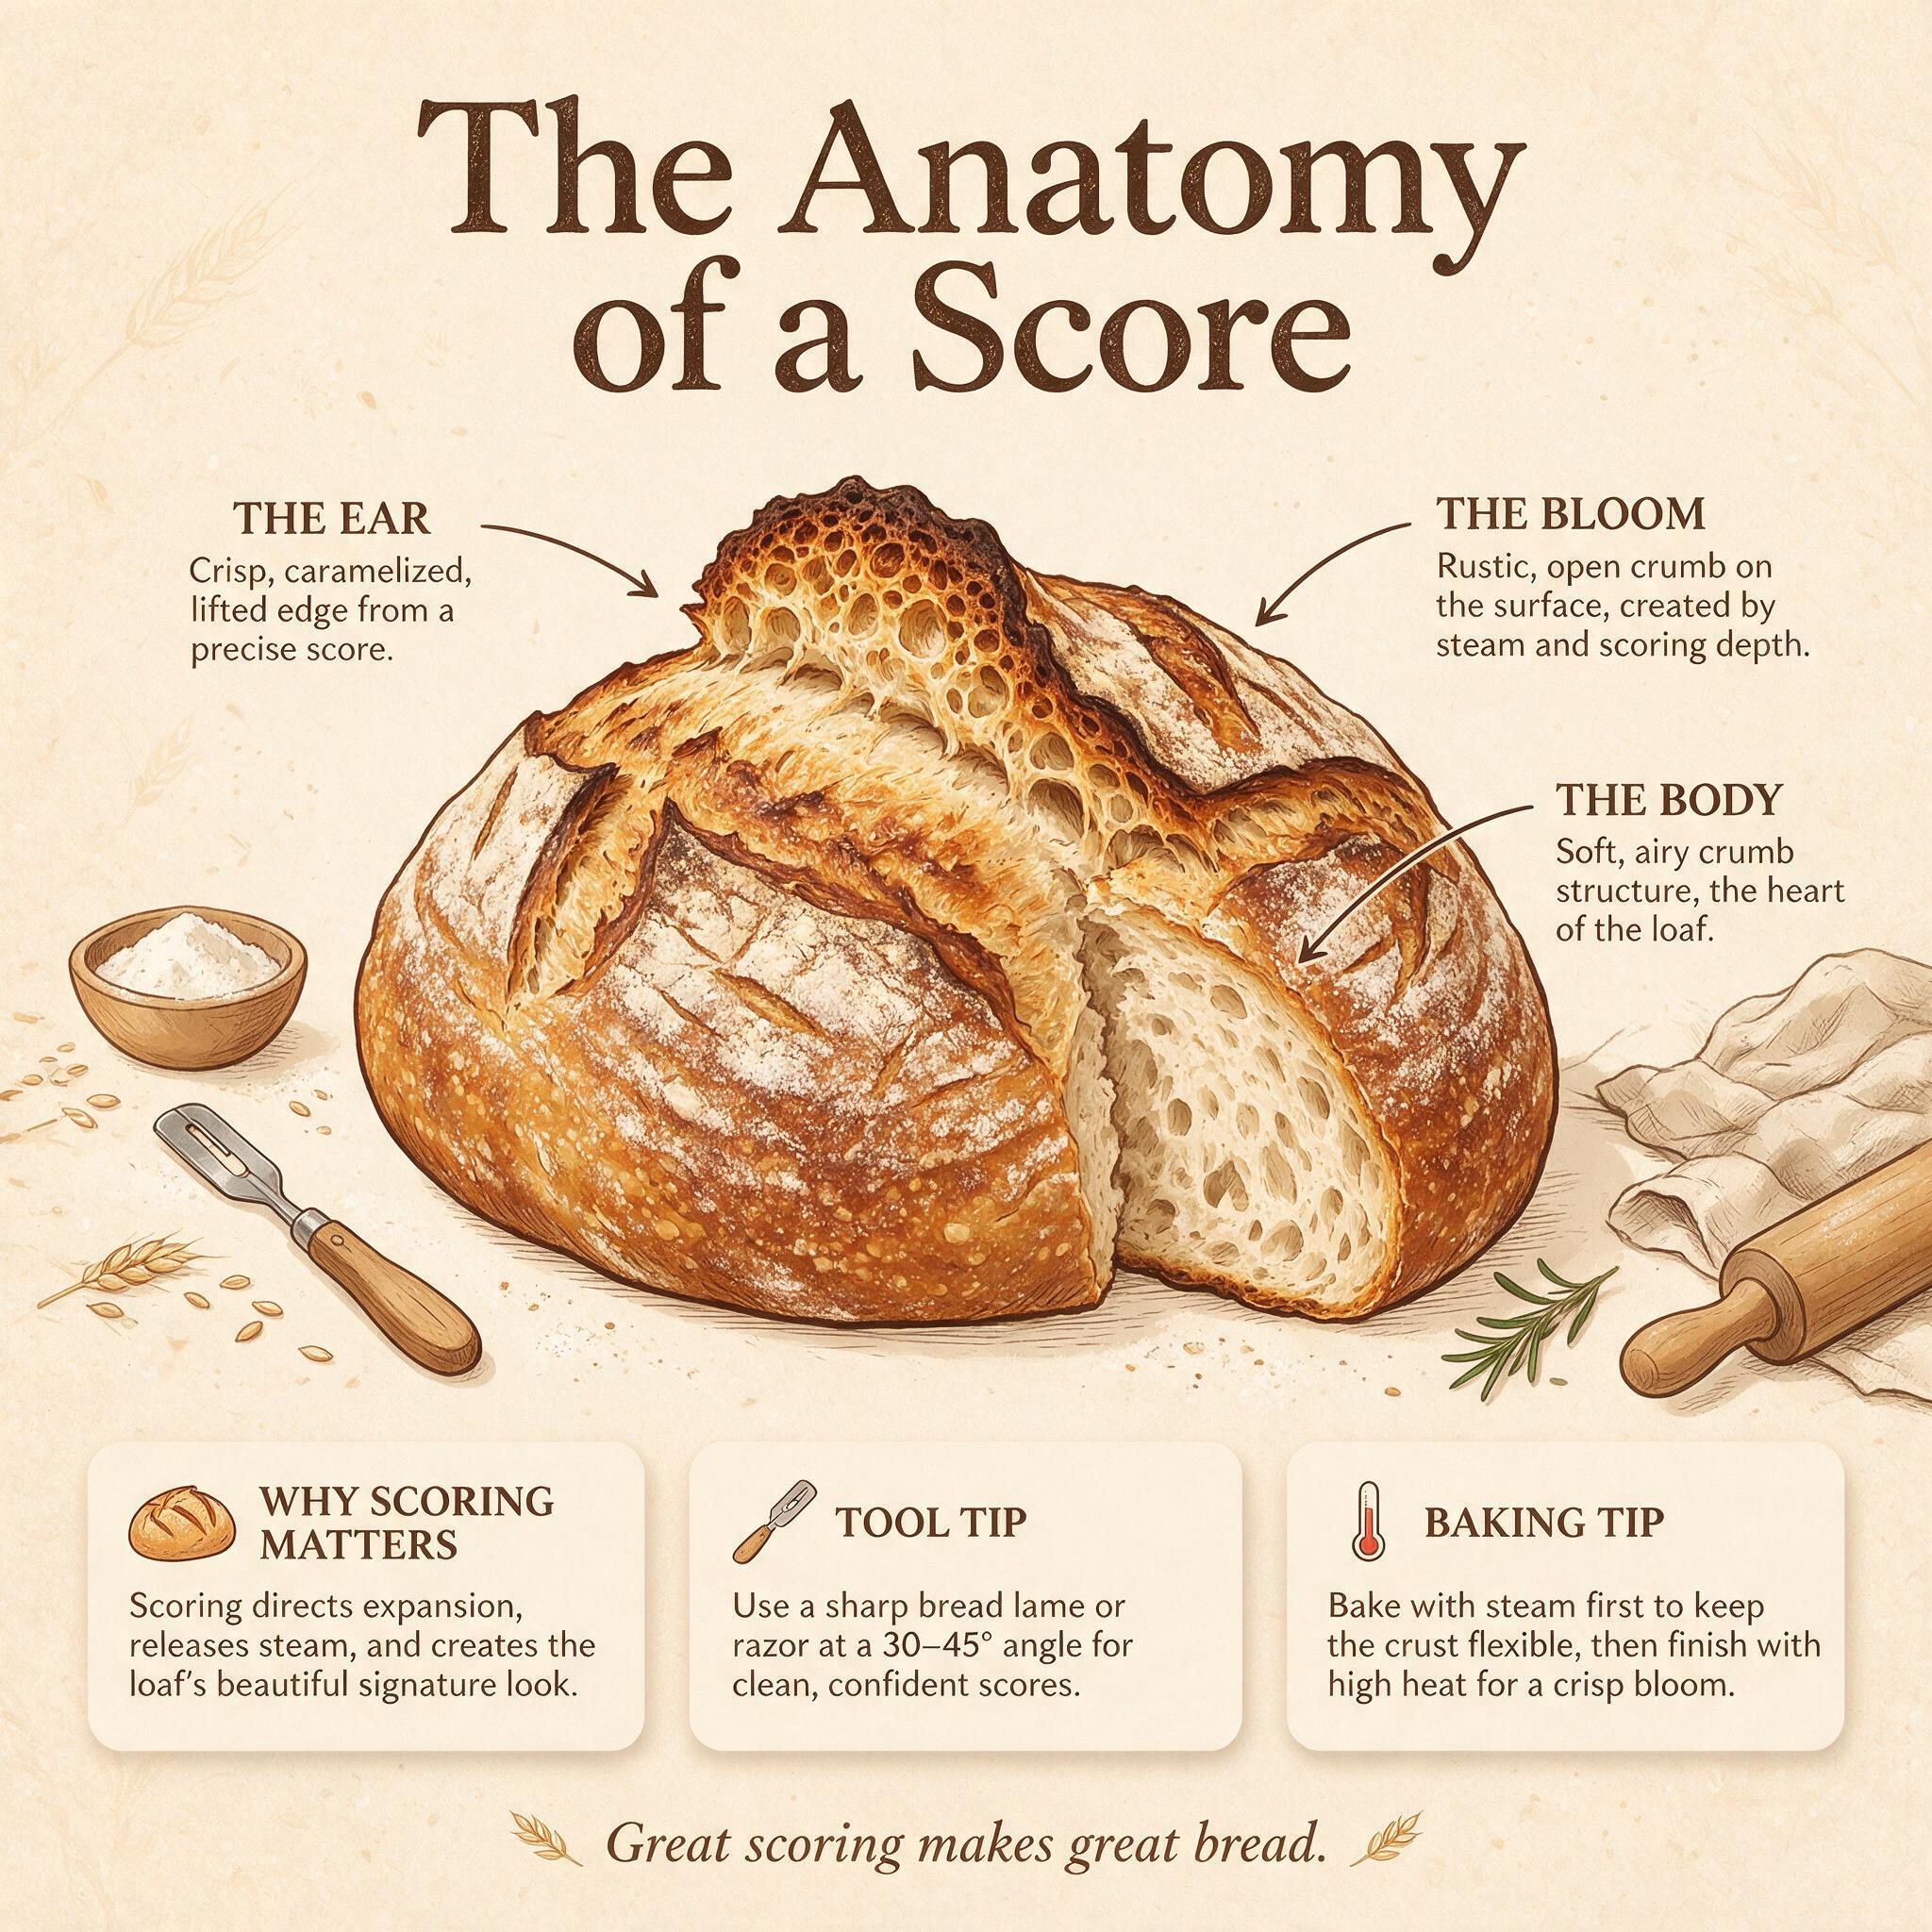
How you score relates directly to how your dough was shaped — understanding this connection helps you direct expansion where you want it.
Boule (Round Loaf) Scoring
For round loaves, a single diagonal slash from center toward one edge is the standard approach. The cut should be positioned so that expansion goes upward and slightly away from the seam (the bottom of the loaf). This directs oven spring vertically rather than toward the seam where tension may be weaker.
Direction rule: Score perpendicular to your shaping direction. If you shaped by rolling from bottom to top, score left to right (or vice versa). This creates a weak point across the grain rather than parallel to it, allowing cleaner expansion.
Batard (Oval Loaf) Scoring
For batards, one or two parallel diagonal cuts along the length of the loaf are standard. Position each cut near the center ridge (not at the edges) and angle toward the nearest end. This directs expansion upward through the scored area rather than outward toward the thinner sides.
Number of cuts: One cut for smaller batards (under 500g flour), two parallel cuts for larger ones. Three or more parallel cuts on a batard can weaken the structure too much — the loaf may spread sideways between cuts instead of rising upward.
Scoring and Proofing Relationship
Scoring alone cannot save poorly fermented dough. As SourdoughGeeks notes: scoring is "just the final flourish in a chain of conditions that starts much earlier." A well-fermented, well-shaped loaf scored at 45° will bloom beautifully. An overproofed loaf scored perfectly may still not open because the gluten network has already degraded beyond recovery.
The golden rule: Score when your dough is properly proofed (poke test: finger should spring back slowly and incompletely). If you're unsure whether to score, err on the side of slightly under-proofed — it's easier to fix a barely-opened score with more fermentation time than to rescue an overproofed loaf that spread flat.
Troubleshooting Common Scoring Mistakes
| Symptom | Cause | Fix |
|---|---|---|
| Score barely opened | Too shallow or dull blade | Cut deeper (½" minimum), sharpen lame |
| Side blowout (ragged tear) | Wrong angle OR too shallow | 30–45° angle, ½" depth. Also check proofing — both cause blowouts |
| No ear formed | Vertical score | Use angled cut — hold lame at ~30° to dough surface |
| Dough deflates before baking | Severely overproofed or scoring too early | Bake immediately; cold-proof next time |
| Multiple small openings instead of one clean ear | Too many shallow cuts in same area | Space cuts ½" apart, ensure consistent depth |
The Diagnostic Order for Scoring Problems
- Check blade sharpness — dull blades cause the most scoring failures. Swap every 3–4 bakes.
- Check score angle — vertical cuts don't form ears; you need 30–45° to create an asymmetric wound.
- Check score depth — too shallow and the cut seals shut before blooming. Aim for at least ½ inch penetration.
- Check proofing level — scoring can't save poorly fermented dough. If your score barely opened, check aliquot jar tracking on next bake.
Scoring Tips from Experienced Bakers
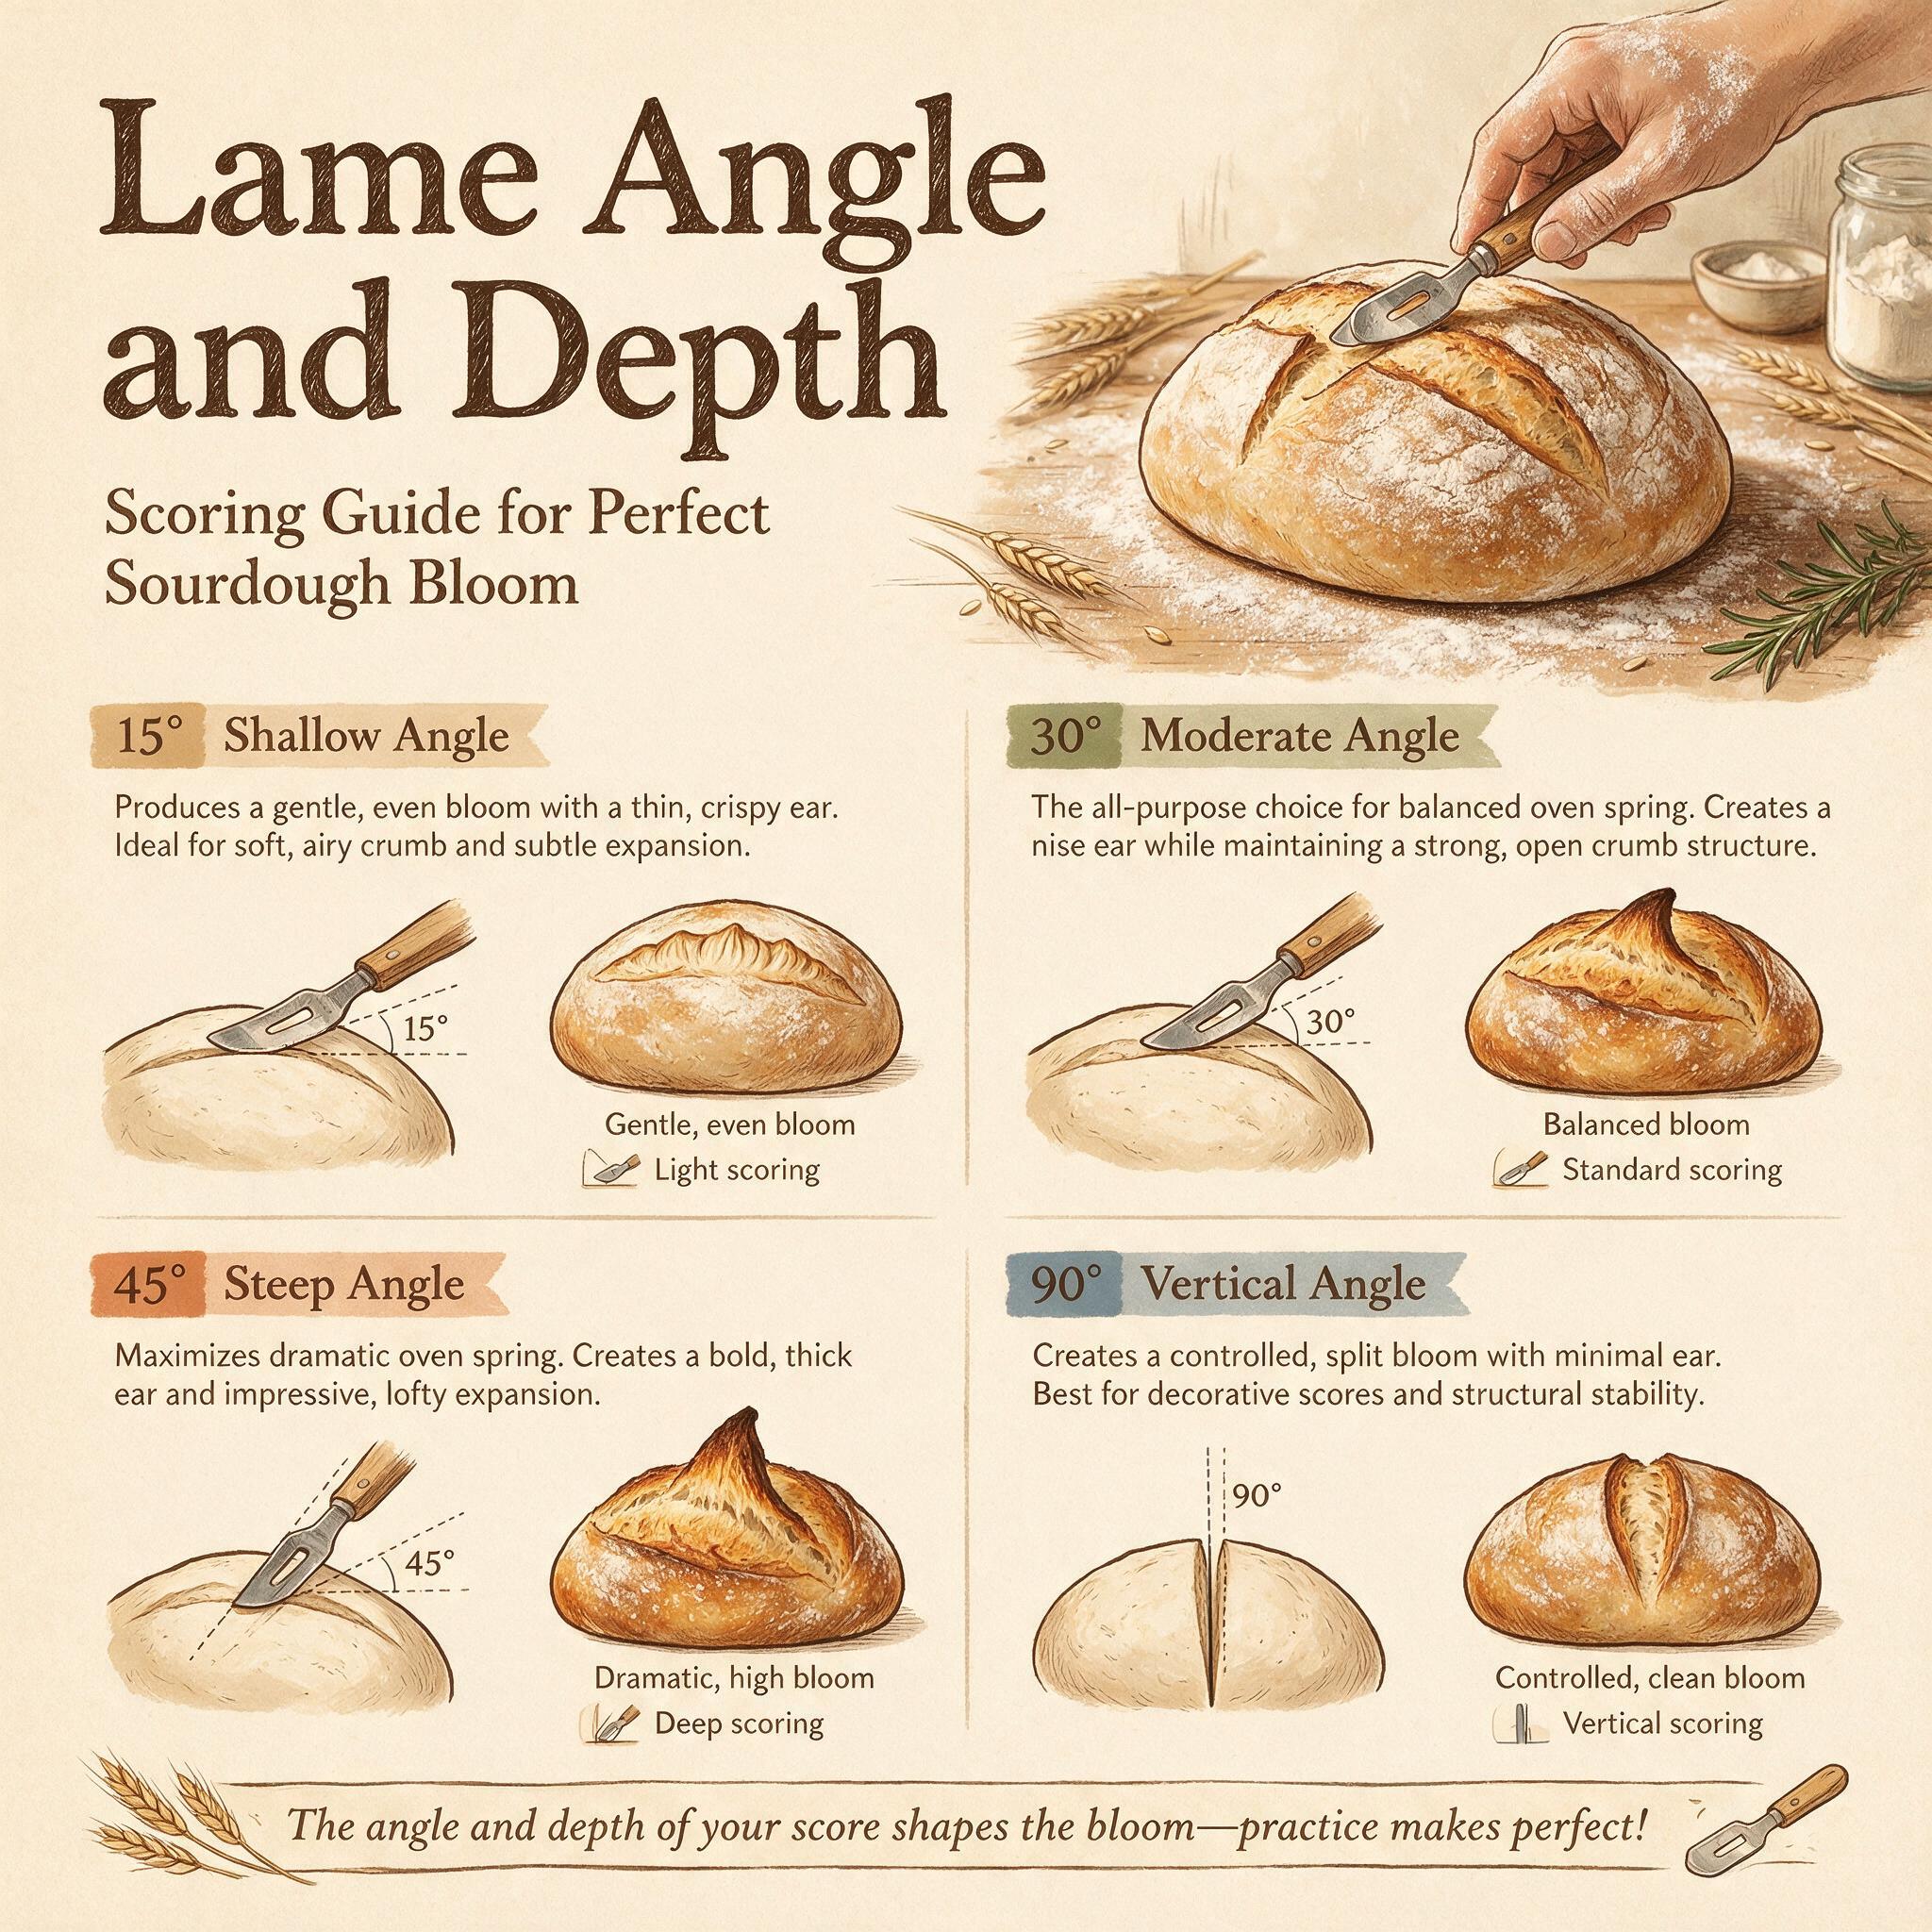
- •Dust with rice flour before scoring. Reduces blade drag and makes cuts cleaner. All-purpose works too but absorbs into wet surfaces more readily.
- •Score cold dough for precision. After overnight cold retard, dough is firmer and holds shape better during scoring — cleaner cuts without deflation. This is one of the less-discussed benefits of baking straight from the fridge.
- •Practice on under-proofed dough first. Your first few scores don't need to be perfect — practice making confident cuts at 30–45° angle on loaves that are slightly under-proofed (they'll expand regardless of score quality). Once scoring feels automatic, focus on fermentation timing for beautiful results.
- •Hold the lame like a pencil. Not too tight (tension causes shaky hands) and not too loose (loss of control). Steady wrist, confident motion.
Frequently Asked Questions
Can I use scissors to score sourdough?
Yes — kitchen shears work surprisingly well for scoring, especially for beginners who find lames intimidating. Snip ½-inch deep cuts at 30–45° angle across the top of your loaf. The result isn't as clean as a lame (edges are slightly ragged), but expansion will be similar if fermentation is correct. Scissors are also safer than blades — no risk of cutting through the banneton or counter.
Do I need to score every sourdough loaf?
Not strictly — you can bake un-scored sourdough and it will still rise. But without scoring, expansion happens at the weakest point (usually the bottom or sides), producing an irregular tear rather than a controlled opening. For professional-looking results with dramatic ear formation, scoring is essential. If presentation doesn't matter to you, un-scored bread tastes exactly the same — just looks different.
Can I score after baking?
Yes! Some bakers (particularly those making flatbreads or focaccia) score after partial baking when the crust has set enough for clean cuts. This produces decorative surface patterns without affecting oven spring (which is already complete). Not applicable to standard sourdough loaves where scoring must happen before full bake, but useful for flatbread variations.
What's the deepest I should score?
½ inch (1.3 cm) minimum, which corresponds roughly to the depth of your lame blade. Deeper than that risks cutting through the dough entirely on very small or under-proofed loaves. For larger batards or well-fermented boules, scoring slightly deeper is fine — just make sure you're not slicing all the way through.
Closing Thoughts
Scoring is one of those sourdough skills where practice matters more than perfection. Your first few scores won't look like Instagram photos — and that's fine. What matters most is that your dough is properly fermented, your blade is sharp, your angle is around 30 degrees, and you commit to one confident motion rather than three hesitant ones.
My personal approach: I score every loaf with a single diagonal slash at 30–45° angle because it's reliable, quick, and produces beautiful ear formation consistently. Once that becomes automatic (usually after 10–20 loaves), you can experiment with wheat stalks or diamond patterns for special occasion breads. But never forget: fermentation timing matters more than pattern complexity. A simple cut on a well-fermented loaf will always beat an elaborate design on under-proofed dough.
The most important thing to remember: scoring is just the final flourish in a chain of conditions that starts much earlier — with gluten development, folding, shaping tension, and proofing. Nail those fundamentals first, and scoring becomes almost effortless.
Happy baking!