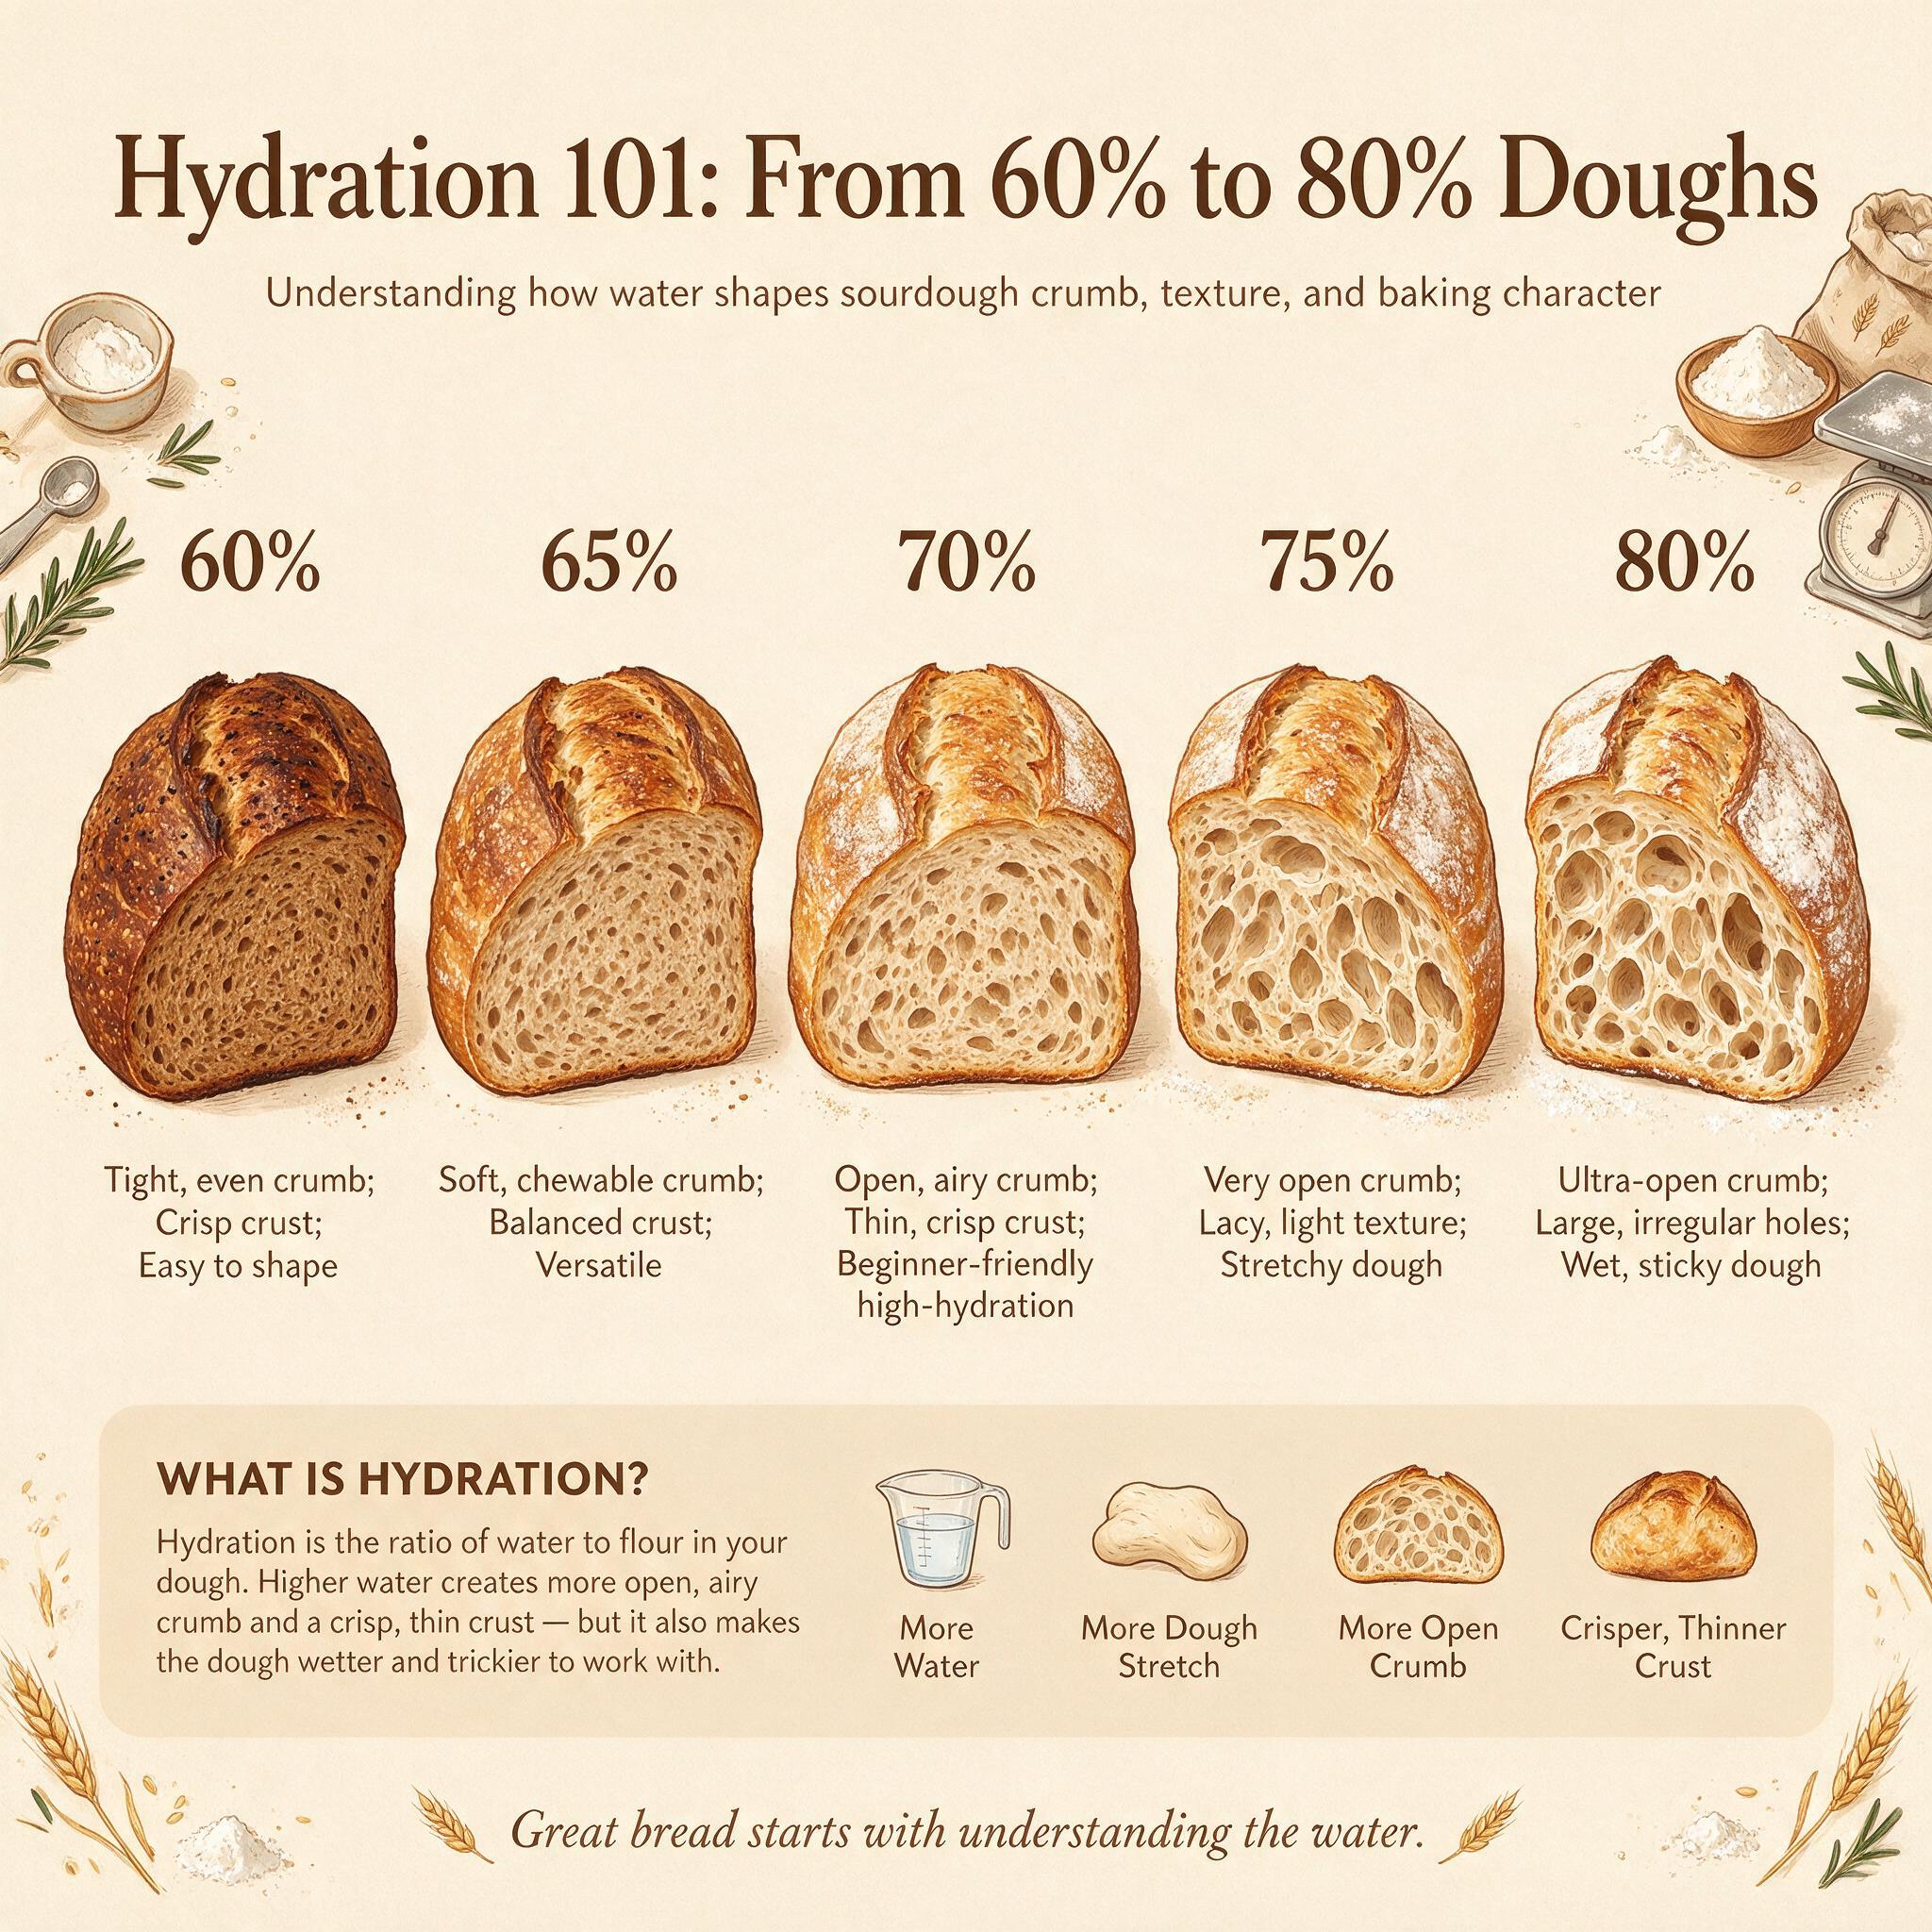
Hydration is the single most influential variable in sourdough baking. It controls crumb structure, crust texture, fermentation speed, and how terrifyingly sticky your dough gets at 11 PM on a Tuesday night. Change hydration by just five percentage points and you're essentially making a different bread.
Most beginners start with a recipe that calls for something like "350g water" and blindly trust it — until their kitchen is warmer than the recipe author's, or they use a different flour brand, and suddenly the dough won't behave at all. Understanding hydration isn't just about memorizing numbers. It's about understanding what each level feels like in your hands, how to adjust for your ingredients, and why a higher number doesn't always mean better bread.
This is your progressive guide from firm sandwich loaves (60%) through standard artisan (72–75%) to show-off territory (80%+). No jumping straight to 85% and crying over batter-dough. We'll build up, tier by tier.
What You'll Learn
By the end of this post, you'll understand:
- •What hydration actually controls in your dough
- •The four tiers of hydration — what each feels like and how to handle them
- •How flour type changes everything (the same recipe at different hydrations)
- •Why higher hydration ferments faster but has a narrower perfect-proof window
- •Troubleshooting for every tier, from dense sandwich loaves to extreme open crumb
This isn't about hitting a magic number. It's about understanding the spectrum so you can bake confidently at whatever level you're working — and know exactly how to adjust when things go sideways. Let's get into it.
What Hydration Actually Controls (Beyond "Wetter = Better Crumb")
Here's what hydration does, confirmed across multiple sources from Maurizio Leo at The Perfect Loaf to academic research in Cereal Chemistry:
Higher hydration produces more open crumb — but this is often overstated. A higher dough hydration makes it easier to achieve an open crumb, but it isn't mandatory. You can get beautiful open crumb at 70% with good technique. Conversely, a poorly shaped 80% loaf will spread flat and look worse than a well-structured 65% loaf every time. Hydration gives you potential — your handling determines whether you realize it.
Higher hydration accelerates fermentation. Water is the medium in which yeast and bacteria metabolize flour sugars. An 80% hydration dough at 75°F may complete bulk in 3–4 hours, while a 65% dough takes 4–6 hours — a full hour difference driven purely by water content. This means higher-hydration doughs have a narrower perfect-proof window: what's perfect at hour four might be overproofed by hour five.
Higher hydration bread stays moist longer. Water is more evenly distributed throughout the crumb, which slows staling. If you've ever wondered why bakery sourdough stays fresh for days while your loaf goes crusty by tomorrow — part of it is simply that higher-hydration doughs retain moisture better.
Crust texture shifts with hydration. Higher hydration produces thinner, crispier crusts; lower hydration yields thicker, chewier crusts. This isn't just a textural difference — it affects how your bread slices, how it pairs with toppings, and whether you're making sandwich bread or eating it straight from the cooling rack with butter.
Here's the thing most guides don't tell you: hydration interacts with flour protein content. A recipe at 70% hydration using bread flour (12–13% protein) feels dramatically different than the same numbers applied to all-purpose flour (10–11%). We'll get into that in a moment. First, let's walk through each tier.
Tier 1: Firm Dough (55–68%) — The Beginner & Sandwich Zone
This is where most beginners should start. Not because it produces the flashiest crumb, but because it teaches you dough behavior without overwhelming you.
What Each Level Feels Like
55–60%: Very firm, almost playdough-like. Easy to knead by hand. Minimal stickiness. This is the range for bagels, pretzels, and dense country breads. If your dough feels like it's fighting back when you stretch it, you're in this territory.
60–65%: Firm but workable. Holds shape readily with barely any stickiness. Great for sandwich loaves and pan breads — especially in cool kitchens where fermentation moves slowly. The dough behaves predictably: you shape it, it stays shaped.
65–68%: Smooth, slightly tacky. Forgiving to shape. This is my recommended starting point for your first sourdough loaf. It's firm enough to build confidence but wet enough to produce a decent crumb structure without excessive folding.
What It Produces
Tighter crumb with small-to-medium uniform holes. Thicker crust that holds up well to slicing and spreading. Milder acidity because lower-hydration doughs ferment more slowly — bacteria have less water activity, so acid production is gentler. This tier is ideal for sandwich bread: the tight crumb slices cleanly without filling leaking through large gaps.
How to Handle It
- •Folding: Two stretch-and-folds in the first 60 minutes, one more between 60–120 minutes, then rest. You don't need five sets of folds for this tier — two or three is plenty.
- •Shaping: Straightforward. The dough holds its shape without a banneton if needed (though a basket still helps).
- •Bulk fermentation target: 50–75% rise, not doubled. A firm dough reaches its structural limit sooner than wetter doughs.
Troubleshooting This Tier
| Problem | Cause | Fix |
|---|---|---|
| Dense, gummy crumb | Underproofed — low-hydration dough ferments slower and needs more time | Extend bulk fermentation; watch for volume increase, not the clock |
| Crust too thick or hard to cut through | Hydration is too low for your desired crust texture | Increase by 2–3% on next bake |
| Dough won't expand in oven | Under-strengthened during mixing | Mix longer than feels comfortable; pass windowpane test before bulk ends |
Best For
- •First sourdough loaves (start at 65%)
- •Sandwich breads and pan loaves (target 68% with fat inclusion)
- •Cool kitchens where fermentation naturally slows down
- •Bakers who prefer a tighter crumb for clean slicing
Tier 2: Standard Artisan (70–75%) — The Sweet Spot
This is what most people picture when they think of sourdough. Open irregular crumb, good oven spring with ear development, thin crackly crust. It's the everyday artisan range — and it's also where experienced bakers land most often because it balances ambition with manageability.
What Each Level Feels Like
70–72%: Soft, slightly tacky. Manageable with basic technique. This is my go-to for a reliable everyday loaf. You'll need a few fold sets and some patience during shaping, but the dough behaves predictably enough to build muscle memory.
72–75%: Noticeably wetter. Requires more folds and attention. The dough will stick to your hands if you're not careful. Pre-shape is essential — give it 20 minutes bench rest before final shaping. This tier demands respect but rewards you with genuinely impressive crumb structure.
What It Produces
Open irregular crumb — the classic artisan sourdough look. Good oven spring with ear development when scored properly. Thinner crust than low-hydration versions. This is where you start noticing the difference hydration makes: the bread tastes fresher longer, and the texture between the holes has a custardy quality that lower-hydration loaves simply don't have.
The Sweet Spot Within the Sweet Spot
Multiple sources converge on 72–73% as where experienced home bakers land for their standard loaf — open enough to be interesting, manageable enough to shape consistently. If you're going to pick one hydration and bake it repeatedly while building skill, this is the range.
How to Handle It
- •Autolyse: Do a 30-minute rest of flour + water before adding starter and salt. This kickstarts gluten formation and dramatically improves extensibility — crucial at this hydration level.
- •Folding: Four stretch-and-fold or coil fold sets spaced 30 minutes apart. The dough will transform from sticky to smooth over the course of these four hours.
- •Wet hands during folds. Keep a small bowl of water beside your work surface. Let the dough stick to your hand and move with you rather than grabbing it aggressively.
- •Flour on the outside, not inside. When shaping, dust the surface but don't work flour into the dough body — this keeps layers sticky for building tension.
Troubleshooting This Tier
| Problem | Cause | Fix |
|---|---|---|
| Flat loaf spreading sideways | Insufficient gluten development OR over-fermentation | Add one extra fold set; reduce bulk time by 30 minutes |
| Tight crumb despite adequate hydration | Under-mixing or aggressive shaping that degassed too much | Mix longer; shape more gently to preserve gas pockets |
| Gummy interior | Over-proofed high-hydration dough OR under-baked | Bake until internal temp reaches 205–210°F; reduce bulk time slightly |
Best For
- •Everyday artisan loaves (batards and boules)
- •Bakers who want open crumb without extreme technique demands
- •All-purpose or bread flour with moderate protein content
- •Social media-worthy sourdough that's still bakeable on a weeknight
Tier 3: High Hydration (75–82%) — Show-Off Territory
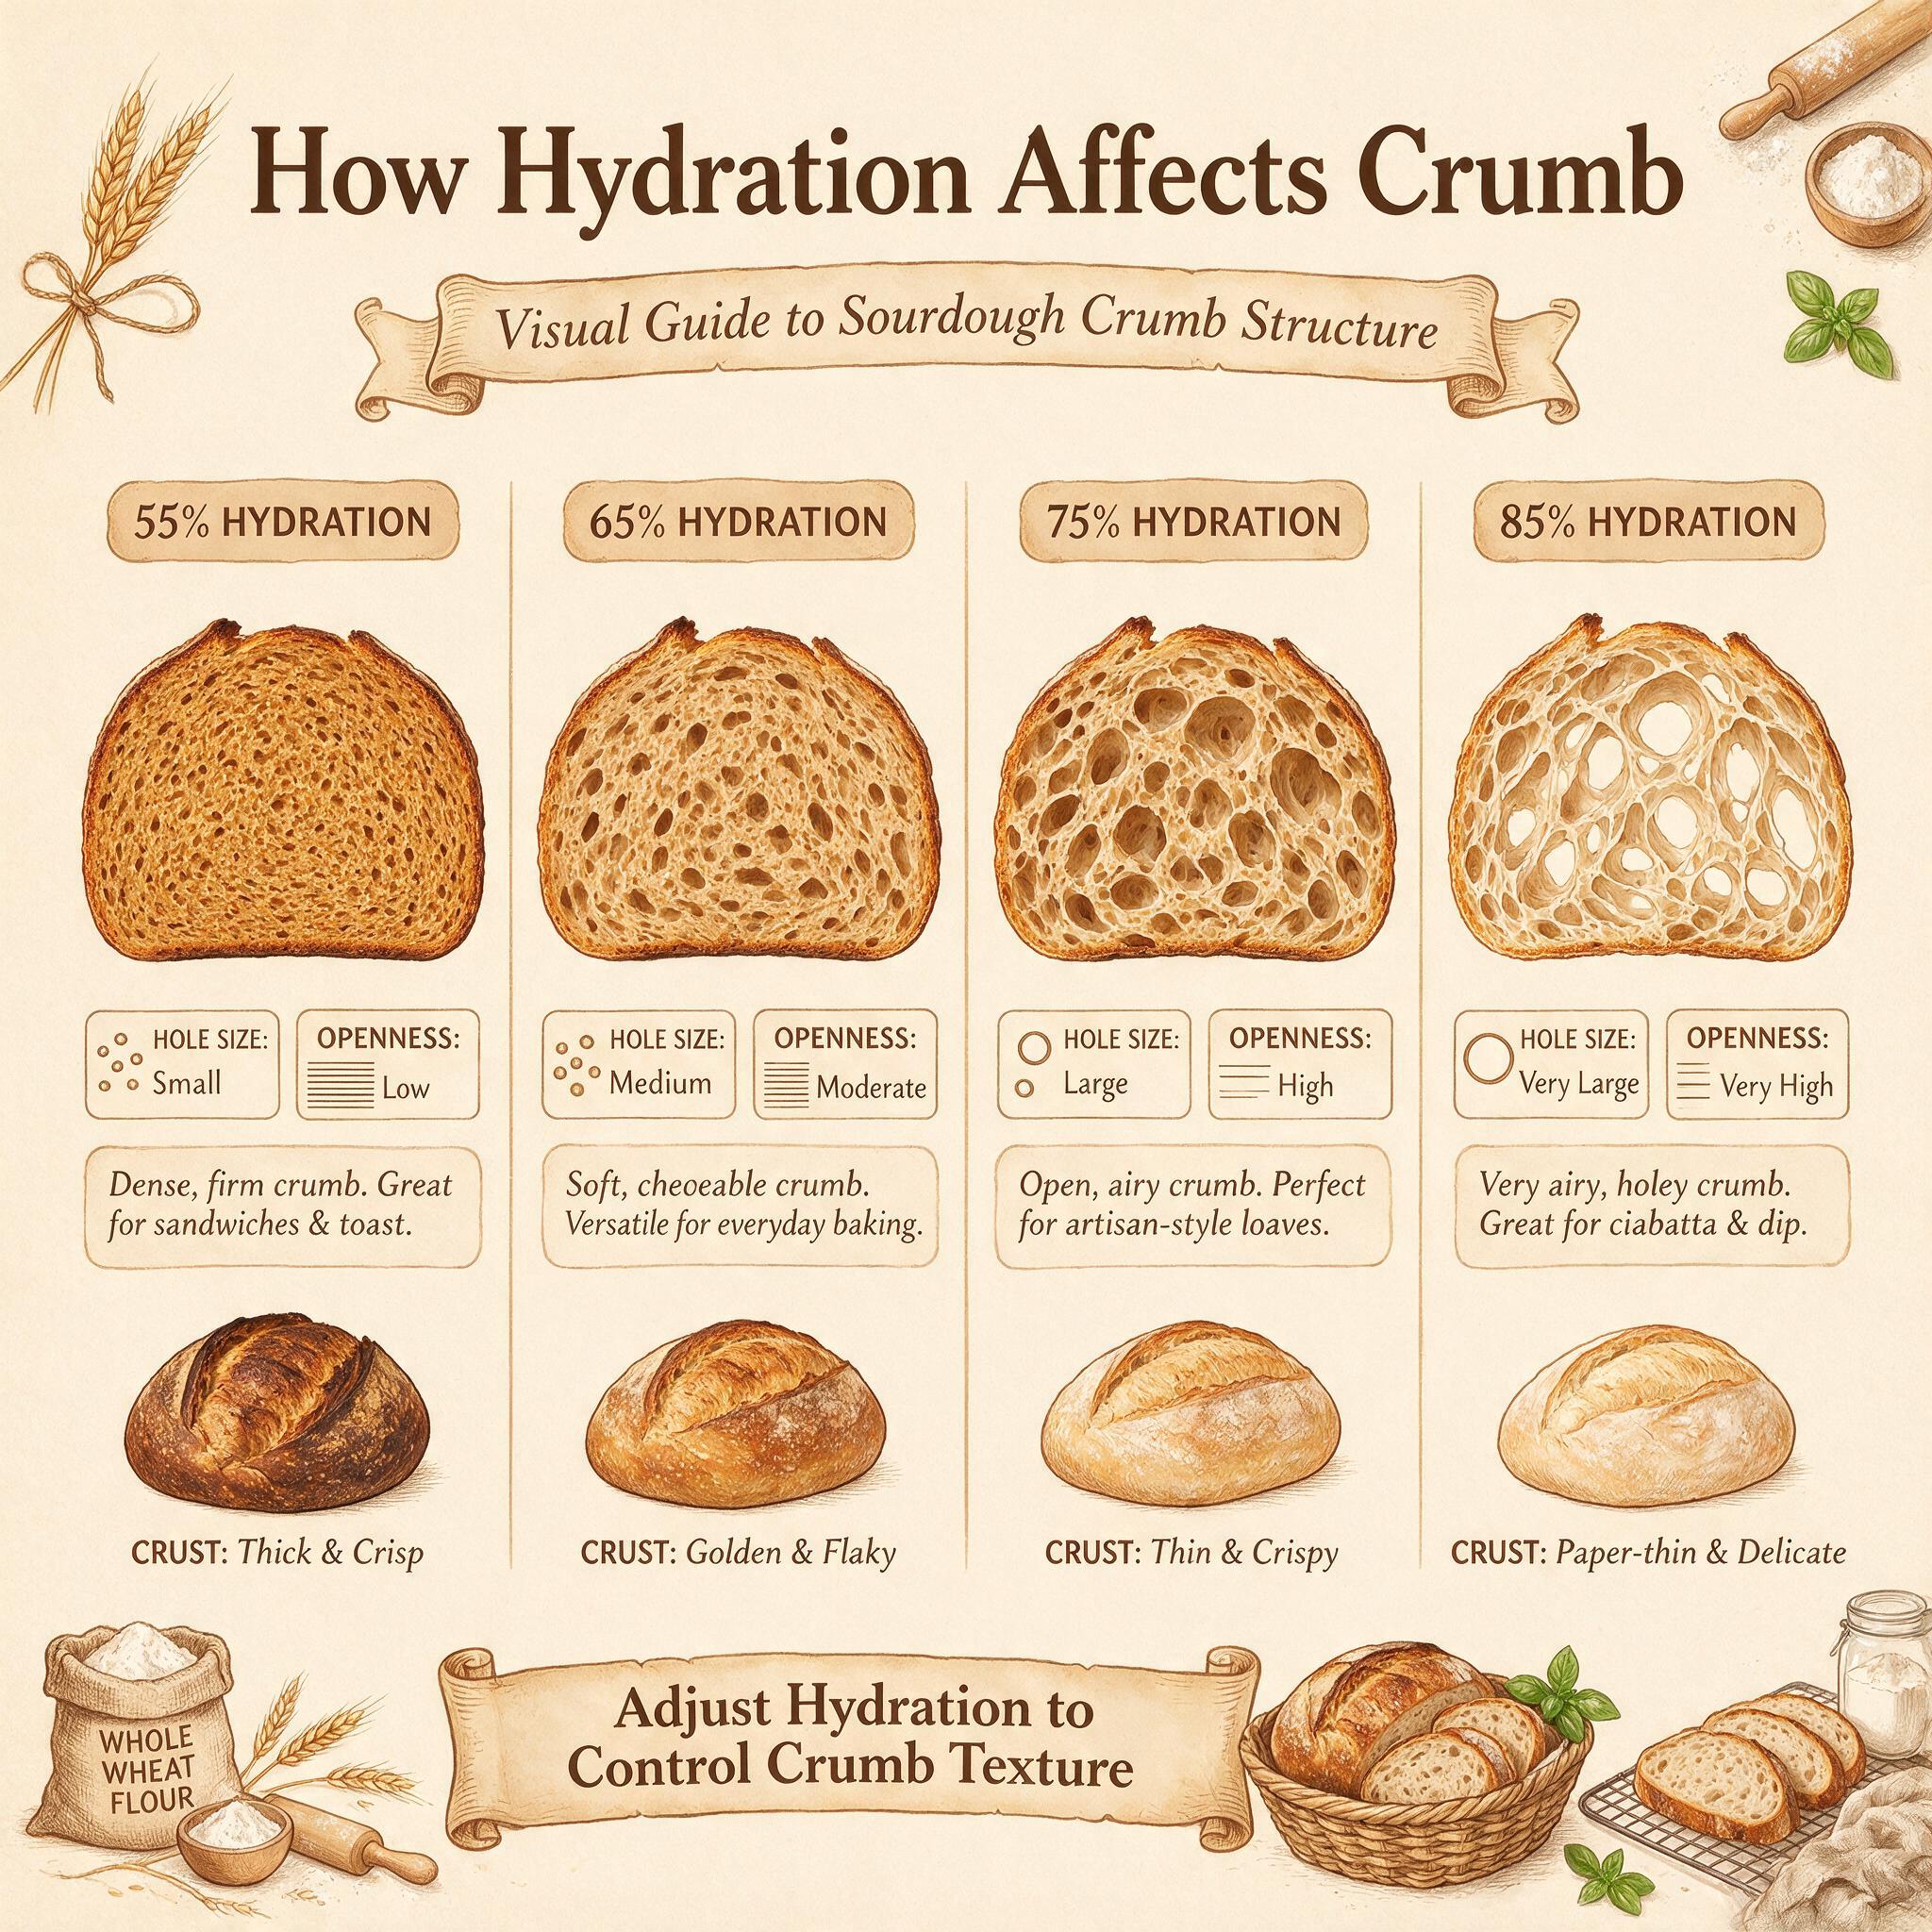
This is where things get exciting and intimidating at the same time. Your dough starts resembling thick batter. You question your measurements. You wet your hands, then wet them again. The bench scraper becomes your best friend. But after you nail it — once — you'll never go back to tight-crumb bread for special occasions.
What Each Level Feels Like
75–78%: Very sticky, slack. Requires confident technique and multiple fold sets. The dough will feel like it's constantly trying to spread flat. Pre-shape before final shaping is non-negotiable — the 20-minute bench rest gives wet dough a chance to develop surface tension.
78–82%: Resembles thick batter. Barely cohesive. You're not shaping in the traditional sense; you're gently coaxing and transferring dough into position. Bake in a Dutch oven or on a heavily floured surface for ciabatta-style loaves. At this level, you'll be using rice flour in your banneton (regular flour gets absorbed into wet dough surfaces; rice flour doesn't).
What It Produces
Dramatic open crumb with large irregular holes — the kind where you can literally stick your finger through. Thin crackly crust with beautiful blisters. Custardy, almost creamy texture between the holes. Spectacular oven spring that makes people ask "did you use commercial yeast?"
Maurizio Leo tested an 80% hydration loaf and described it: "the dough was so wet I questioned my measurements. But after baking, the crumb had holes large enough to stick my finger through."
How to Handle It — Baker Bettie's Top Tips
Baker Bettie, who has extensive experience with high-hydration doughs, recommends these approaches:
- Wet hands, always. Keep a bowl of water beside your work surface and dip before every touch.
- Coil folds over stretch-and-folds at very high hydration. Coil folds build strength more effectively than standard stretches for wetter doughs.
- Cold shaping. Shape straight from the fridge after overnight retard — cold dough is dramatically more manageable, even at 80% hydration.
- Bench scraper over hands. Metal doesn't stick to wet dough the way skin does. Use it for almost everything above preshape.
- Quick motions. Move fast and confidently; less time for dough to stick to your hands.
- Pre-shape before final shaping. Never go straight from bulk to final shape at this hydration level — give the dough 20 minutes to relax and develop surface tension.
Troubleshooting This Tier
| Problem | Cause | Fix |
|---|---|---|
| Dough too sticky to shape | Hydration too high for skill level OR skipped autolyse | Use 30–45 min autolyse; wet hands + bench scraper |
| Flat loaf after proofing | Over-fermented (protease broke down gluten) OR under-strengthened during bulk | Reduce bulk time; add fold set; shape from cold |
| Gummy crumb despite high hydration | Over-proofed or under-baked at extreme hydration | Internal temp must reach 205–210°F; reduce hydration by 3–5% next bake |
Best For
- •Special occasion loaves where open crumb is the goal
- •Bakers who've baked 8–10 loaves at lower hydrations and are ready to level up
- •High-protein flour (14%+) that can handle extreme hydration
- •Ciabatta, focaccia, and other Italian-style breads
The Golden Rule: Work Up Gradually
Baker Bettie's #1 tip for high-hydration doughs: don't jump from 65% to 80%. Increase in 3–5% increments. Bake eight to ten loaves at each level before moving on. Your hands need time to learn what each hydration feels like — and your intuition for "is this dough ready?" develops through repetition, not theory.
Tier 4: Extreme Hydration (82%+) — Expert / Ciabatta Zone
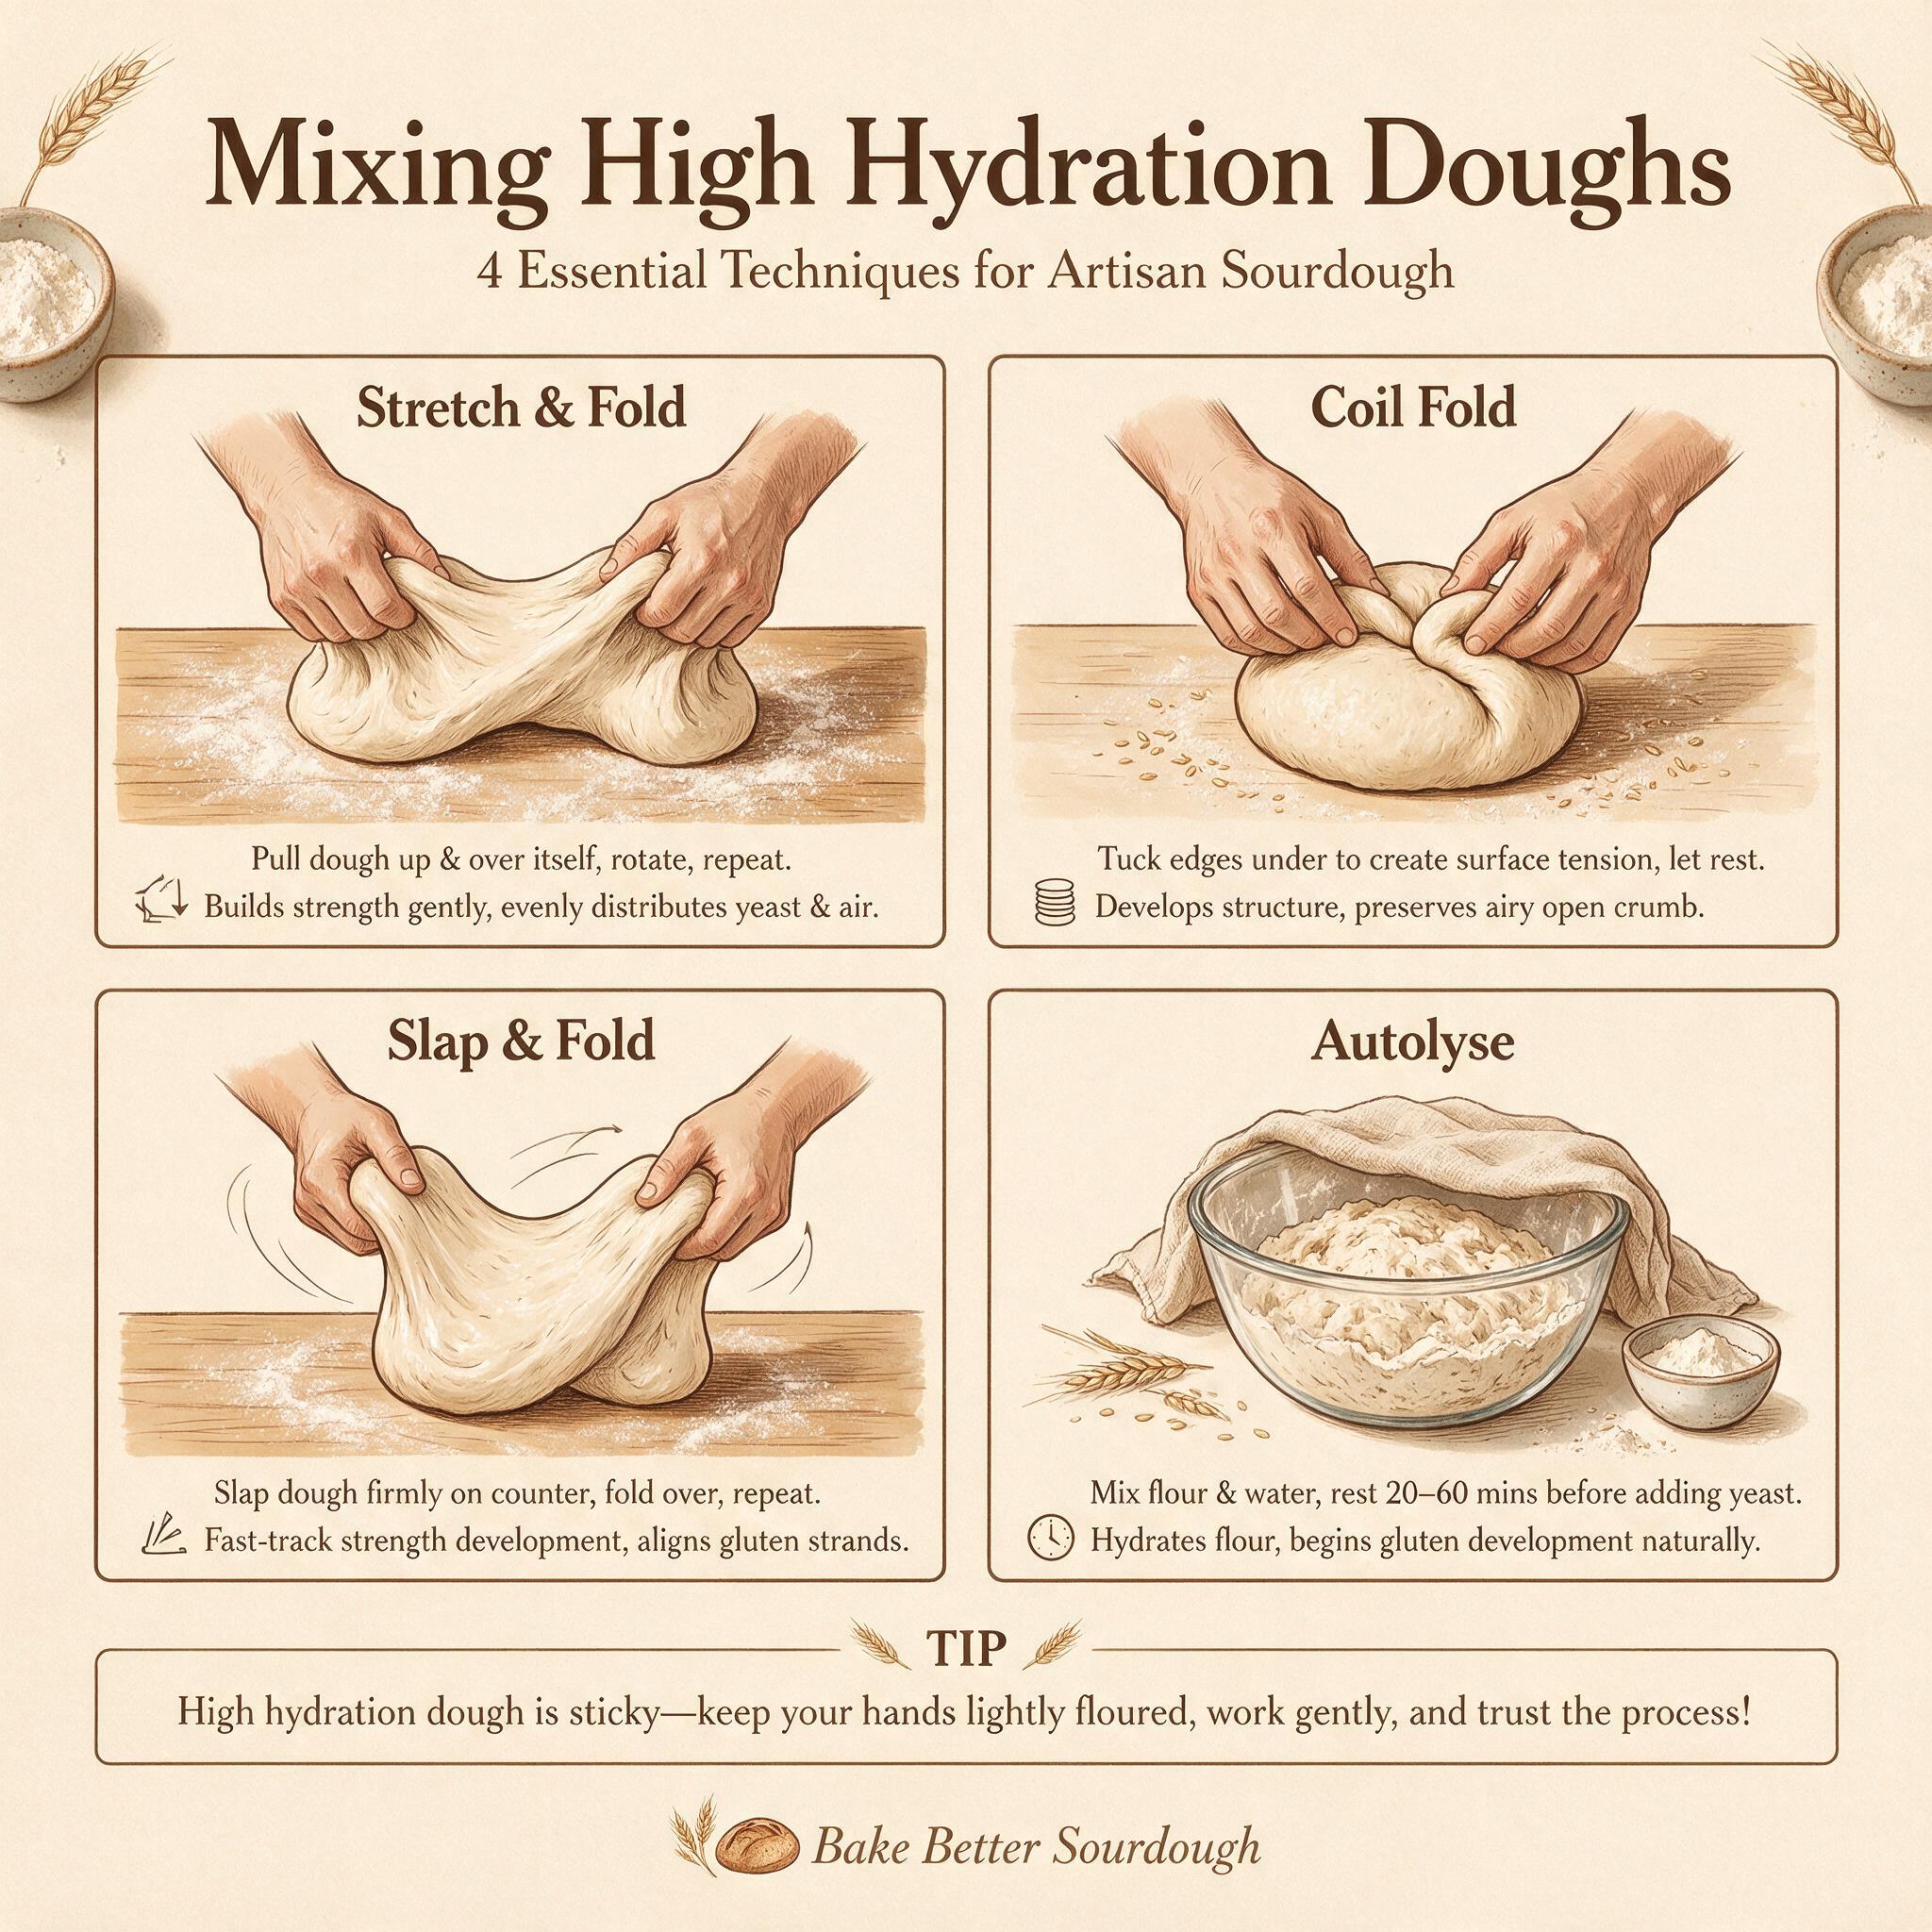
At this level, you're barely working with dough anymore. You're managing a thick batter that has opinions about where it wants to spread. You either work on heavily floured surfaces or pour directly into oiled pans for focaccia. This tier is less about technique and more about embracing chaos.
What it feels like: The dough is barely cohesive. It won't hold its shape vertically — you can't use a banneton. Expect massive oven spring but also maximum spread. You'll laugh, then you'll cry, then you'll bake another one because the crumb was worth it.
Practical tips:
- •Mix and handle in a stand mixer bowl rather than by hand (Baker Bettie confirms this works well)
- •Bake in oiled pans for focaccia; heavily floured counter for ciabatta
- •Don't use a banneton — the dough won't hold its shape vertically
- •Use rice flour exclusively for dusting (all-purpose absorbs into wet surfaces)
From Flourwise testing at 85%: "The dough was so wet I questioned my measurements. For focaccia, you're not shaping dough in the traditional sense — you're gently transferring and coaxing it into position."
The Science Behind Hydration: Why It Matters
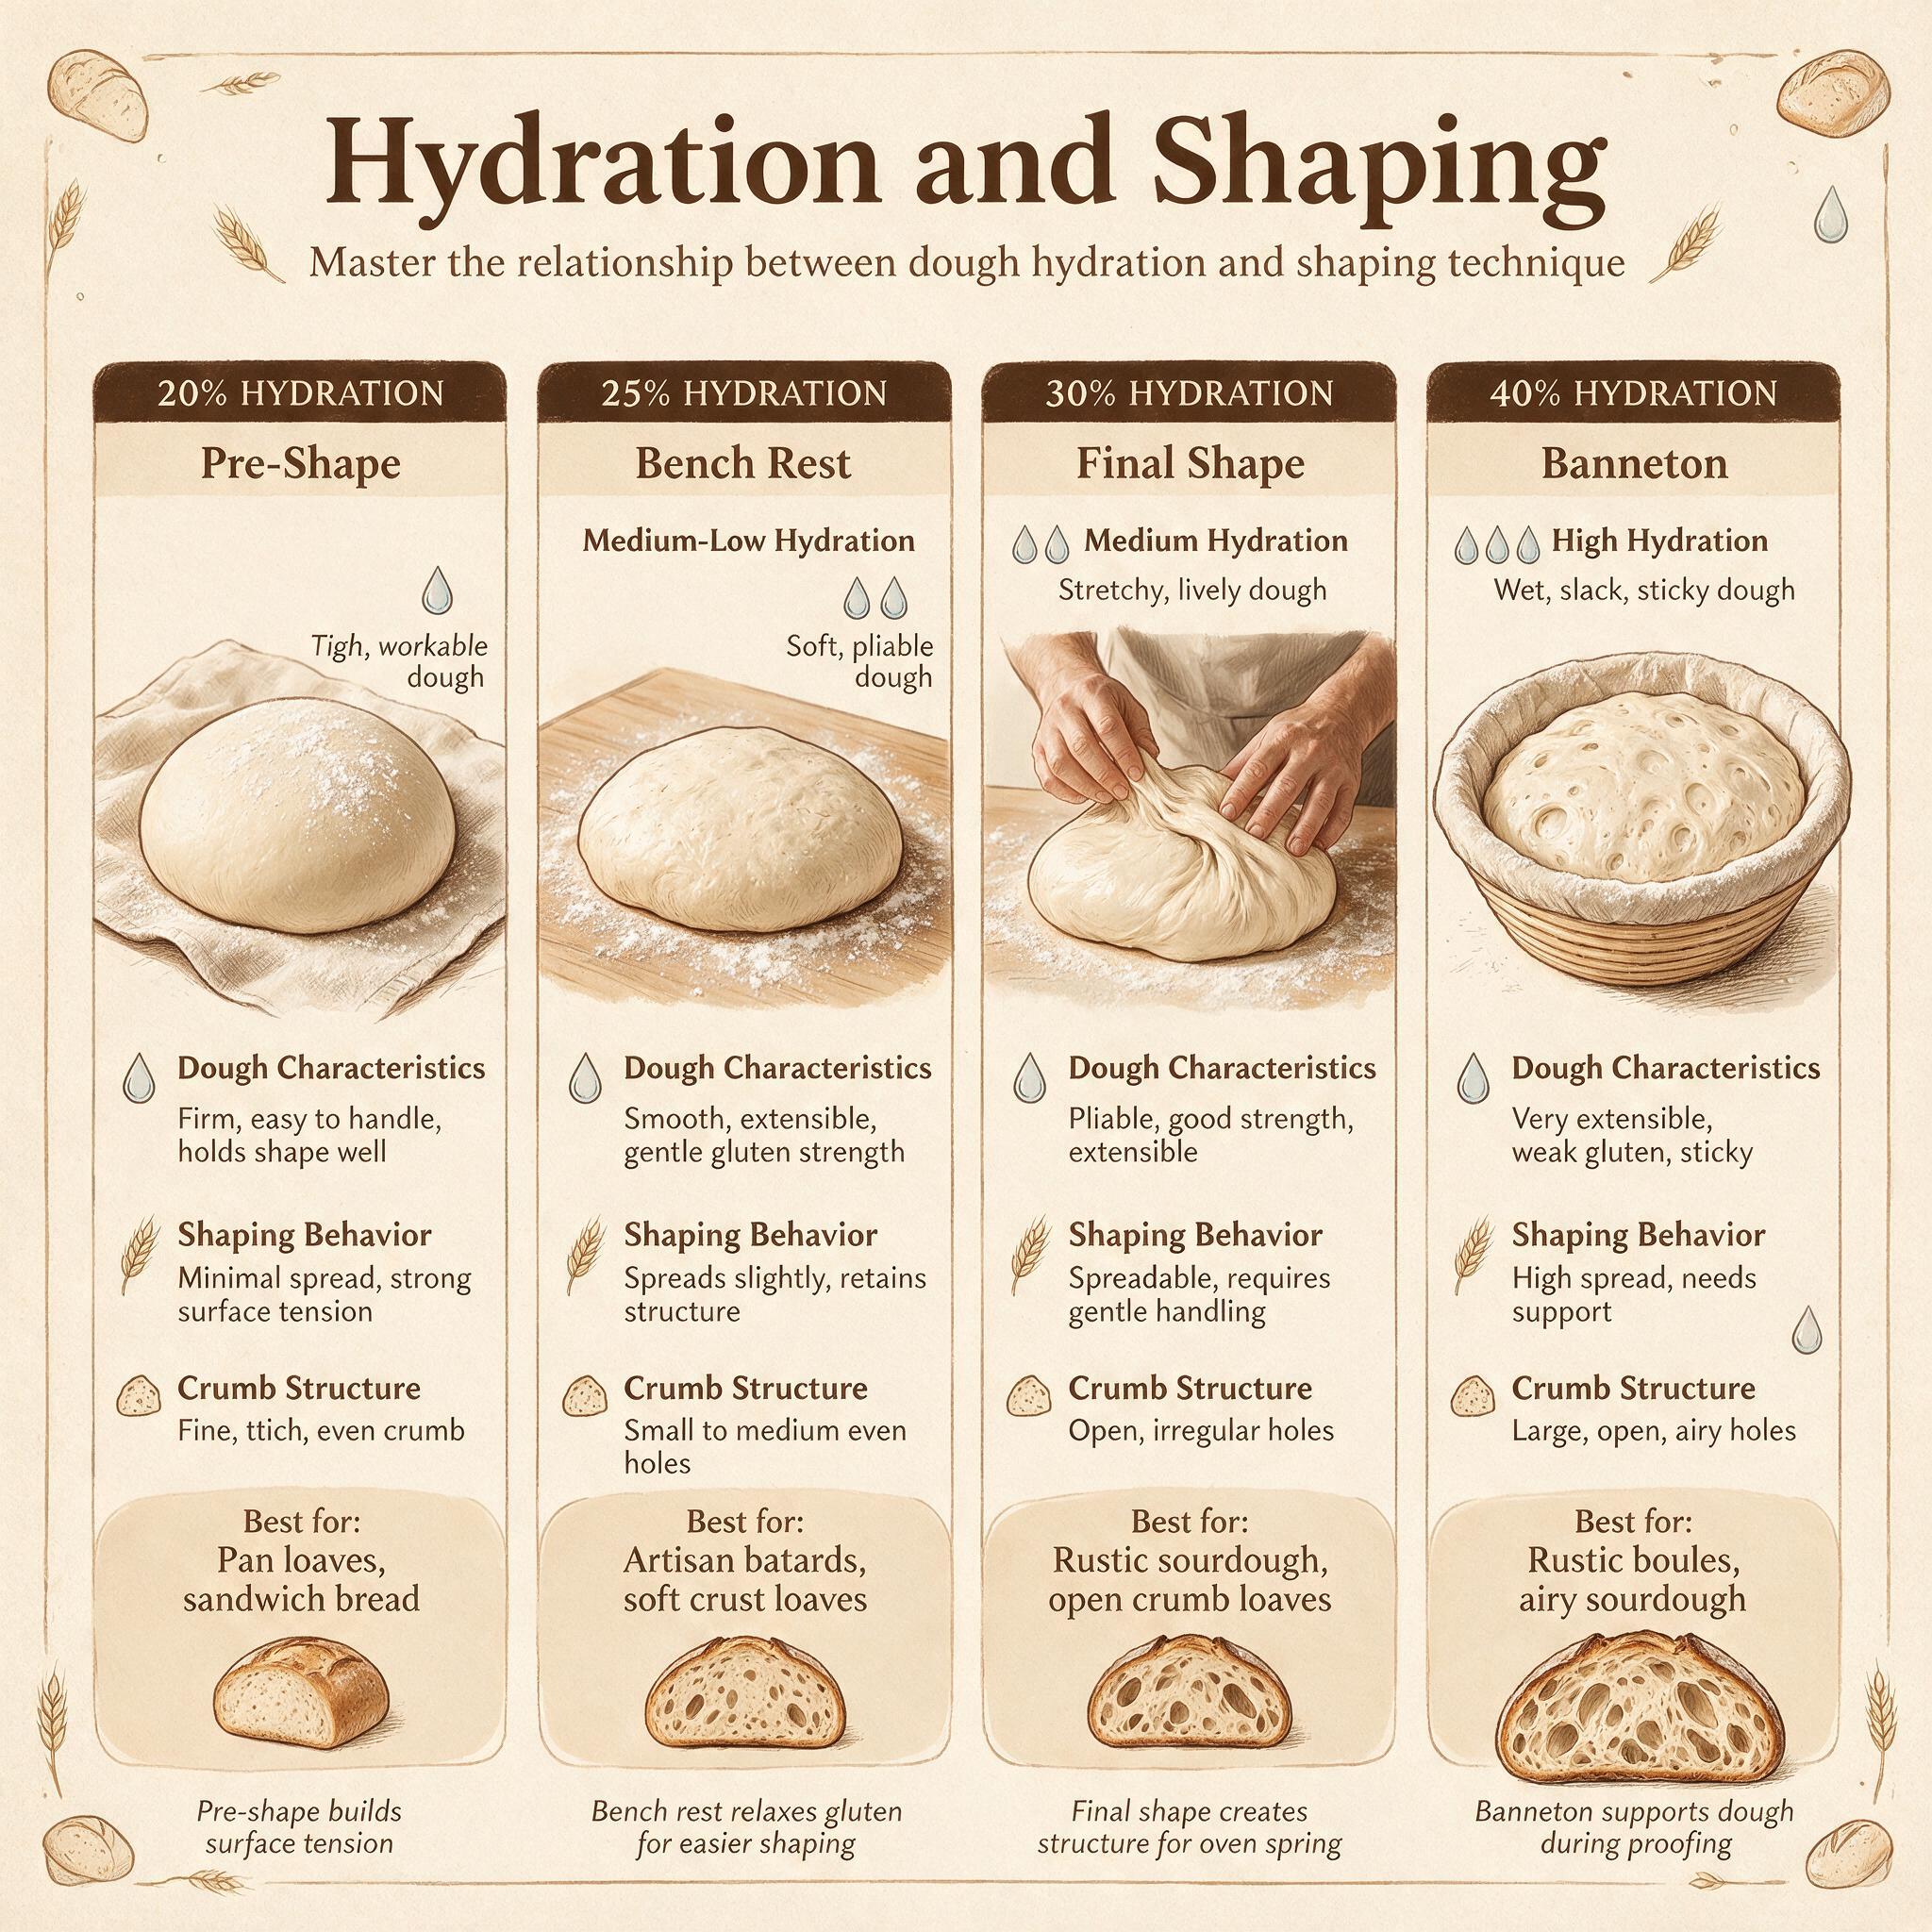
Understanding the mechanics helps you troubleshoot when things go wrong. Here's what's actually happening inside your dough:
Autolyse Kickstarts Gluten Formation
A 20–60 minute rest of flour + water before adding salt and starter dramatically improves extensibility. During this rest, enzymes naturally present in flour begin breaking down protein bonds and organizing gluten networks without mechanical input. The result: dough that's both stronger AND more extensible — crucial for high-hydration work. Coined by French professor Raymond Calvel in 1974 as "the secret to extensibility," this remains one of the most underutilized techniques among home bakers.
Flour Protein Determines Maximum Viable Hydration
Your flour's protein content sets a ceiling on how much water it can absorb while maintaining structure:
| Flour Type | Protein Range | Recommended Max Hydration |
|---|---|---|
| Bread flour (hard red winter/spring) | 12–13.5% | Up to 78–80% with practice |
| All-purpose flour | 10–11% | ~64–66% |
| High-protein white (14%+) | 13.5–15%+ | Up to 82–85% |
| Whole wheat | — | Same % but needs more actual water (+3–5% per 20% WW) |
The hidden water mistake: A starter at 100% hydration is 50% water, 50% flour by weight. If you add 200g of 100%-hydration starter to your dough, that's 100g of hidden water and 100g of hidden flour. Many bakers targeting 70% hydration are actually baking at ~80% because they don't account for starter water. Flourwise author made this mistake for his first six or seven loaves, producing "unmanageable dough."
The Rheology Shift During Fermentation
A Cereal Chemistry study (Clarke, 2004) showed that sourdough fermentation alters dough rheology over time. As acidification progresses, gluten structure softens — making dough more extensible but eventually weaker as protease enzymes break down protein bonds. This explains why high-hydration doughs feel progressively slacker during bulk fermentation: the acid is literally dissolving parts of your gluten network while bacteria eat through their food supply.
Fermentation Speed by Hydration (at 75°F / 24°C with 20% starter)
| Hydration | Expected Bulk Time | Volume Increase Target | Fold Sets Needed |
|---|---|---|---|
| 65% | 4–6 hours | 50–75% | 2–3 sets |
| 70–72% | 4–5 hours | 50–75% | 4 sets |
| 75–78% | 3.5–4.5 hours | 40–50% (watch closely) | 5 sets |
| 80%+ | 2.5–4 hours | 30–40% (narrow window) | 5–6 sets |
Higher hydration ferments faster but has a narrower perfect-proof window. This is why the aliquot jar method — tracking your dough's actual rise percentage — matters more than any timer at higher hydrations.
Sandwich vs. Artisan: Deliberate Hydration Choices
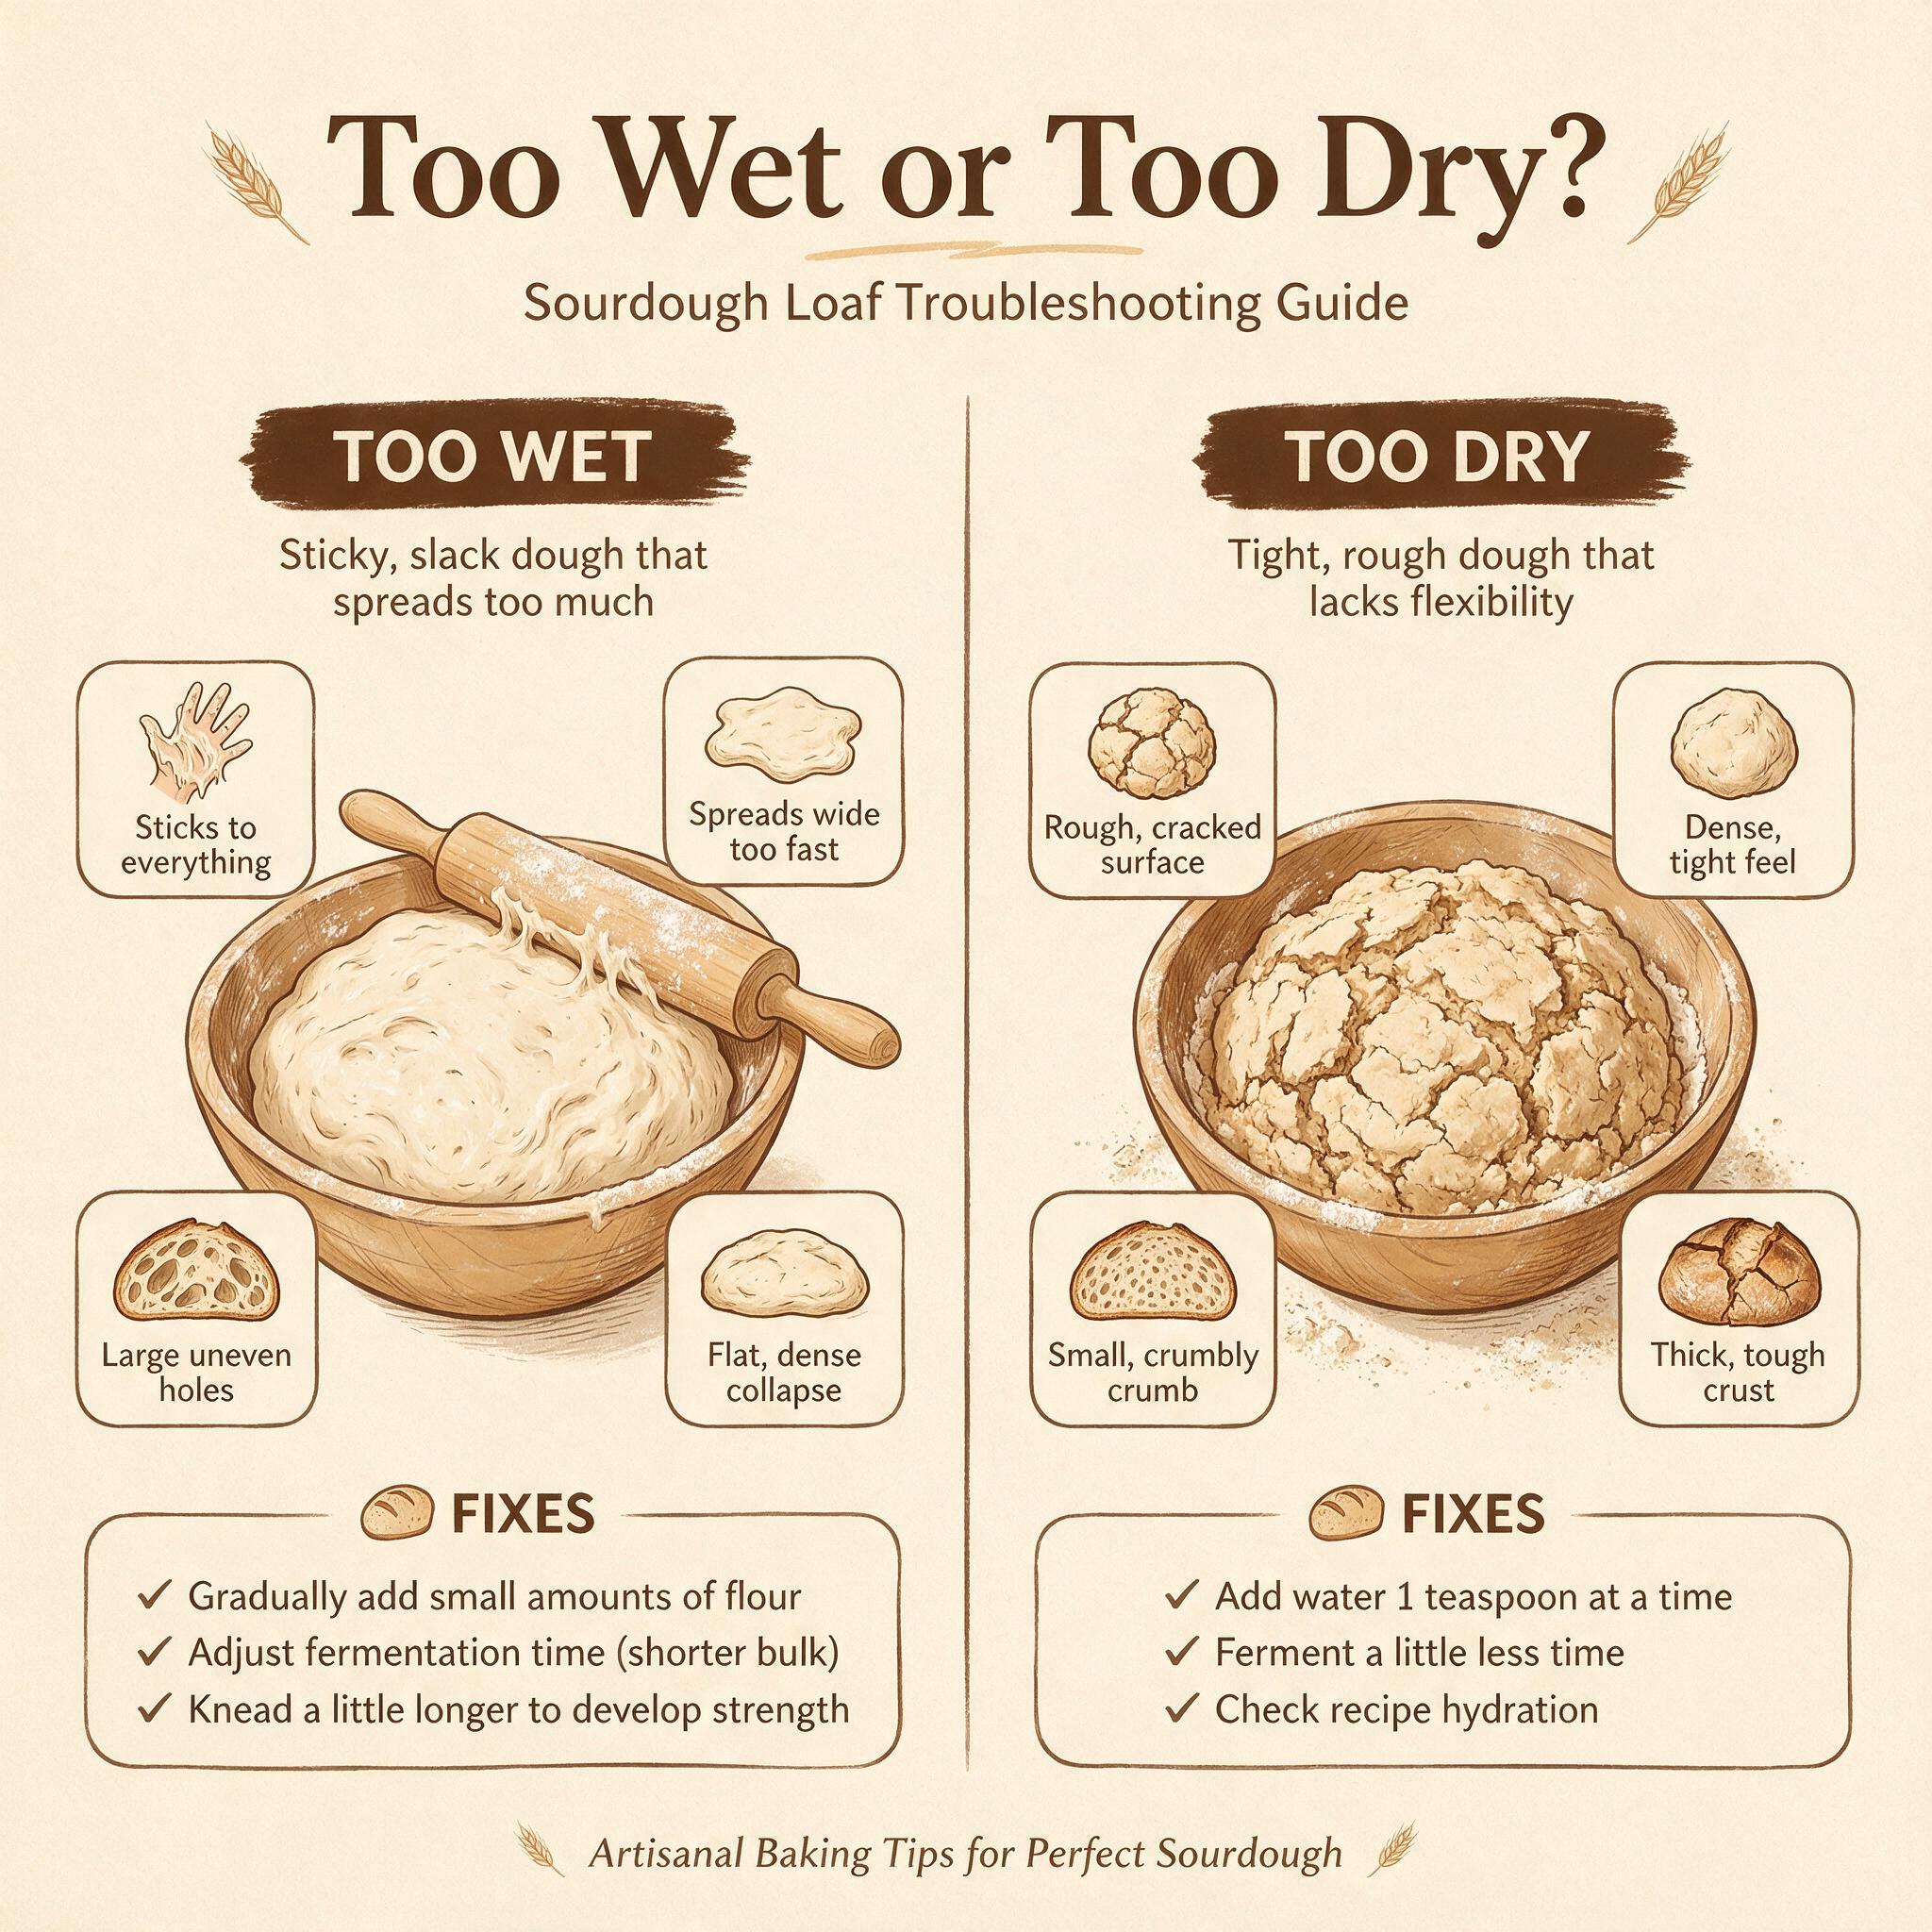
Not every loaf needs an open crumb. In fact, for sandwich bread, a tighter crumb is often preferable — it slices cleanly and holds fillings without leaking. Here's how to deliberately target a sandwich-style loaf:
Target hydration: 65–70%, with 68% as the sweet spot — soft but structured, slices hold together without leaking fillings.
Fat is critical. Add 5–10% fat (butter or oil) as baker's percentage. Fat coats gluten strands creating tenderness, locks in moisture (extends shelf life to five to seven days), and aids Maillard browning at lower bake temperatures.
Bake temperature: 375–400°F (190–200°C) — much lower than artisan's 465–500°F. Enriched doughs brown faster; gentler heat equals softer crust.
Bulk fermentation ends at ~50% rise (not 75–80% like artisan). Lower-hydration + fat = tighter gluten network that reaches its limit sooner.
Proof fully. Sandwich loaves want a fully-proofed loaf crowned about one centimeter above the pan rim, not saved for oven spring. Bake in a loaf pan — the dough needs support since it won't hold its own shape like high-hydration dough.
Crumb Control via Handling
You can control crumb even at the same hydration level through how you handle the dough. The same 75% hydration dough produces three very different results depending on technique:
- •Minimal handling → wild open crumb (Tartine style)
- •Balanced handling → even open crumb (everyday artisan)
- •Structured handling + selective degassing → tight sandwich crumb
The key insight: you're not deflating the dough — you're editing the gas structure. For sandwich bread, press out large bubbles during shaping and tighten firmly for surface tension.
Switching Flours? Adjust Your Hydration
When you change flours, your hydration needs shift. Here's a practical rule: reduce your water by 20–30g from what the recipe states and add more gradually until the dough feels right. It's easier to add water than to correct an overly wet dough.
Different flours also create different bacterial communities that ferment at different speeds. The NC State Wild Sourdough Project found that whole grain flours foster more vigorous fermentation than white flour — so even at identical hydration and temperature, a loaf with 20% whole wheat will complete bulk faster than an all-white equivalent.
Frequently Asked Questions
Should I always account for starter water in my hydration calculations?
Yes, especially if you're targeting a specific hydration level. A 100%-hydration starter is half water by weight, and that hidden water adds up quickly. For casual baking, the difference might not be noticeable — but if you're consistently getting dough that's wetter than expected, this is usually why.
Does higher hydration always mean better flavor?
Not necessarily. Flavor comes primarily from fermentation time, not hydration percentage. A well-fermented 70% loaf will taste more complex than a poorly fermented 82% loaf. That said, higher-hydration doughs do stay fresh longer (more even moisture distribution), which preserves flavor after baking. Think of it this way: hydration affects texture and shelf life more than raw flavor potential.
Can I use high hydration with whole wheat flour?
Yes, but expect higher numbers. Whole wheat absorbs significantly more water due to bran particles and pentosans (arabinoxylans). A 20% whole wheat addition typically needs 3–5% extra water. At 100% whole wheat, hydration tops out around 85–90% — above that, the gluten structure can't hold more water and becomes unshapable.
What's the fastest way to practice high-hydration technique?
Work up gradually: start at 72%, bake five loaves there until shaping feels automatic, then jump to 75%. Spend another five loaves at that level before trying 78%. Your hands learn through repetition — and each level teaches you something different about dough behavior. Don't skip steps.
Closing Thoughts
Hydration isn't a number on a recipe — it's a dial you turn toward the bread you want to bake. Firm dough for clean-slicing sandwich loaves? Target 65–68%. Want classic open-crumb artisan bread? 72–73% is your sweet spot. Going for show-off territory with dramatic holes and blistered crust? Push to 78%+ and embrace the stickiness.
My personal approach: I keep a standard loaf at around 72% hydration for everyday baking — reliable, impressive enough, and bakeable on any weeknight. When I want something special (a cheese board, a dinner party), I push to 76–78%. And when I'm feeling ambitious or the flour calls for it, I go higher. But I always start at 72% and work from there — never jump straight up.
The most important thing isn't hitting any specific number. It's understanding what each level feels like in your hands, watching your dough instead of the clock, and trusting that whatever hydration you're working with is exactly right for the bread it wants to become.
Happy baking!