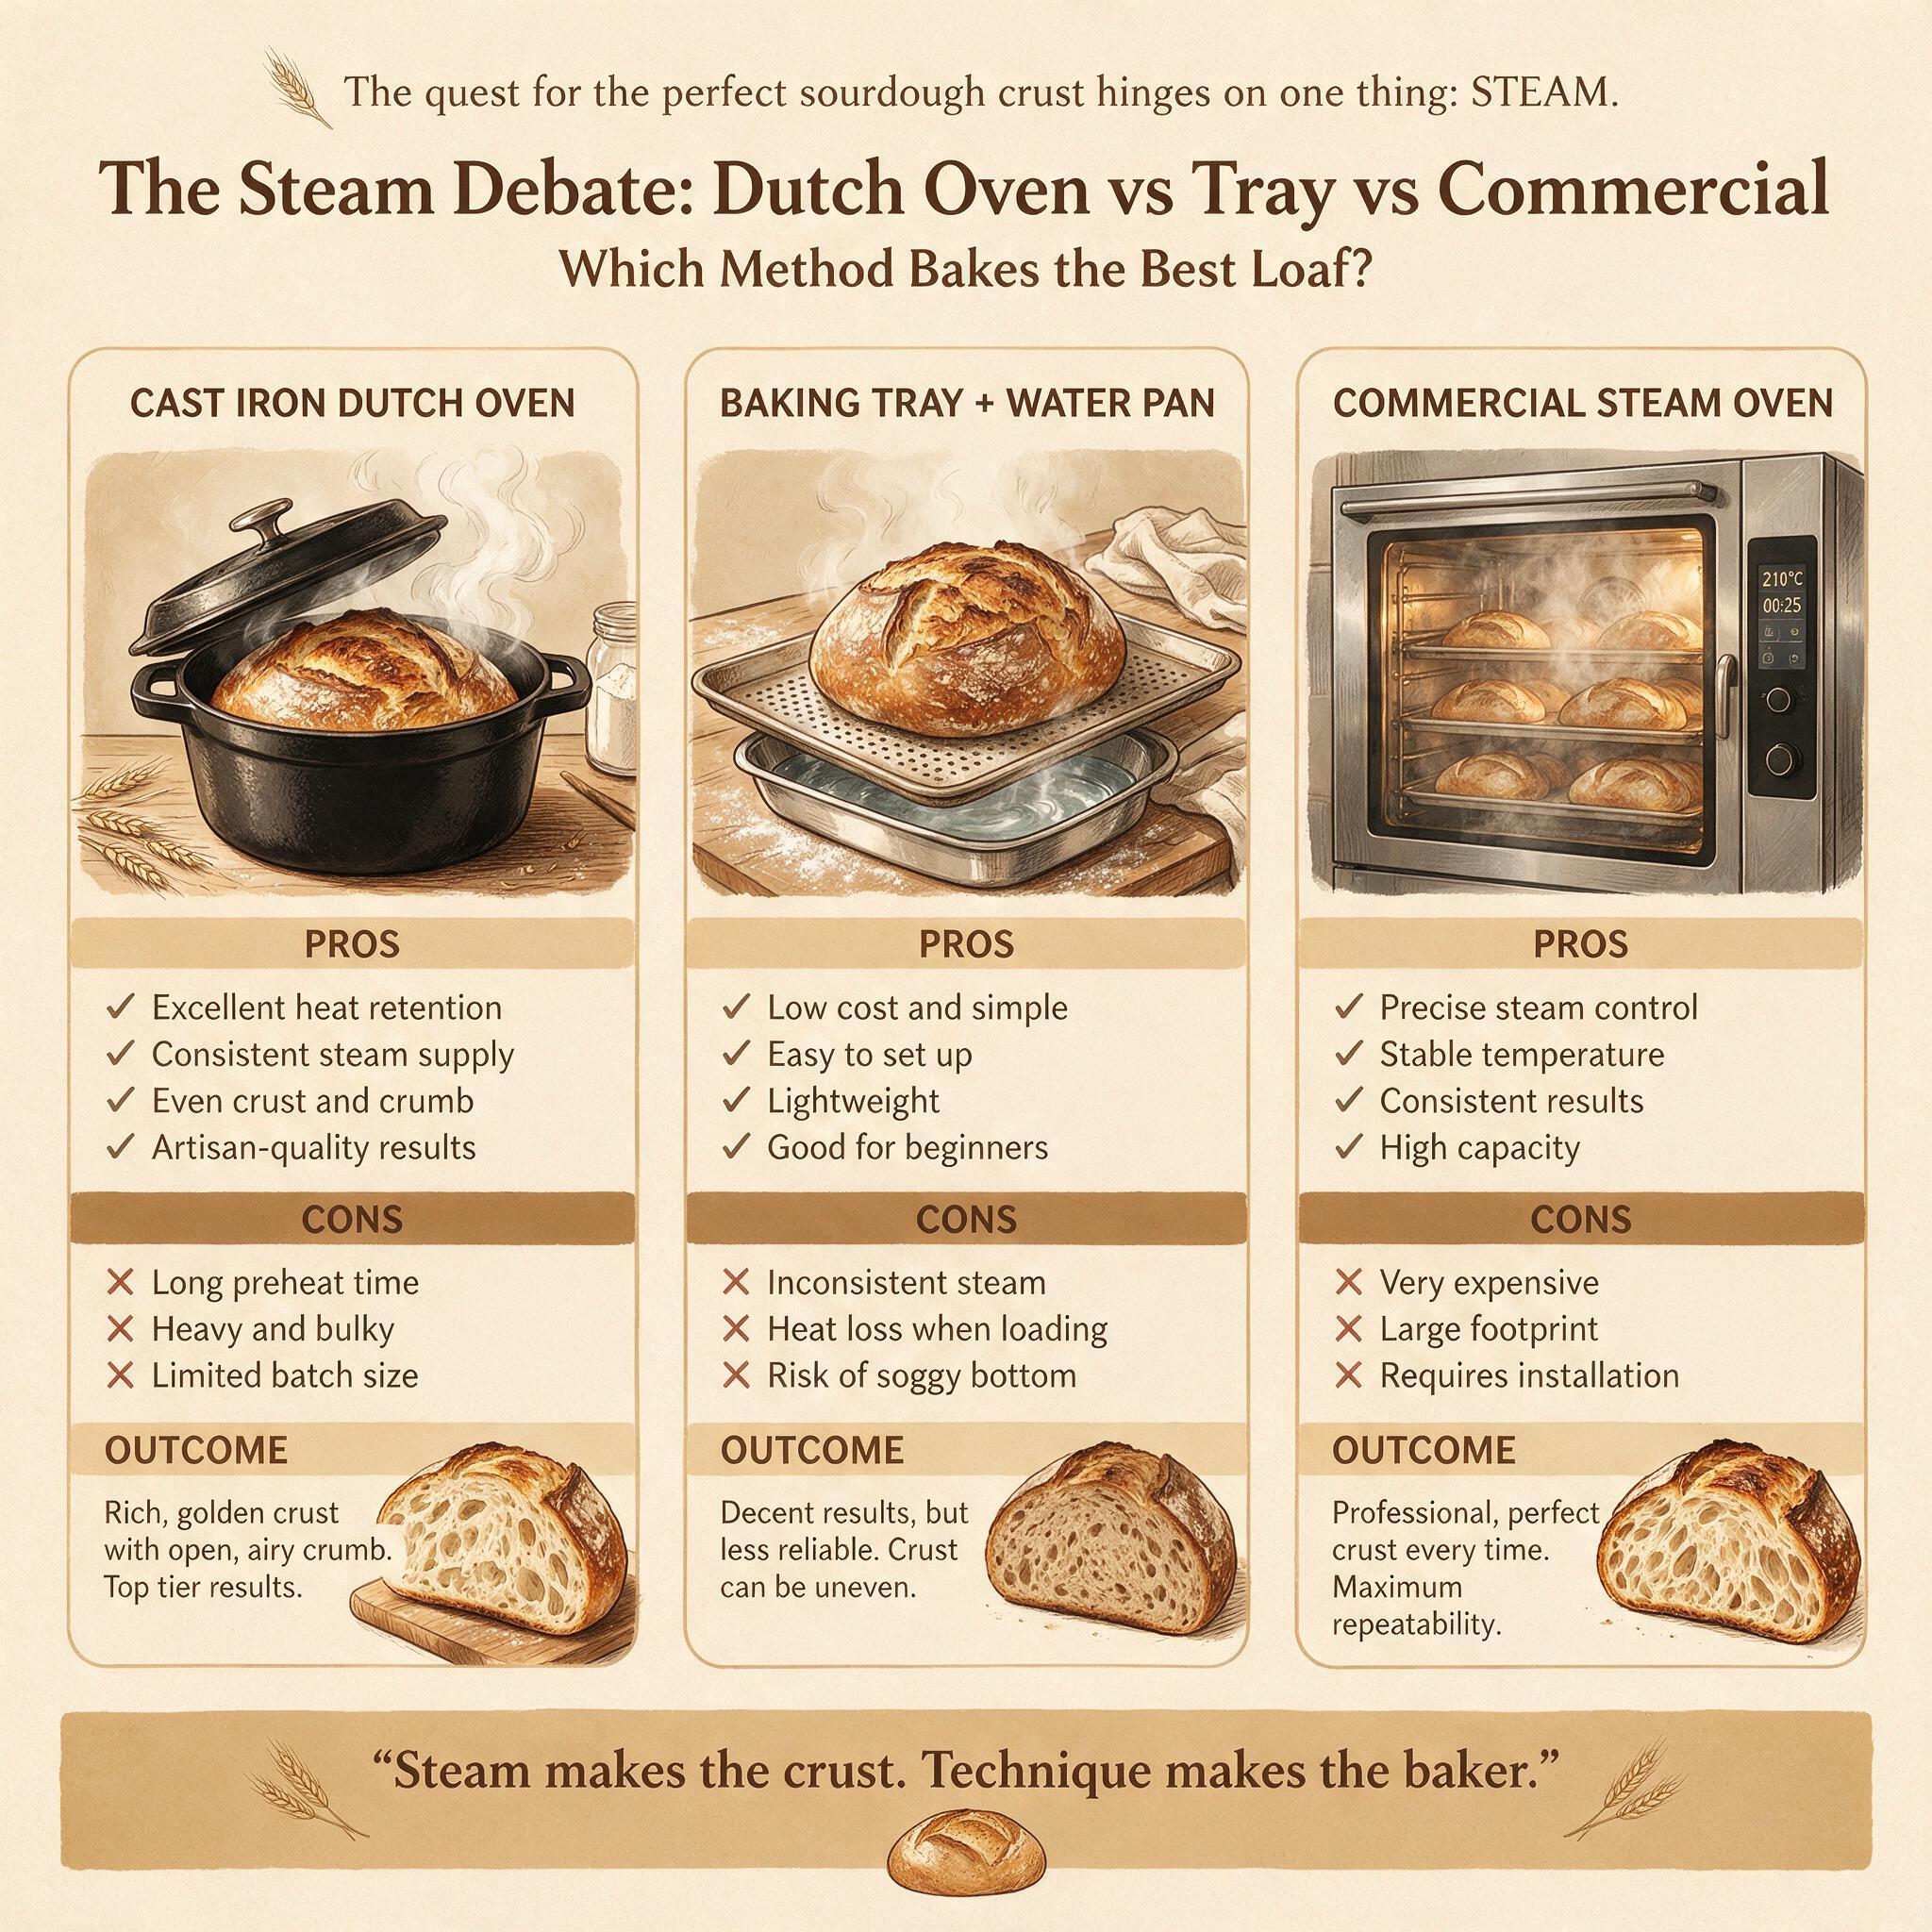
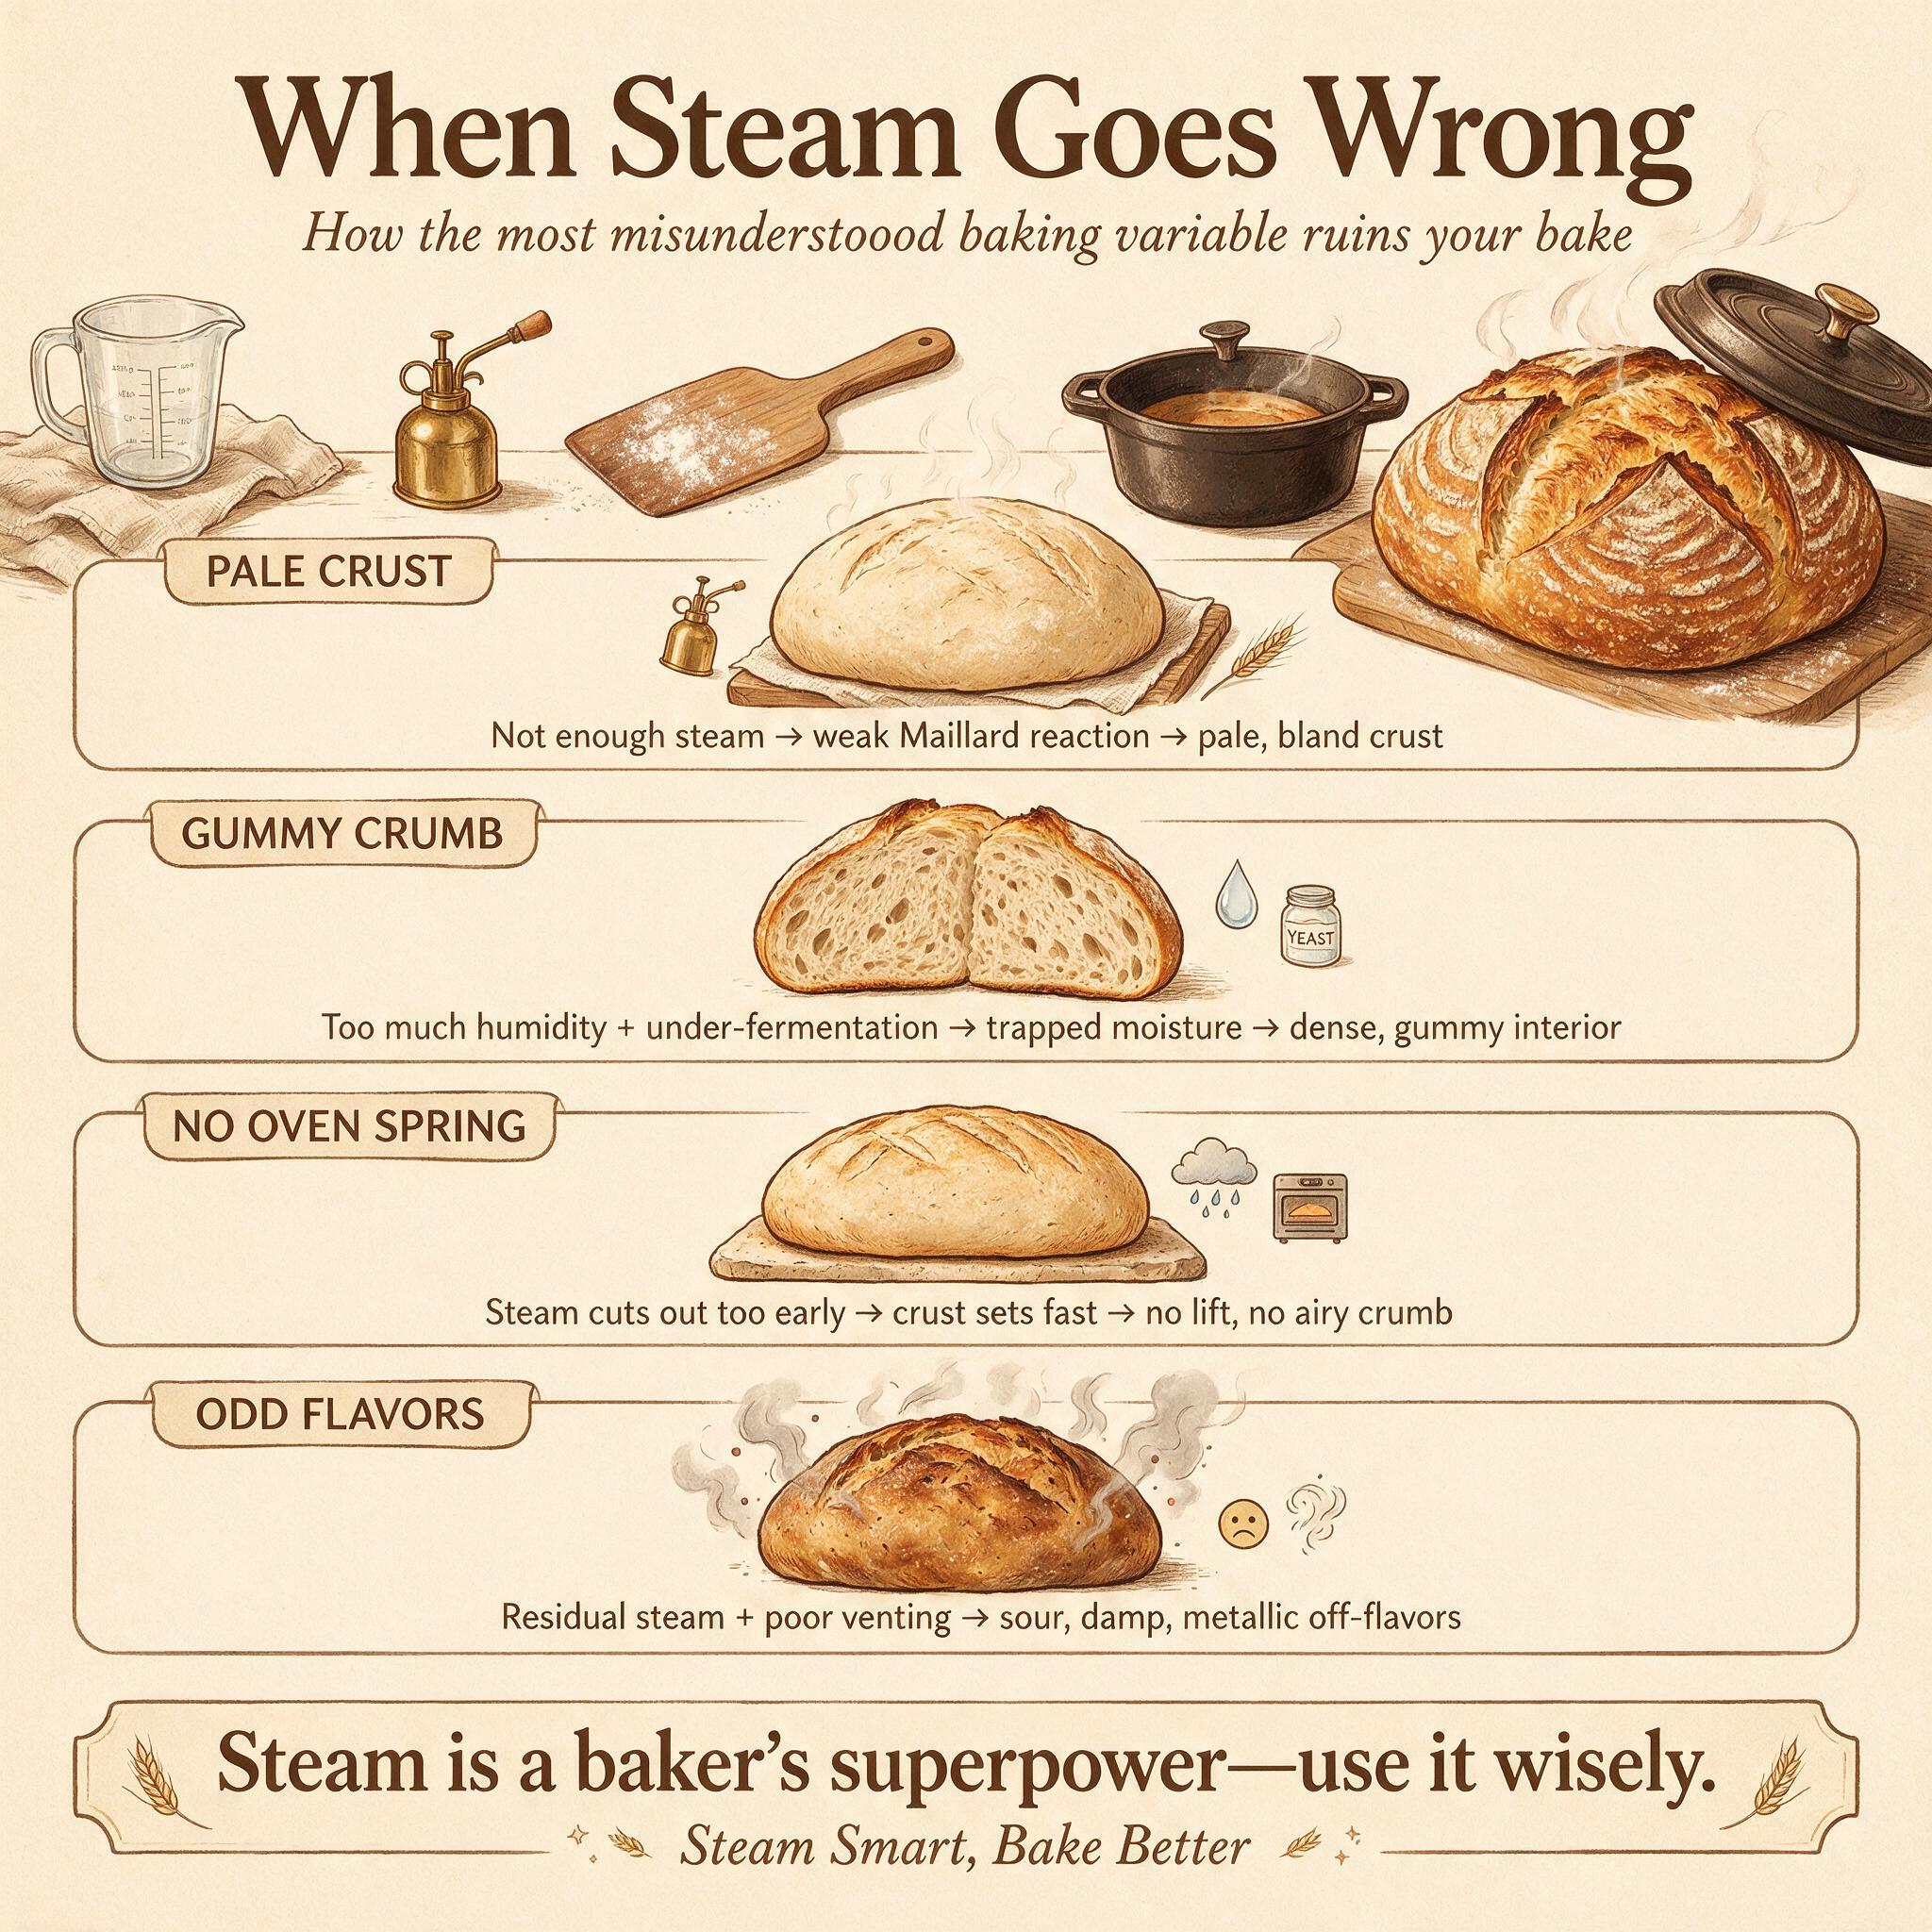
Steam is essential during the first 10–20 minutes of baking. Without it, your crust sets within the first three to five minutes — before oven spring can complete — leaving you with a flat, pale loaf with a thick, leathery exterior. With it, the crust stays soft and extensible while your dough expands dramatically, then crisps beautifully once you remove the steam source.
But here's where bakers diverge: the method of getting steam into your oven. Some swear by Dutch ovens. Others use trays of water or ice cubes. A few have commercial steam injection systems. Each approach has trade-offs in cost, convenience, capacity, and results.
This guide compares the three main methods — Dutch oven, tray/steam pan, and commercial steam ovens — covering pros and cons of each, which produces better results, and the best budget-friendly DIY tricks for home bakers.
Why Steam Matters: The Science
Before comparing methods, it helps to understand what steam actually does during baking:
1. Keeps the crust extensible. Moist air prevents the surface from setting within the first three to five minutes, allowing maximum oven spring. Without steam, the crust hardens immediately and locks the loaf in place — even with perfectly proofed dough.
2. Gelatinizes surface starches. This creates a glossy, thin, crackly crust rather than a thick, dull, leathery one. The Maillard reaction (browning) happens at the surface, and steam keeps that surface moist enough for proper caramelization.
3. Enables scoring to bloom. Scores won't open properly without steam. A scored loaf baked without steam barely opens — the crust sets around the cut before expansion can push through. With steam, every score blooms open dramatically.
The critical window: Steam is needed for approximately the first 20 minutes of baking. After that, a dry finish allows the crust to firm and caramelize properly.
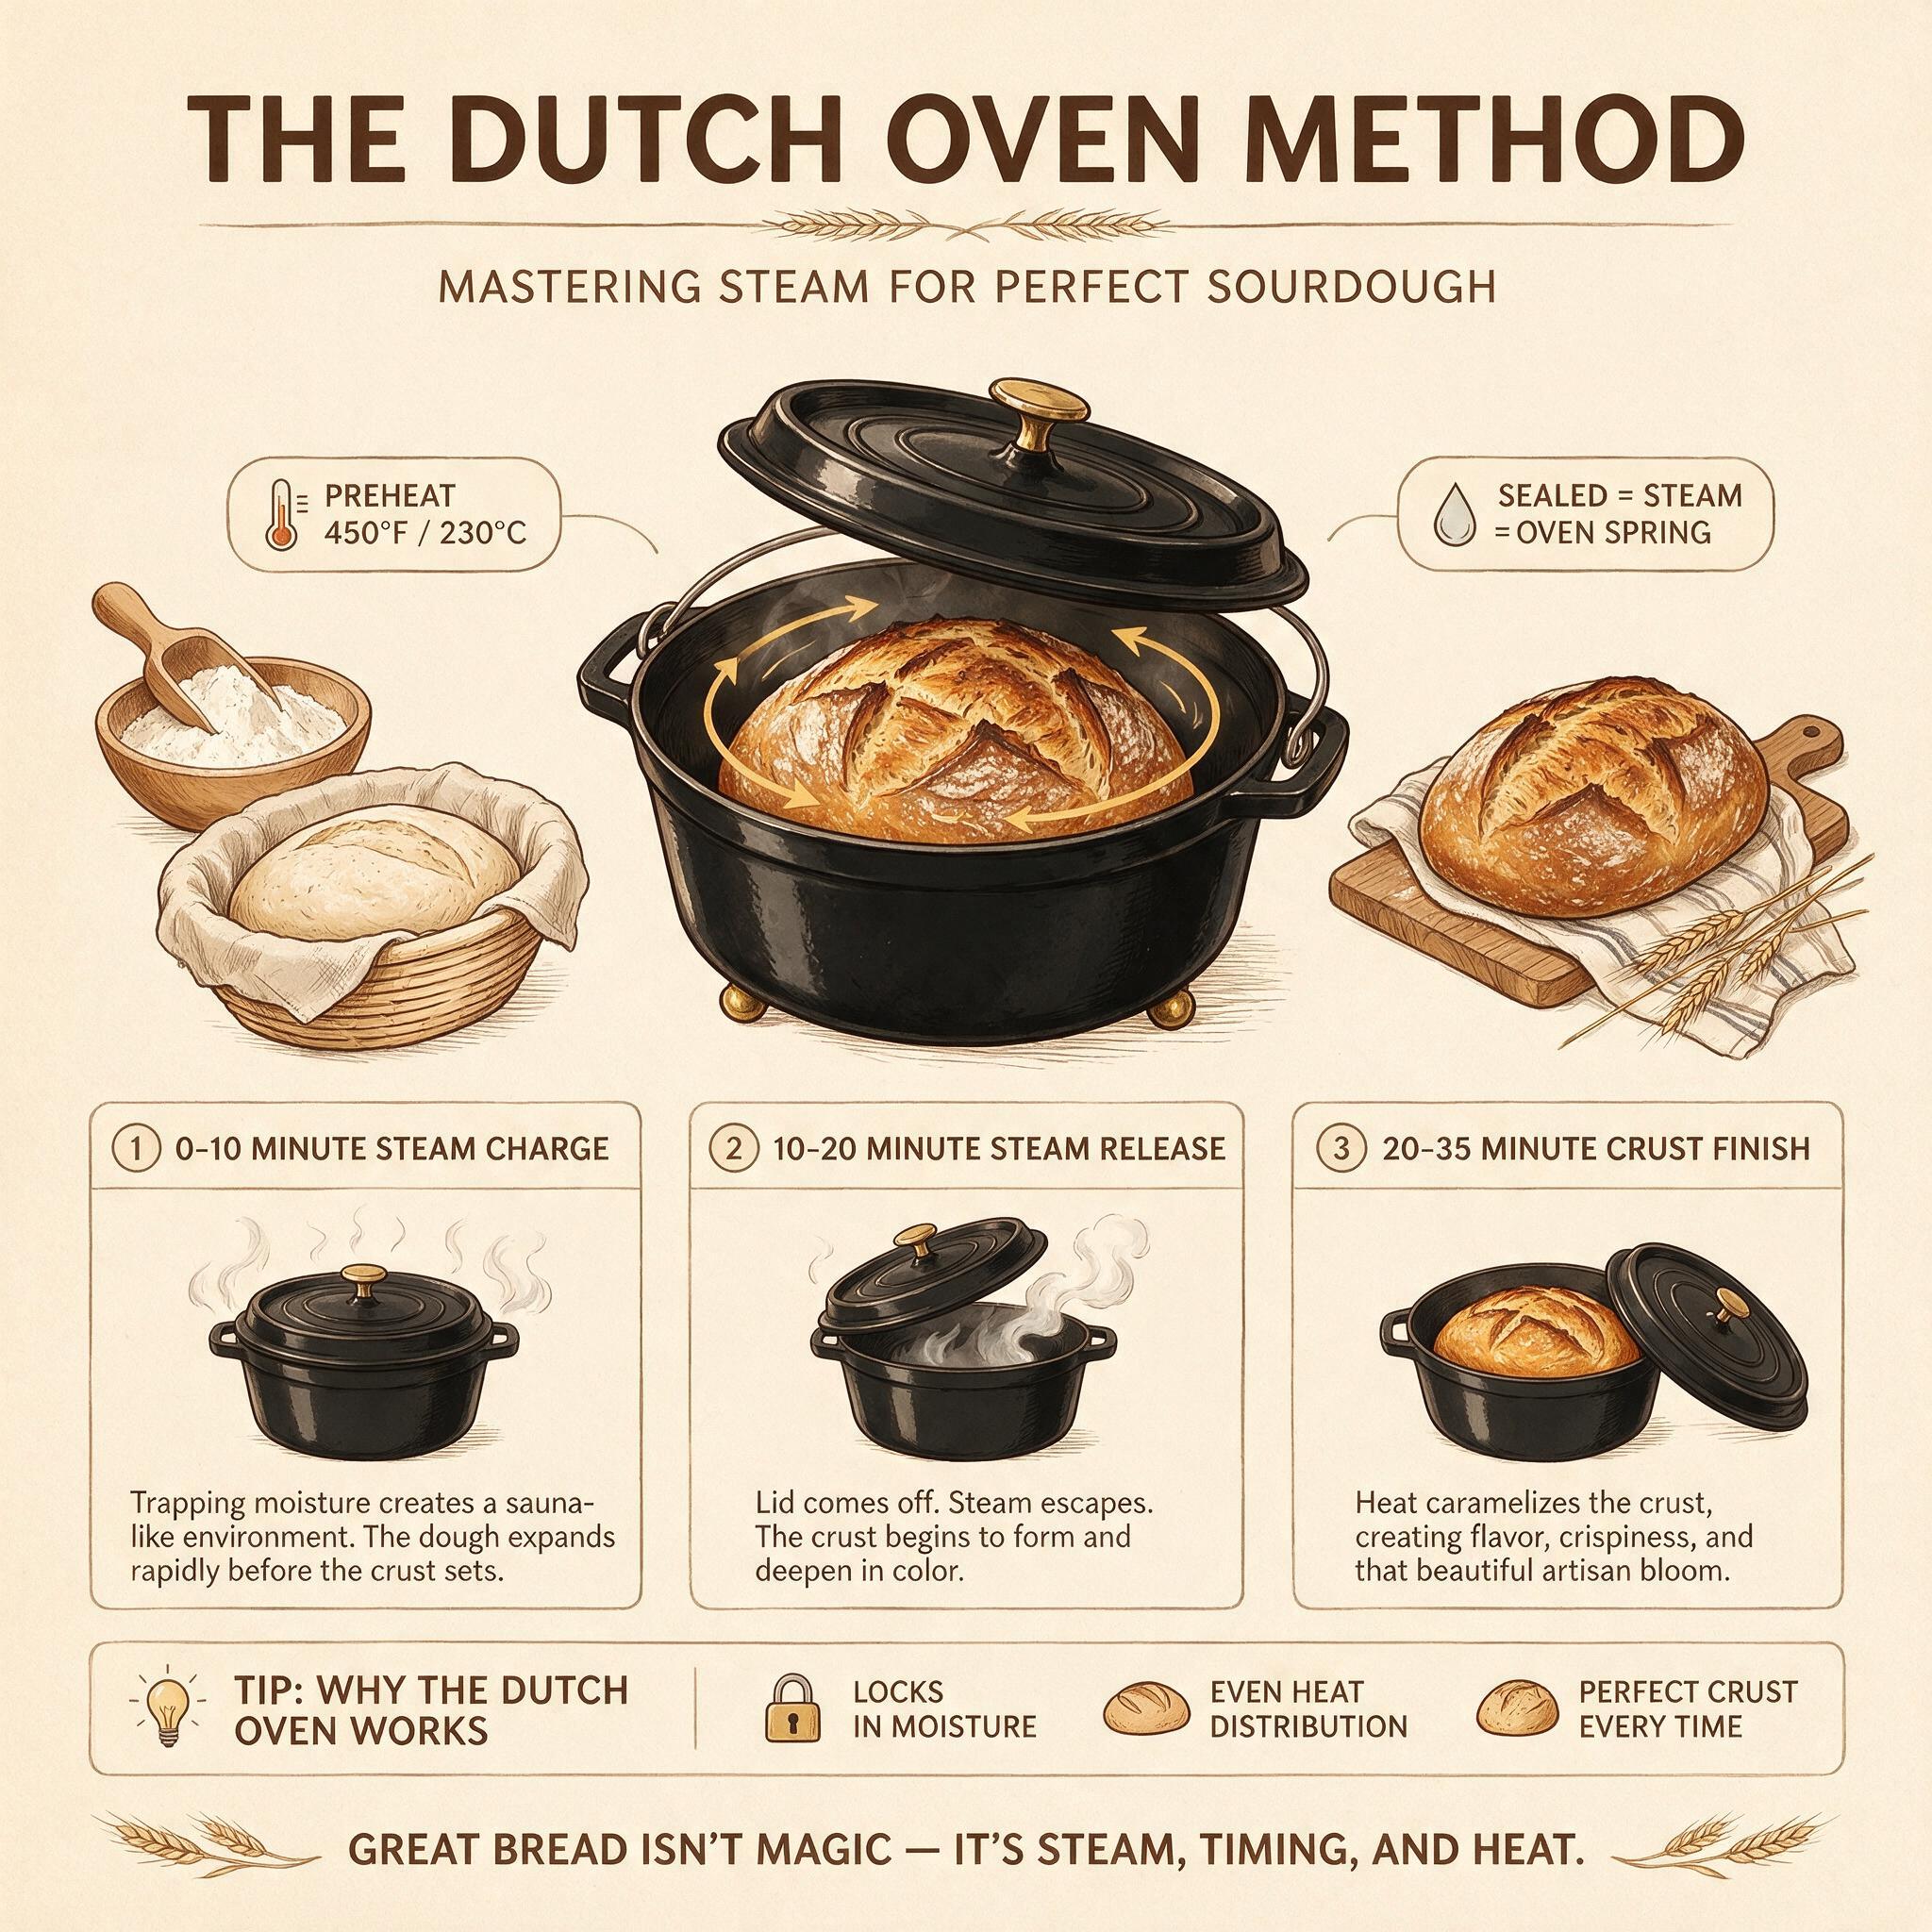
Method 1: Dutch Oven (Most Reliable)
How It Works
A preheated Dutch oven traps moisture the dough naturally releases, creating a steamy micro-environment without any external steam source. Lid on for 20 minutes (covered phase), then lid off for 20–25 minutes (uncovered phase). That's it. No trays, no sprays, no monitoring.
Pros
- •Most reliable results. Consistent steam every time without any skill or attention required.
- •Works in any oven. No need for a professional deck oven or steam injection system.
- •Produces excellent crust. The trapped steam creates a beautiful thin, crackly crust with good blistering.
- •Very forgiving. Minor temperature or timing variations don't dramatically affect results.
- •Affordable setup. A $45 Lodge Dutch Oven produces nearly identical results to $300+ purpose-built bread ovens per Serious Eats testing.
Cons
- •Limited capacity. A standard 5–6 quart Dutch oven fits one standard loaf at a time. You can't bake multiple loaves simultaneously unless you own multiple pots.
- •Heavy to handle at 500°F. Hot and cumbersome — you need proper oven gloves and careful lowering.
- •Lid shape affects results. Round Dutch ovens produce slightly rounded tops; oval shapes work better for batards.
- •Can't bake batards easily. The elongated batard shape doesn't fit well in most round Dutch ovens.
Best Practices
- •Preheat oven to 500°F (260°C) with Dutch oven inside for 45–60 minutes (not just until the oven signals ready)
- •Carefully lower cold dough into screaming-hot pot using parchment paper as a handle
- •Bake covered for exactly 20 minutes
- •Remove lid and reduce temperature to 450°F (230°C) for the uncovered phase
- •Bake another 20–25 minutes until internal temperature reaches 205–210°F
Budget Pick
Lodge Cast Iron Combo Cooker (~$40–50) — the round Dutch oven (not the inverted lid) is your baking vessel; the inverted lid doubles as a pizza/bread peel.
Method 2: Tray / Steam Pan (DIY Steam)
How It Works
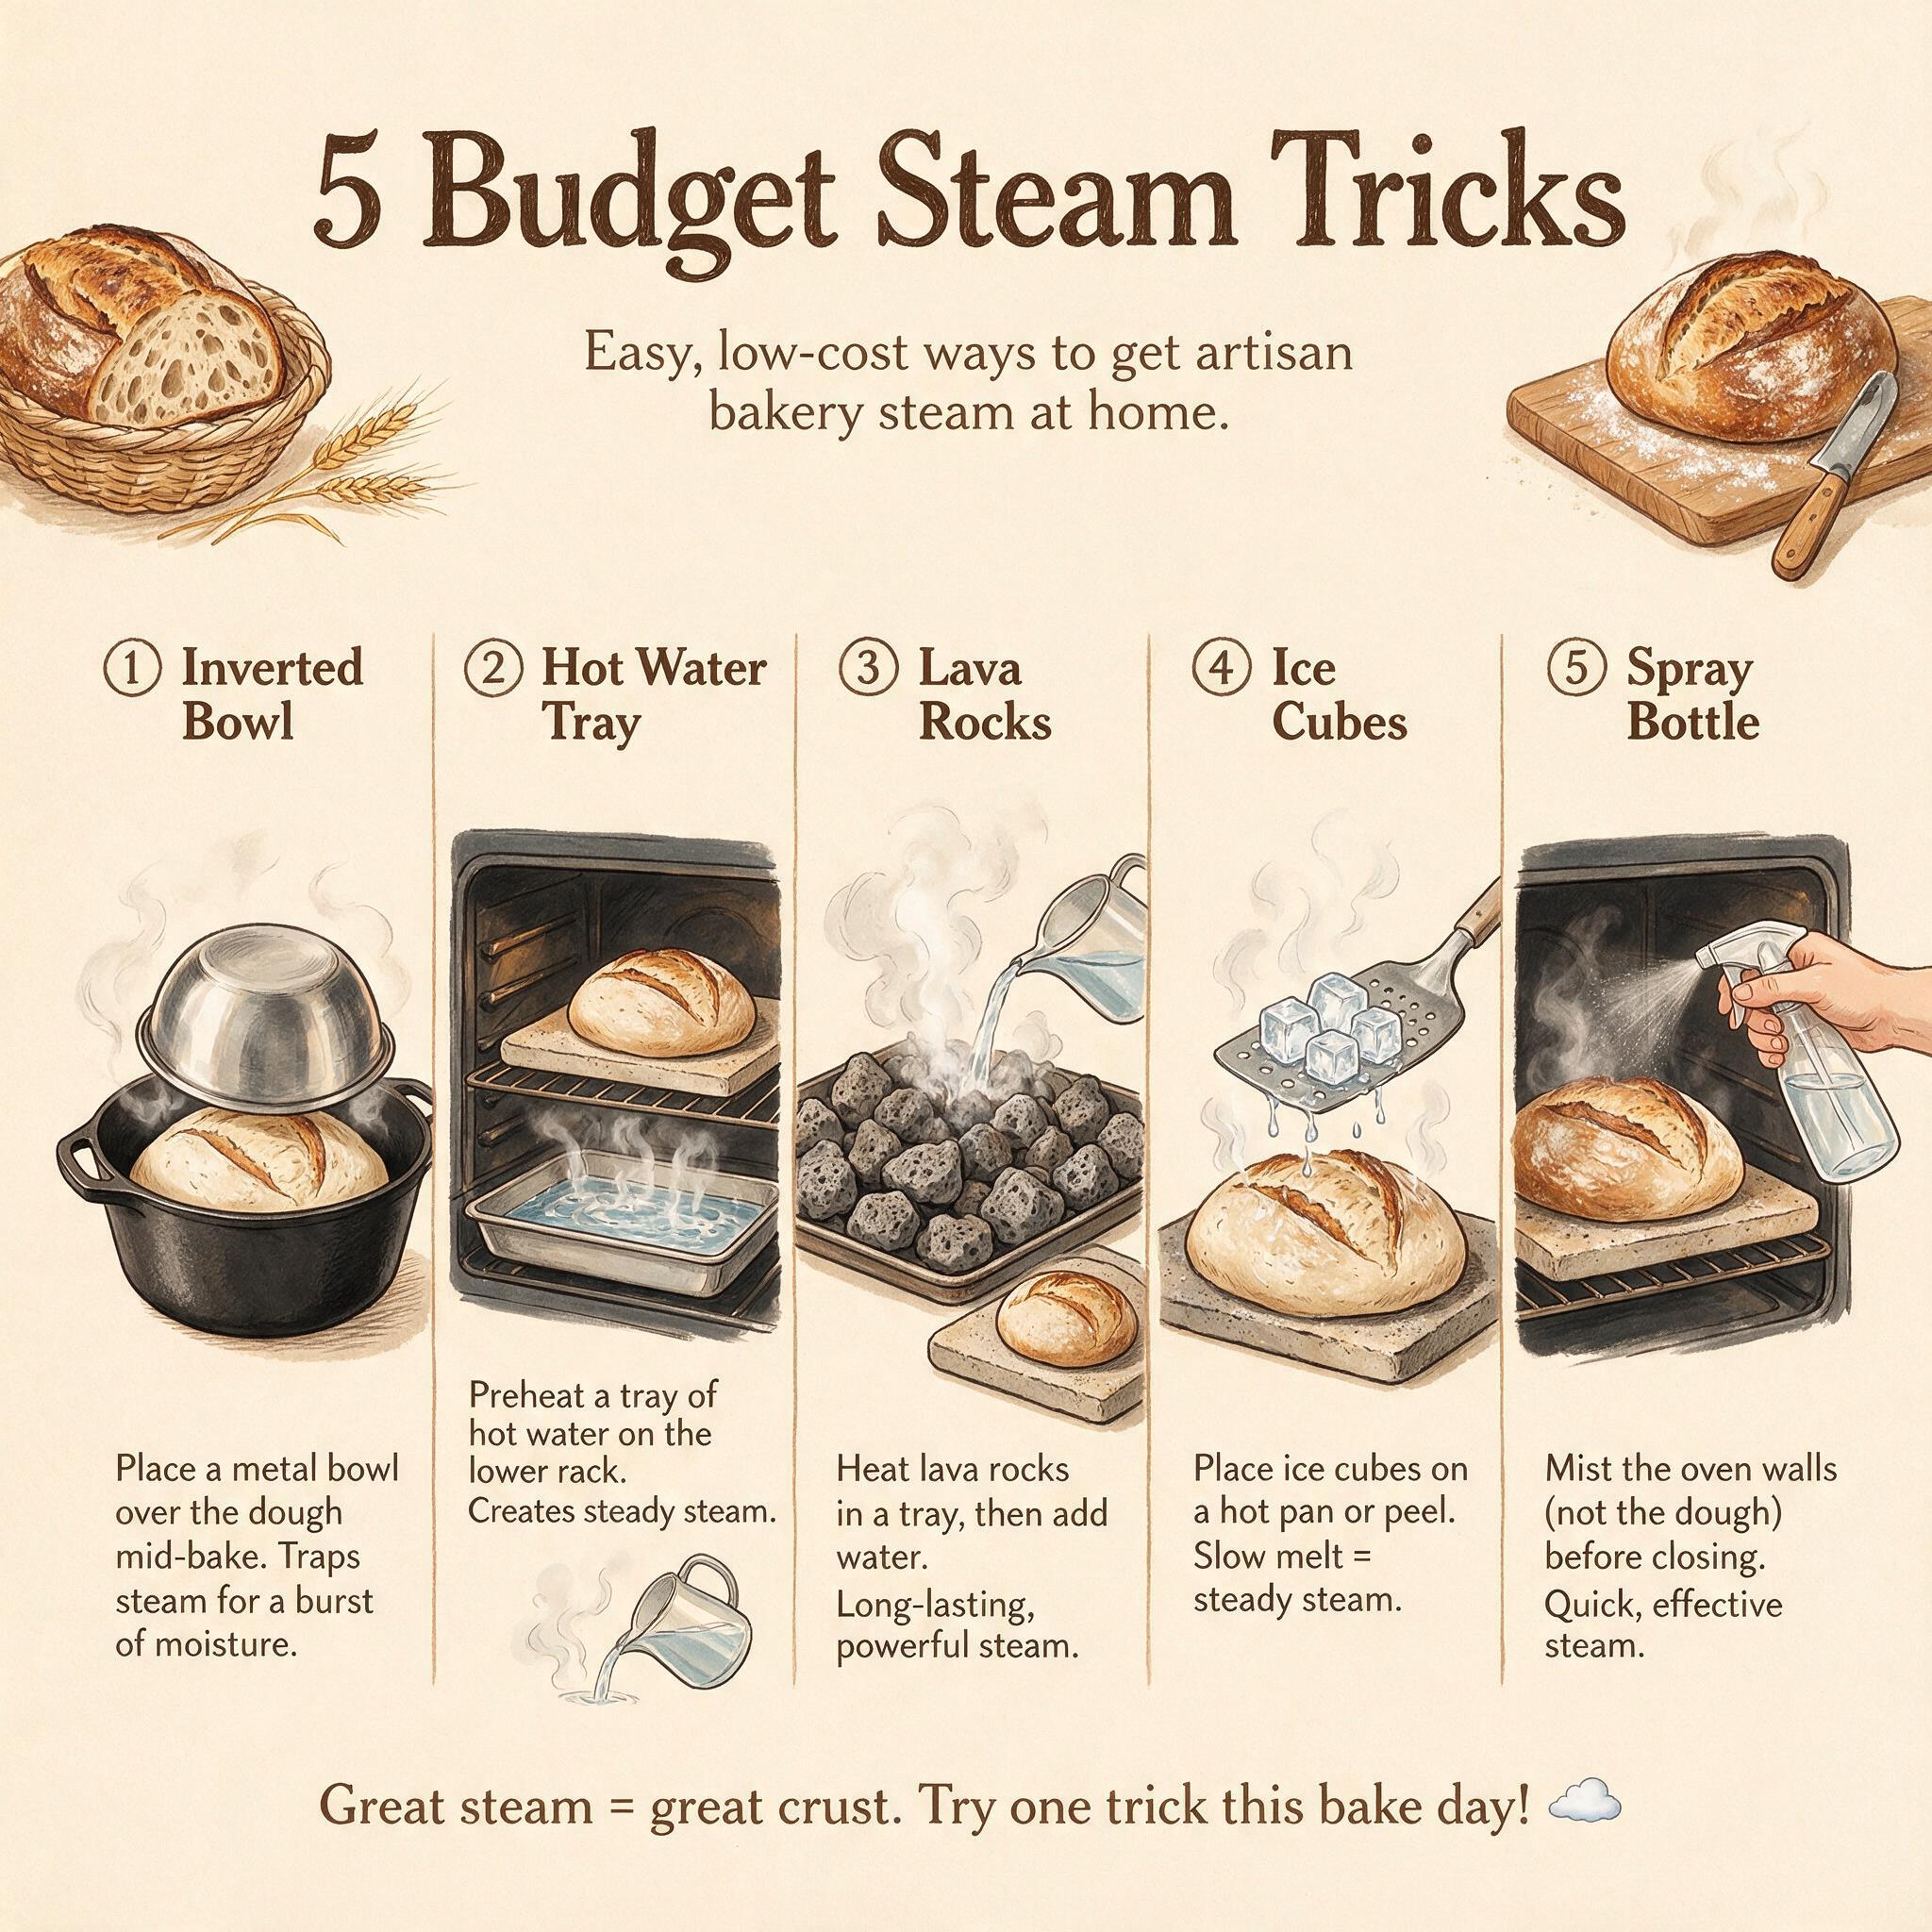
Preheat your oven with one or more metal trays on the oven floor (or at the lowest rack position). When you put your dough in the oven, add boiling water or ice cubes to the hot tray(s) to create steam. The steam rises and surrounds the baking loaf. You typically add steam in two to three batches over the first 20 minutes, then remove the trays for the dry finish.
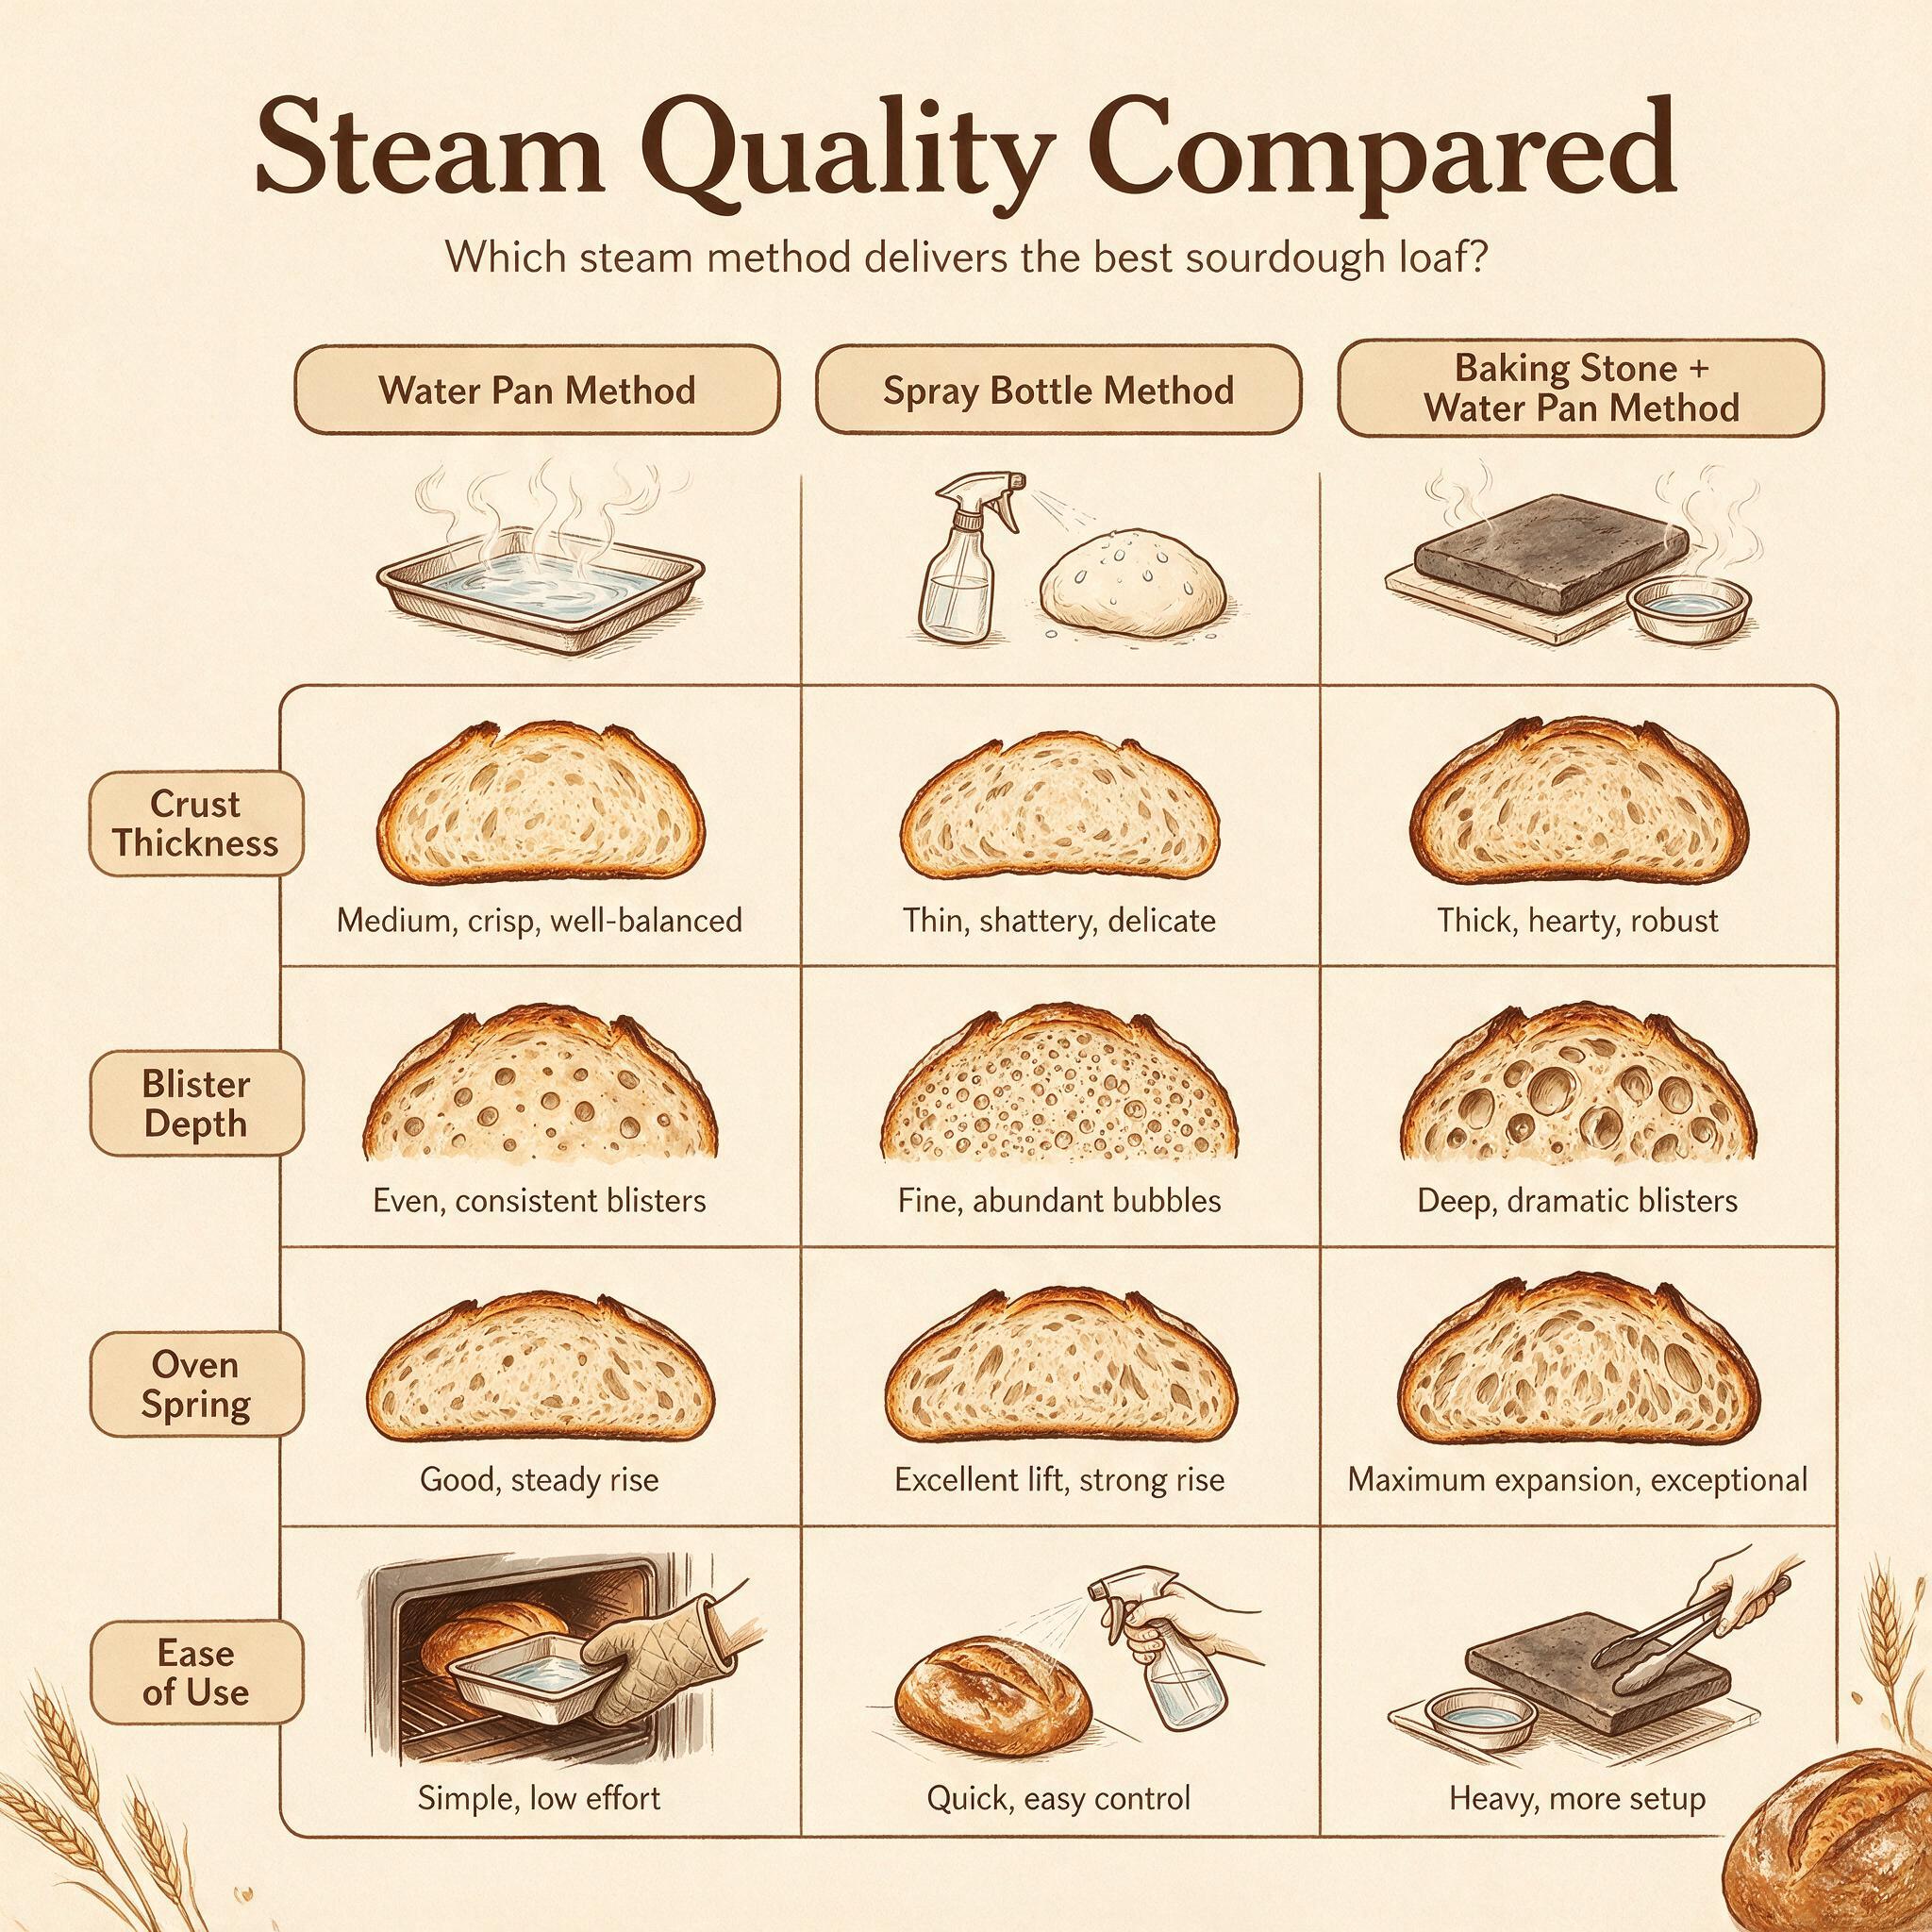
Methods Ranked by Effectiveness
- Preheated cast iron + boiling water (1 cup): Most effective — the cast iron stays hot, boiling water converts to steam rapidly, and you can add more at 10 minutes for sustained steam.
- Preheated tray + ice cubes: Works well — ice sublimates to steam over ~15 minutes, providing gradual steam release. Less intense than boiling water but covers the full window naturally.
- Towel method (continuous steam): Soak clean towels in water, wring out, place on preheated tray in oven. Produces intense, sustained steam for the full 20 minutes. Risk of burning if towels touch heating elements.
- Spray bottle: Least effective. Provides minimal moisture — works as a supplement, not a primary steam source.
Pros
- •Multiple loaves at once. You can bake as many loaves as fit on your oven racks simultaneously.
- •Works for any shape. Batards, baguettes, and oval loaves all fit on a baking stone or steel without Dutch oven limitations.
- •More authentic crust development. Open-oven baking with steam produces a crustier, more rustic exterior than Dutch oven baking.
- •Better for crusty artisan breads. The exposed crust develops more character in an open oven.
Cons
- •More skill required. Timing the steam addition, knowing how much water to use, and managing temperature requires practice.
- •Safety concerns. Adding water to a screaming-hot tray risks steam burns. Use long tongs or oven gloves and add water carefully.
- •Less forgiving. Inconsistent steam addition produces inconsistent results.
- •Oven temperature management. Removing trays mid-bake drops oven temperature briefly — timing matters.
Best Practices
- •Preheat oven to 500°F (260°C) for 45–60 minutes with steam tray(s) inside
- •Place a baking stone or steel on the center rack
- •Add 1 cup boiling water to the hot tray immediately after loading your loaves
- •Add another ½ cup at the 10-minute mark for sustained steam
- •At 20 minutes: remove trays, reduce temperature to 450°F, continue baking until done
Method 3: Commercial Steam Injection Ovens
How It Works
Commercial deck ovens and professional bakery ovens have built-in steam injection systems — pressurized steam piped directly into the baking chamber. Temperature, steam pressure, and steam duration are all precisely controlled with mechanical or digital systems.
Pros
- •Perfect, consistent steam delivery every single time
- •No operator skill required — steam is automated
- •Highest quality crust for professional results
- •Maximum oven spring — steam is abundant and perfectly timed
Cons
- •Cost: $2,000–$10,000+. Not an option for home bakers.
- •Requires plumbing/installation. Commercial ovens need dedicated electrical and often gas connections.
- •Overkill for home use. Unless you're baking 20+ loaves daily, a Dutch oven produces 90% of the results at 2% of the cost.
Who It's For
Professional bakeries, serious cottage food operations, and bread-obsessed home bakers with unlimited budgets and dedicated baking spaces. For everyone else, Dutch oven or DIY steam methods produce excellent results without the expense and complexity.
The Two-Phase Principle (Universal)
Regardless of which steam method you use, the two-phase baking principle is universal:
Phase 1 (0–20 minutes): Steam ON. Maximum steam for oven spring and crust development. During this phase, crust must stay soft and extensible so the dough can expand fully. Steam keeps the surface from setting.
Phase 2 (20+ minutes): Steam OFF. Dry heat for crust caramelization and final bake. Once oven spring is complete (roughly 20 minutes in), steam becomes counterproductive — you want dry heat to firm and brown the crust properly.
The transition between phases should be:
- •Dutch oven: Remove lid at 20 minutes
- •Steam trays: Remove trays at 20 minutes (or let water evaporate naturally if using ice)
- •Commercial ovens: Turn off steam injection at 20 minutes
Steam Method Comparison
| Factor | Dutch Oven | Tray/Steam Pan | Commercial Steam |
|---|---|---|---|
| Reliability | Most reliable | Moderate | Most reliable |
| Setup cost | $40–50 | $0–20 | $2,000–10,000+ |
| Capacity | 1 loaf at a time | Multiple loaves | Unlimited |
| Crust quality | Excellent | Excellent | Exceptional |
| Skill required | Minimal | Moderate | None |
| Safety | Safe (pre-bake loading) | Caution (hot water) | Safe |
| Works for batards | Poorly | Yes | Yes |
| Best for | Home bakers, beginners | Multiple loaves, batards | Professional |
The Verdict: Which Should You Use?
Use a Dutch oven if:
- •You bake one or two loaves at a time
- •You want maximum reliability with minimal effort
- •You're a beginner — the Dutch oven forgives timing and technique mistakes
- •Your budget is under $100
Use tray/steam method if:
- •You regularly bake multiple loaves at once (baguettes, batards, etc.)
- •You want more rustic, artisan-style crust development
- •You already own a baking stone or steel
- •You're comfortable with a bit more technique and attention
Consider commercial steam if:
- •You're baking commercially or semi-commercially (20+ loaves per session)
- •You have budget for it and want the absolute best results
- •You're a serious home baker who bakes daily and wants professional-level equipment
Frequently Asked Questions
Can I use a baking stone instead of a Dutch oven?
Yes, but you need steam with it. A baking stone alone doesn't trap steam — it just provides even heat distribution. Use the tray/steam method alongside your baking stone: preheat stone + steam tray together, add water when you load your loaves, remove trays after 20 minutes for the dry finish. A baking steel is even better than stone — it conducts heat faster and holds more thermal energy.
Does steam matter for Dutch oven baking?
Yes — but it's self-generated. A Dutch oven traps moisture the dough releases during baking, creating steam automatically. No external steam is needed. The lid prevents that moisture from escaping, which is why preheating the pot is critical — you're trapping heat as well as moisture.
How much water do I need for steam?
For the tray method: approximately 1 cup (240ml) of boiling water added immediately, plus ½ cup at the 10-minute mark. Ice cubes: use 4–6 cubes (roughly equivalent to ½ cup water). The goal is sustained steam for 20 minutes — if your oven is well-preheated, one cup of boiling water will last the full window.
Closing Thoughts
Steam is non-negotiable for good sourdough — but the method you use is far less important than actually having steam. A Dutch oven is the most reliable setup for most home bakers because it requires no skill and produces excellent results consistently. The tray method rewards more technique but offers flexibility and capacity that Dutch ovens can't match.
My personal setup: I use a Lodge Dutch oven for everyday loaves — it's simple, reliable, and produces bakery-quality bread every time. When I want to bake batards or multiple loaves simultaneously, I use a baking stone with a preheated cast iron skillet and boiling water. Both methods work. Neither is definitively better — they suit different situations and bakers.
Pick the method that fits your baking habits and kitchen. Master it. Then experiment with the other if you're curious. But never skip steam — your bread will thank you for it.
Happy baking!