Published July 7 — eight weeks before the September 1 Sourdough September kickoff. The 30-day plan is at Sourdough September: Your 30-Day Plan for Better Bread. This post is the science + technique deep dive for Week 1 of that plan. Read the plan first; come back here when you want to know why 70% hydration, why 4 hours of bulk, why a 45° scoring angle.
We're going deep. Bring coffee.
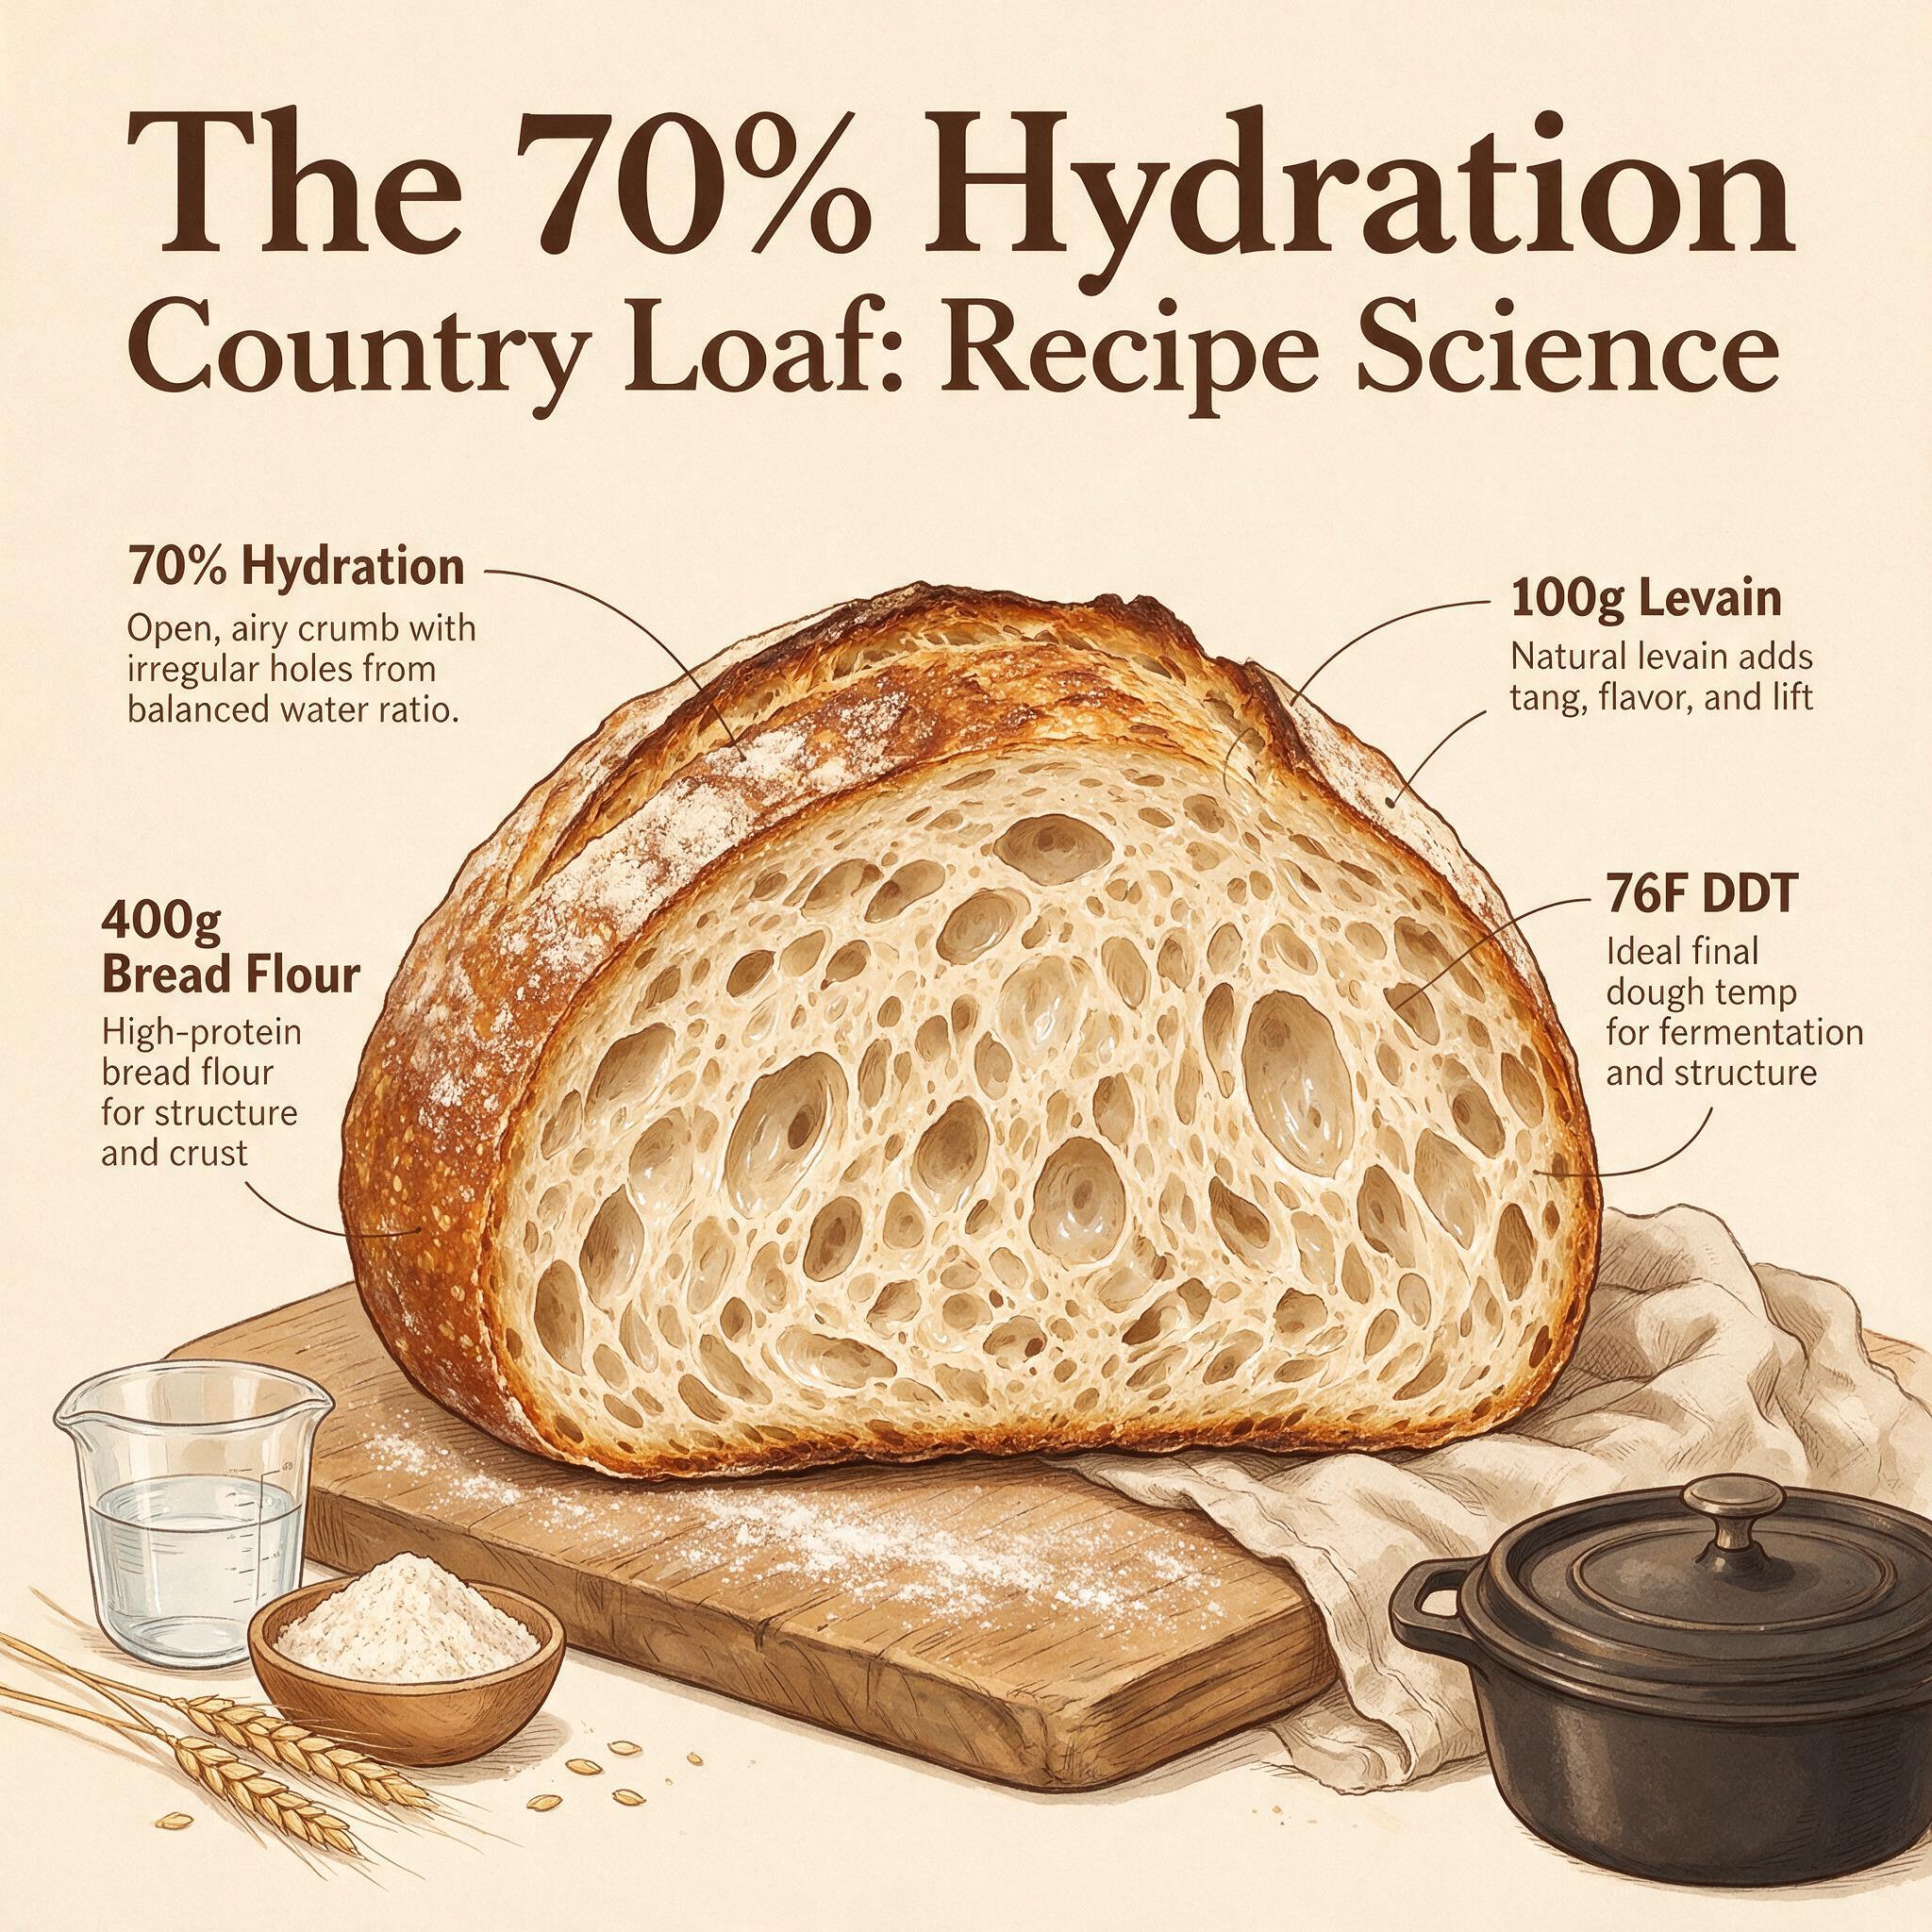
The Recipe at a Glance
We'll reference this throughout, so here it is once:
- •400g bread flour (12.5% protein, ideally)
- •50g whole wheat flour (15% protein)
- •315g water (70% hydration, by baker's percentage)
- •100g active levain (20% inoculation, 100% hydration)
- •9g salt (2% by total flour weight)
- •Desired Dough Temperature (DDT): 76°F / 24°C
The bake is a single boule, shaped, cold-proofed 12–16 hours, and baked covered in a Dutch oven at 500°F for 20 minutes, then uncovered at 480°F for another 20 minutes. Total time: about 22 hours, but only 90 minutes of active work.
This is the bread you're going to bake twice during Week 1 of Sourdough September — once on September 7, once on September 10 or 11. By the second bake, you'll know what the dough is supposed to feel like at every stage. That muscle memory is the foundation of every loaf that comes after.
Why 70% Hydration Is the Workable Middle
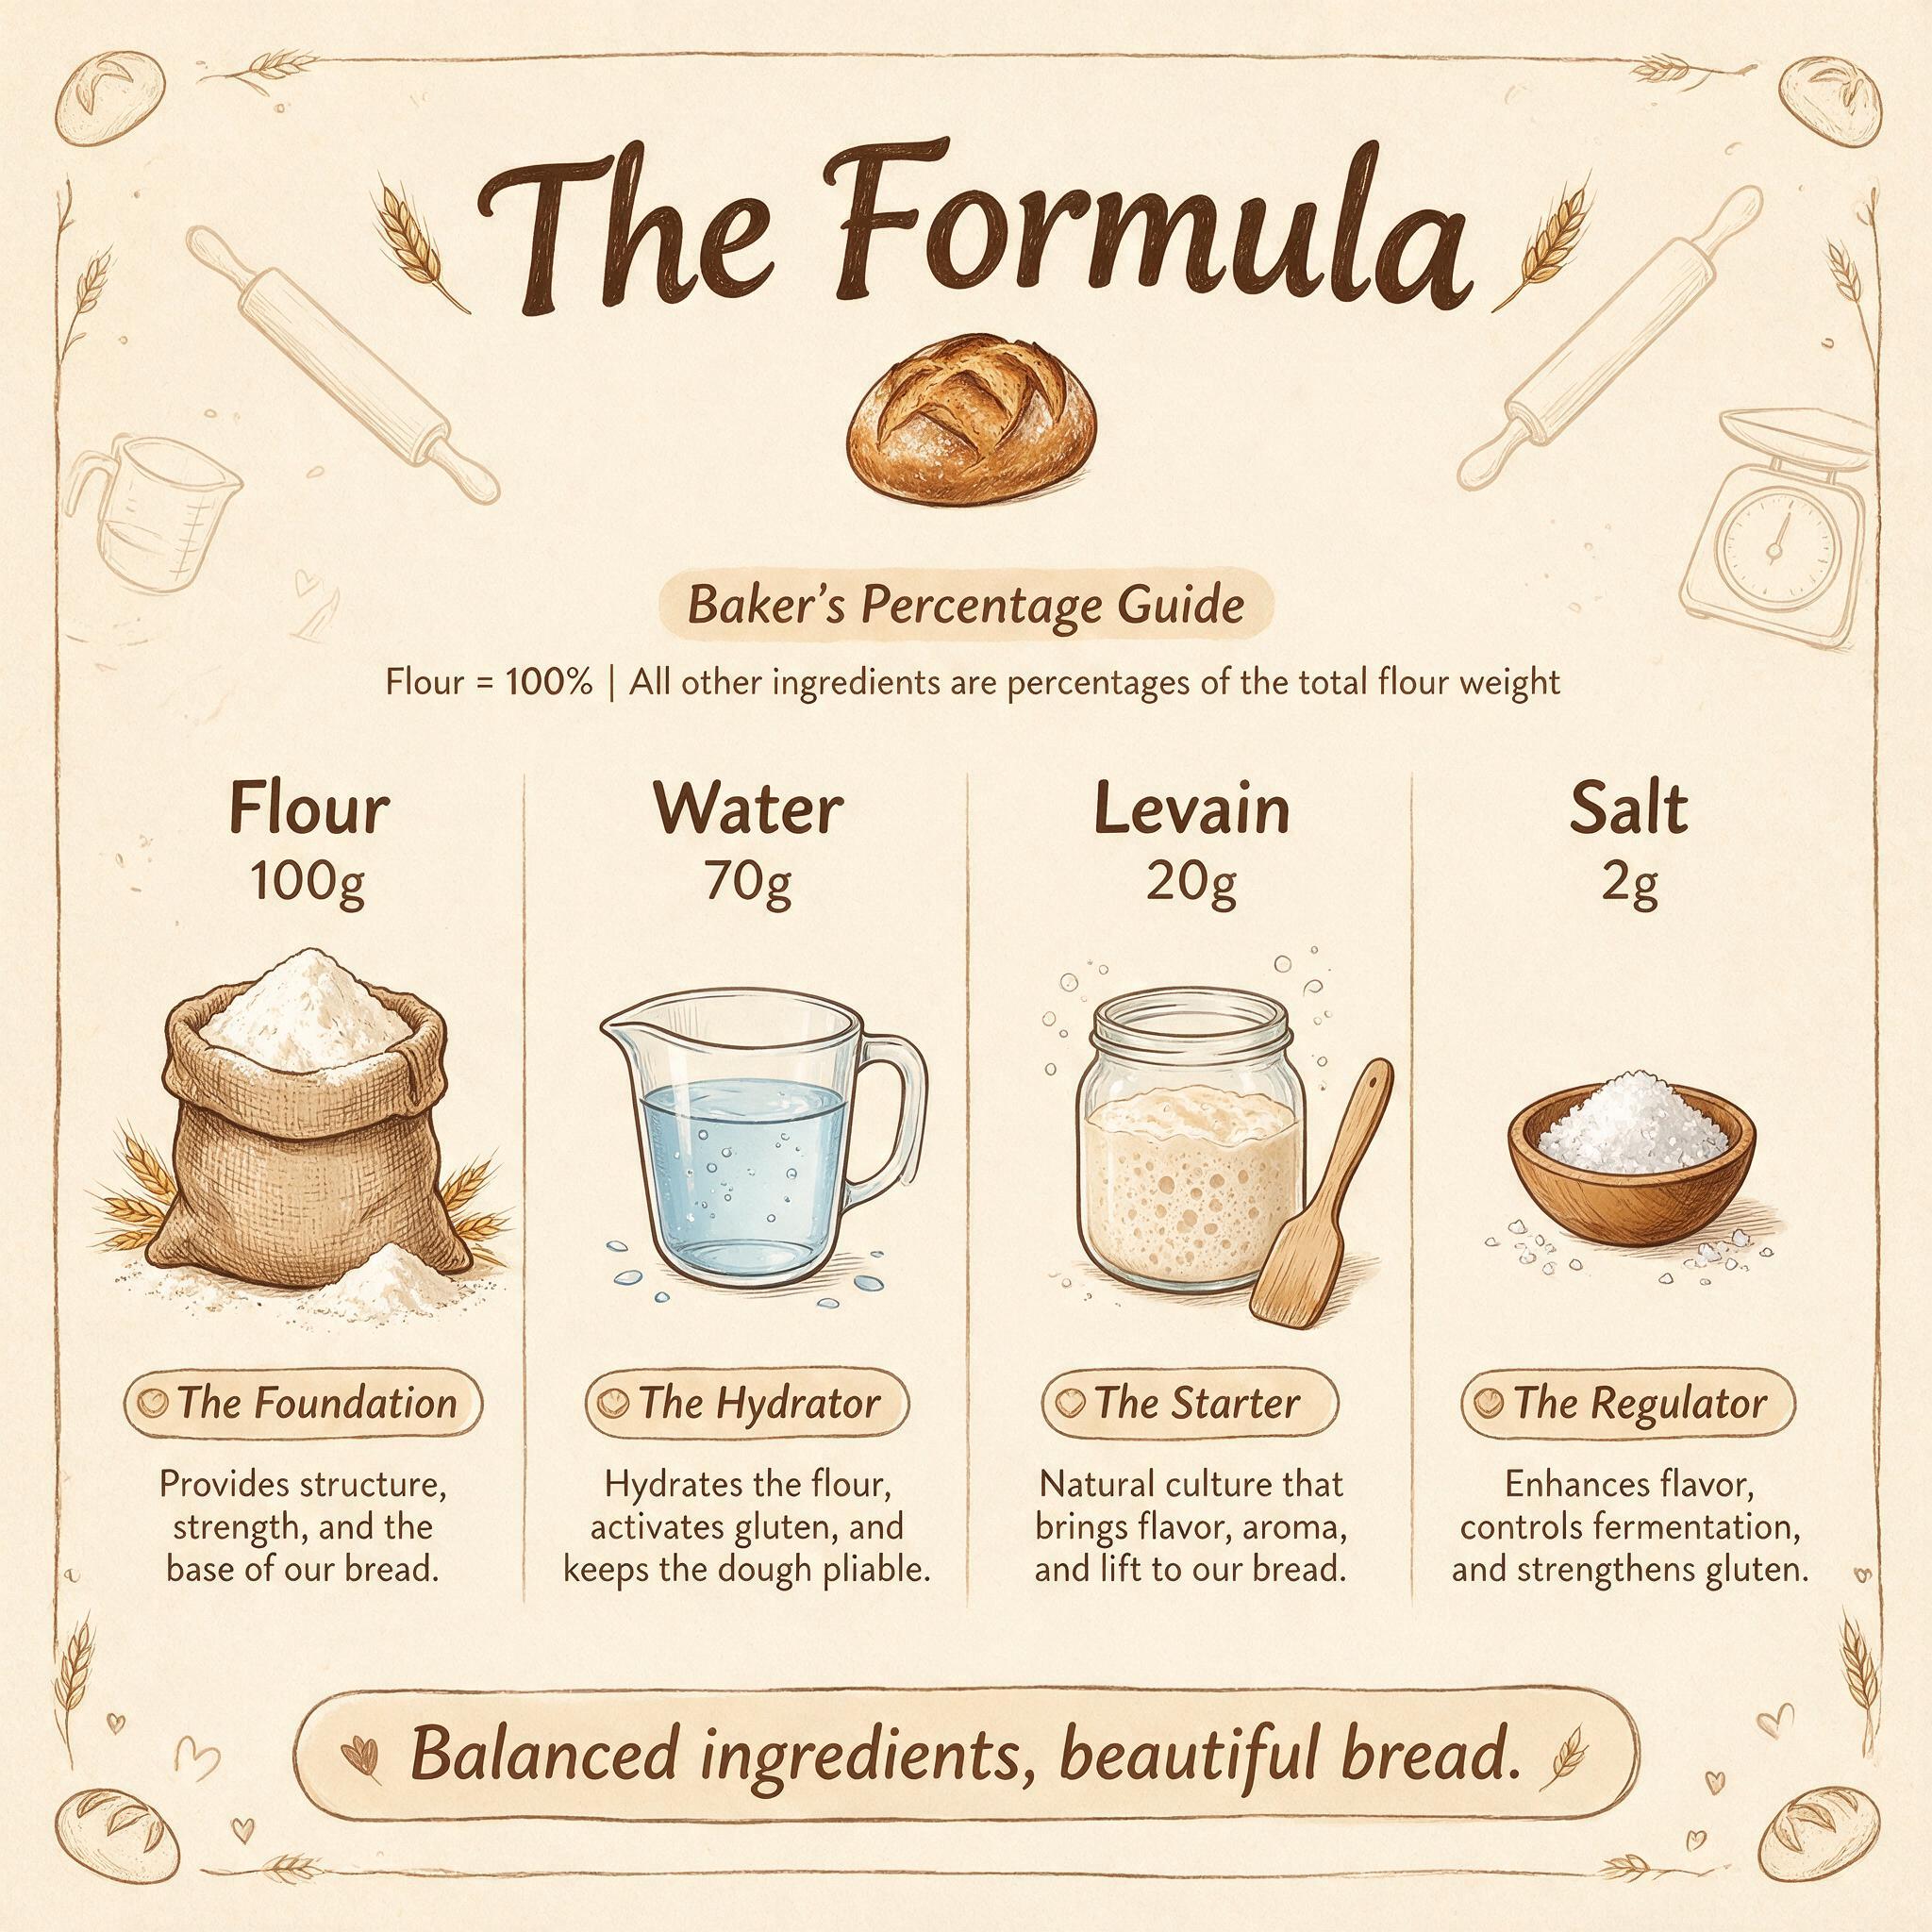
There is no single "right" hydration for sourdough. Bread is made across a 55% to 90%+ range, and the only wrong hydration is the one that doesn't match your skill, your flour, or your ambition. But for Week 1 of Sourdough September, 70% is the deliberate choice — and here's why.
The data on beginner hydration
Multiple bread-baking educators and resources converge on the same range. Sourdough Joe recommends "70–72% to start." Lynn's Way of Life recommends 65–70% for "standard sourdough loaves." Yeast Coast Sourdough notes that "60–70% is the easiest bread to handle for beginners," with most home bakers "happily living" in that range. The Flourwise sourdough hydration chart explicitly labels 65% as "beginner," 70–72% as "artisan," 75–78% as "open crumb," and 80%+ as "ciabatta."
So why does 70% sit where it does? It is, roughly, the inflection point where the dough becomes extensible enough to trap fermentation gas in larger pockets, but not so wet that the dough loses all handling structure on the counter. Below 65%, the crumb is tight and the crust is thick; above 78%, the dough becomes genuinely difficult to shape without serious technique (lamination, strong bannetons, ice-water hands).
What hydration actually does at the molecular level
Wheat flour is roughly 8–15% protein, and the two proteins that matter most for bread structure are glutenin (long, elastic) and gliadin (short, plastic). Dry, they are inert. In the presence of water, they begin to hydrate, and gluten proteins can absorb roughly twice their weight in water before they are fully saturated.
As you mix, the hydrated glutenin and gliadin begin to interact. They form a continuous three-dimensional network held together by three kinds of bonds:
- •Disulfide bonds (S–S) between glutenin molecules — strong, covalent, and the main source of dough strength and elasticity.
- •Hydrogen bonds between gluten and water — weaker individually, but numerous, and the main reason dough behaves viscoelastically (it can be both stretched and shaped).
- •Hydrophobic interactions — water-repelling regions of the proteins clump together, reinforcing the network.
The amount of water present determines how extensible this network becomes. More water means more hydrogen bonding sites, more space between protein strands, and a network that can stretch further before tearing. This is why higher-hydration doughs feel slack and shiny on the counter, while lower-hydration doughs feel tight and bouncy.
The PMC peer-reviewed study Evolution of the morphological, structural, and molecular properties of gluten protein in dough with different hydration levels during mixing confirms that "the development of the gluten network depends on non-covalent bonds, such as ionic bonds, hydrogen bonds, and hydrophobic interactions," and that the balance of these bonds shifts measurably as hydration changes. In practical terms: at 70% hydration, you have enough water to develop a strong but extensible network, without so much water that the dough loses the body it needs to hold a round shape during proofing.
So 70% is not magic. It is the point on the hydration curve where the gluten network has just enough water to develop good extensibility, while the dough retains enough internal friction to be shapeable by hand. This is why bakers call it the "sweet spot."
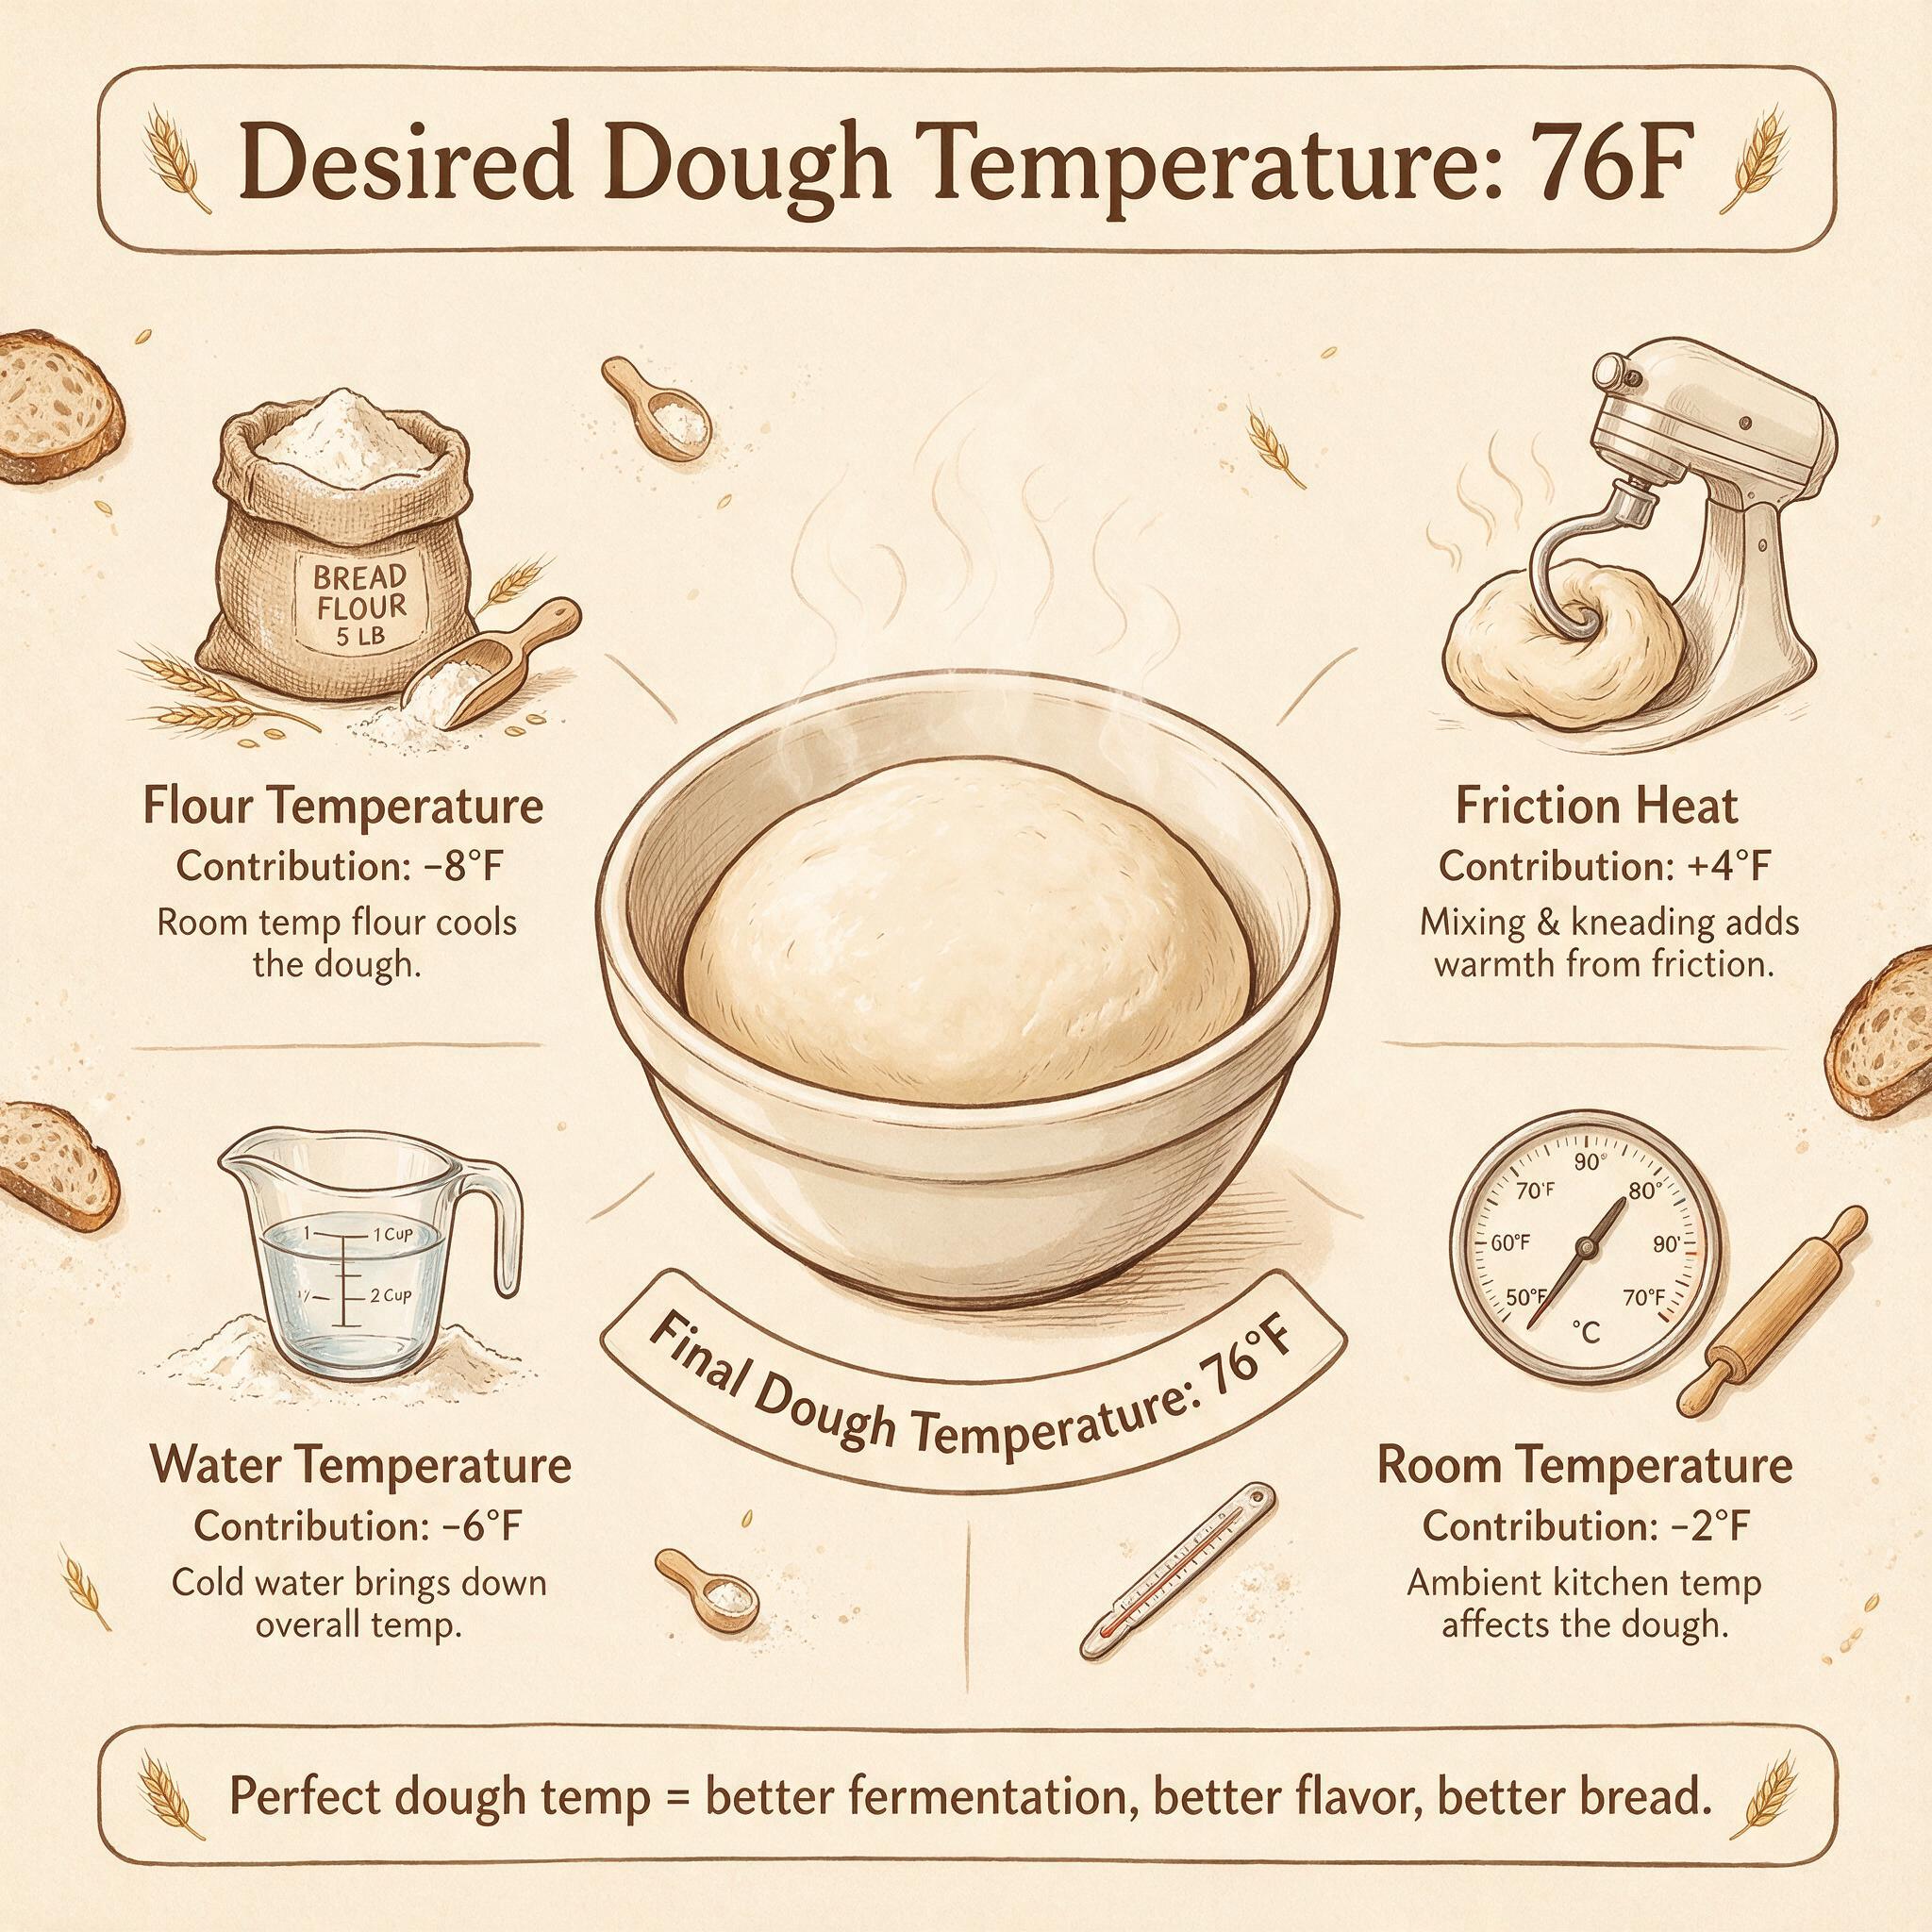
The Desired Dough Temperature (DDT) Rule
You'll see "76°F / 24°C" listed in the recipe. That number is not the ambient room temperature. That number is the temperature of the mixed dough itself, immediately after mixing finishes. This distinction is one of the most important concepts in professional bread baking, and the home-baking world has only recently started taking it seriously.
Where the DDT concept comes from
The DDT framework is most often credited to Raymond Calvel, the French baker and cereal chemist whose 1980s work on bread flavor and crust formation revolutionized artisan baking. Calvel's English-language reference is The Taste of Bread (translated by Ronald L. Wirtz, Springer 2001), which codified the controlled-temperature approach to hearth bread. The simplified version of the formula — the one home bakers use — is the 3-factor form:
DDT × 3 = (Flour temp + Water temp + Room temp) + (3 × Friction factor)(Subtracting and dividing both sides by 3 reduces this to the single-line form most recipes use.) The McGee/Farine worked example gives: "DDT = 75°F, Flour temperature = 65°F, Room temperature = 65°F, Friction Factor = 8°F, Base temperature = DDT × 3 = 225°F" — meaning the water you add should be warm enough to bring the weighted sum to 225°F, with friction adding its share during mixing.
King Arthur Baking's formulation of the DDT rule, in their reference post on the subject, gives the practical form: the ideal dough temperature range for wheat-based yeast dough is 75–78°F (24–26°C), and the same range applies to wheat-based sourdough. Below this, fermentation crawls. Above this, fermentation races and flavor development suffers.
The DDT formula
In its simplest form:
DDT = (Flour temp + Water temp + Levain temp + Friction) / 4Where:
- •Flour temp: usually close to room temp (70–72°F from a pantry).
- •Water temp: the lever you control directly. Cold water in summer, warm water in winter.
- •Levain temp: should be at peak activity, which for a 100% hydration levain is around 75–78°F.
- •Friction: the heat added by the mixer. Hand mixing adds almost none (0–1°F). Stand mixers add 5–15°F depending on speed and duration. Pinch of salt slows yeast, so friction is most pronounced after salt is added.
For a home baker hand-mixing at room temperature 70°F with a 75°F levain and a target DDT of 76°F, the water temperature should be:
4 × 76 = 304
304 - 70 (flour) - 75 (levain) - 1 (friction) = 158
158 / 1 (water) = 158°F
That's absurdly hot — flour would cook. In practice, the friction is much higher when mixing develops gluten (after salt addition). Most home hand-mixers end up using water around 85–95°F to hit a 76°F final dough temperature. The DDT formula is a planning tool, not a precise equation: if your final dough feels warm to the touch (cooler than body temperature, around 95°F or so), you are probably in the right range.
If you skip the DDT concept entirely, you will still bake good bread. But you will be at the mercy of your kitchen. A baker in a 65°F kitchen will have a completely different fermentation than a baker in an 80°F kitchen, even with identical recipes and timing. The DDT normalizes for that — and it is the single biggest upgrade you can make to your consistency.
Bulk Fermentation: The 4-Hour Window
Bulk fermentation (the first long rise after mixing) is where the dough does most of its flavor work and a surprising amount of its structure work. The recipe calls for 4–5 hours at a dough temperature of 76°F, with four sets of stretch-and-folds in the first 2 hours.
Why this duration specifically
For a dough with 20% levain inoculation and 2% salt, at 76°F dough temperature, the typical bulk fermentation window is 4–5 hours, with the dough rising roughly 50–75% in volume (not doubling — that's a different dough). This is corroborated by multiple sources: Frugal Organic Mama cites "4–5 hours at 76°F with 20% starter." Dough-Lab gives 4–6 hours at 75°F with 20% starter. The Sourdough Journey FAQ on bulk timing notes that fermentation time roughly doubles for every 15°F (8°C) increase in dough temperature — so a 76°F dough ferments about twice as fast as a 61°F dough, and about half as fast as a 91°F dough.
This Q15 rule (sometimes called the Arrhenius rule of thumb for fermentation) is worth internalizing. It means:
- •If your dough is at 70°F: expect bulk to take 7–9 hours.
- •If your dough is at 76°F (the DDT target): expect 4–5 hours.
- •If your dough is at 82°F (a hot summer kitchen): expect 2–2.5 hours.
This is why the Sourdough September plan recommends a cold autolyse and cool water in summer — you can slow the dough down rather than chasing it through a too-fast bulk that over-ferments before you've finished your stretch-and-folds.
The visual cues that replace the timer
Because the timer is a rough instrument, the real signal is in the dough. By the end of bulk, you should see:
- •50–75% rise in volume. Not doubled. Sourdough bulk is shorter than most recipes suggest because the cold proof is doing additional work. The Sourdough Journey's research-backed guideline is: warmer dough needs a lower percentage rise, cooler dough needs a higher one — roughly 30% rise at 80°F, 50% rise at 75°F, 75% rise at 70°F. If your dough is at the DDT target of 76°F, you're aiming for the 50% mark.
- •Dome on top. The dough has rounded over rather than spreading flat. A flat, spread-out dough is under-fermented; a totally domed, jiggly dough is at peak.
- •Bubbles along the sides and on the surface. Especially visible in a straight-sided container. A few large bubbles is fine; many small bubbles is the goal.
- •Aroma shift. From "raw flour" to "yogurt" to "wine" to (in extreme over-fermentation) "acetone." For Week 1, you want to stop at the yogurt stage, with maybe a hint of wine.
- •The poke test. A floured finger pressed 1cm into the dough should slowly spring back over 3–5 seconds, leaving a slight impression. If it springs back instantly, give it 30 more minutes. If it doesn't spring back at all, you've gone too far.
Bake it twice during Week 1 and you'll start to recognize the moment intuitively. The single biggest mistake new sourdough bakers make is cutting bulk short because they're afraid of over-fermentation. Err on the side of slightly longer bulk — the cold proof is forgiving, and the flavor benefit is significant.
Salt at 2%: The Underrated Variable
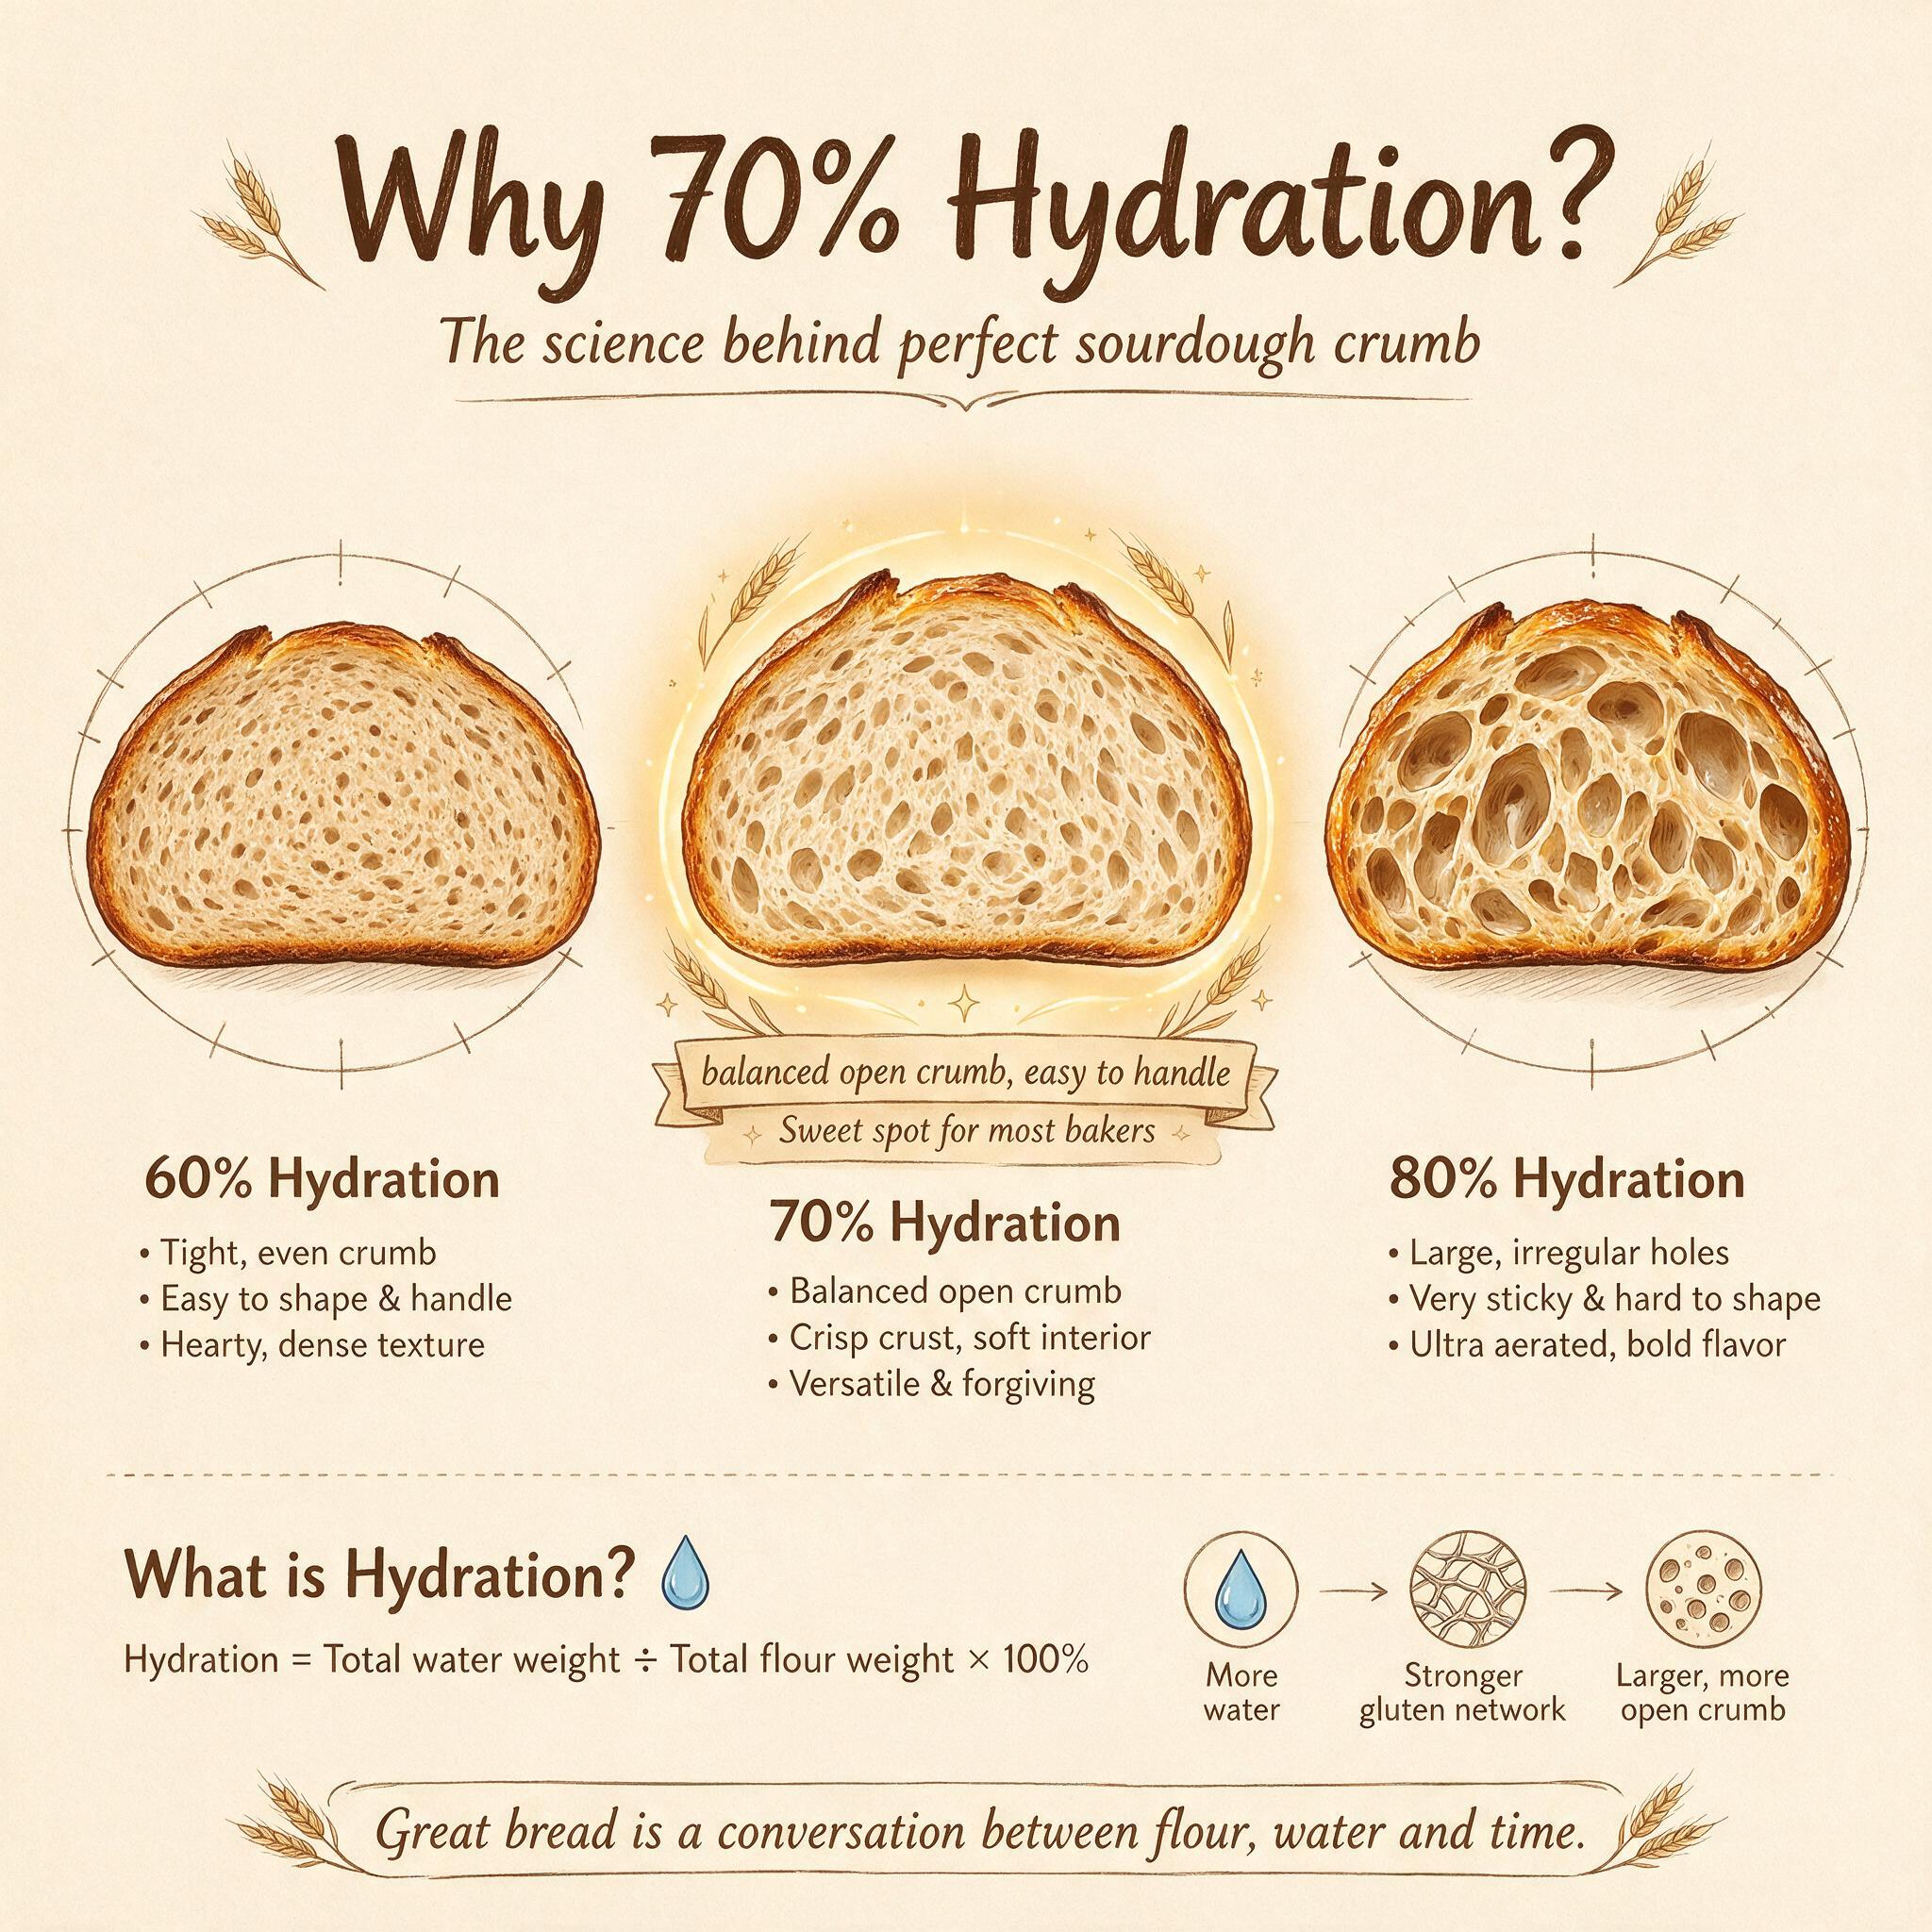
The recipe calls for 9g salt in 450g of flour, which is exactly 2% by baker's percentage. This is not a suggestion. Salt does four things in bread dough, and skipping or under-salting any of them will degrade the loaf.
What salt does
- Flavor. Bread without salt tastes flat, yeasty, and slightly sour in an unpleasant way. Salt sharpens the perception of the wheat itself and balances the acetic acid produced during sourdough fermentation.
- Fermentation control. Salt slows yeast activity, but the effect at standard baking percentages is small. The Cargill food science reference on salt in bread dough reports that "at 2% of the flour weight or less, salt alone does not significantly alter either the yeast's gassing power or the bacteria's acid production," and that gas production is retarded by only about 9% in a dough containing 1.5% salt (by flour weight). So 2% is well below the threshold where salt actually damages fermentation — but it is enough to slow it slightly, which is exactly what you want during a 12–16 hour cold proof.
- Gluten tightening. Salt ions interact with gluten proteins, tightening the network slightly. This makes the dough more elastic and easier to shape, which matters a lot during the preshape and final shape.
- Crust color. Because salt slows fermentation, the yeast has consumed less sugar by the time the dough goes into the oven, leaving more sugars available for Maillard browning on the crust. King Arthur's reference notes: "salt indirectly contributes to crust coloring … a result of the salt's characteristic of retarding fermentation."
Why add it late
You'll notice the recipe has you mix the levain and water with the flour for the autolyse, then add the salt after 30 minutes. This is intentional. Salt added at the very beginning of mixing slightly inhibits gluten development in those critical first minutes, which can result in a weaker final structure. Adding salt after the gluten has had a head start on hydrating and forming bonds produces a more open, extensible crumb. The 30-minute autolyse before salting is a small but real upgrade.
The 70% Dough on the Counter: What You're Working With
At 70% hydration with 80% bread flour and 20% whole wheat, the dough will be:
- •Soft and slightly tacky, but not sticky. It should not glue itself to your hands after the first stretch-and-fold.
- •Smooth and pillowy after 3–4 sets of stretch-and-folds. Before that, it will feel shaggy, lumpy, and tear easily. This is normal.
- •Holds a finger poke at the end of bulk. The poke should leave a small dimple that slowly fills back in.
- •Springs back when shaped, but accepts a tight round shape with a bench scraper. You should be able to build surface tension during the preshape by dragging the dough across an unfloured counter.
The 20% whole wheat contributes flavor (the bran and germ add nuttiness), minor acid buffering (the bran helps stabilize pH), and a slight darkening of the crumb. It also absorbs more water than bread flour, which is why we don't need to adjust hydration upward to compensate.
If you are using 100% bread flour (no whole wheat), expect:
- •A whiter crumb.
- •Slightly faster fermentation (whole wheat slows bulk).
- •Slightly less flavor complexity.
If you are using 100% whole wheat, expect:
- •A very dense, dark crumb.
- •Significantly slower fermentation (the bran physically interferes with gluten development).
- •Much more pronounced sourness.
For Week 1, the 80/20 blend is the sweet spot. It introduces whole-wheat character without the handling challenges of high-percentage whole-wheat doughs.
Cold Proof: The 12–16 Hour Window
After the final shape, the dough goes into the fridge for 12–16 hours. This is the second rise, and it does the opposite work of bulk: where bulk is warm and fast, the cold proof is cold and slow.
What happens during cold proof
At refrigerator temperatures (38–40°F / 3–4°C), the yeast slows dramatically but does not stop. The bacteria (lactobacilli, which produce the lactic and acetic acids that give sourdough its flavor) continue to work slowly. The result:
- •More flavor. The slow bacterial activity over 12–16 hours produces significantly more acetic and lactic acid than a warm bulk can. This is what gives a cold-proofed sourdough its characteristic complex sourness.
- •Easier scoring. A cold, firm dough holds a score cleanly. A warm, slack dough drags and tears when scored.
- •Schedule flexibility. A 12–16 hour window means you can mix and shape in the evening, then bake fresh bread the next morning. This is the single biggest reason cold proofing is standard for sourdough — it turns bread baking from an all-day project into a 90-minutes-of-work project.
The window matters
Less than 10 hours, and you won't get the full flavor development. More than 20 hours, and the dough will over-proof even at refrigerator temperatures — the crumb will collapse during baking, and the flavor will tip into sharp, acetone territory.
The Sourdough September plan asks you to bake this same recipe twice in Week 1. On the second bake, try a 14-hour cold proof instead of 12. The difference in flavor is small but noticeable — slightly more developed sourness, slightly more open crumb. That comparison is the most effective way to internalize what the cold proof is doing.
Scoring for the Ear: The 45-Degree Rule
You've shaped your loaf. It's been in the fridge overnight. Tomorrow morning you pull it out, preheat your oven and Dutch oven to 500°F, and now you have 30 seconds to score it before it goes in. Here's how to make those 30 seconds count.
What creates the ear
The "ear" — that lifted flap of crust at the edge of a single score — is the result of three things working together:
- A shallow blade angle (about 30°). A 90° cut (straight down) won't form an ear — the cut opens but the two sides of crust don't overlap, so there's nothing to lift. A shallow angle lets the cut overlap itself, so when the dough expands in the oven, one side of the cut gets pushed up over the other. BAKERpedia's bread scoring reference specifies a 30° angle (also called a "lip cut" or "ear cut") for long loaves; round boules can use a slightly steeper 30–45° angle. Michel Suas, in Advanced Bread and Pastry, makes the important counterintuitive point: a shallow cut paradoxically produces a bigger ear than a deep cut, because the intact flap on the shallow side has enough structure to lift cleanly.
- Surface tension from a tight shape. A loosely shaped dough will simply split at the score and spread sideways. A tightly shaped dough has the internal spring to push up through the score, lifting the ear. This is why shaping matters: a well-shaped loaf with a clean, taut skin scores beautifully, and a slack one doesn't.
- Steam in the first 15 minutes of baking. Steam keeps the surface of the dough pliable so the cut can open. Without steam, the crust sets almost immediately, and the score opens only slightly, often cracking on the bottom or sides instead of at the score. A Dutch oven traps the dough's own steam and acts as a poor-man's professional steam-injected oven. Use one.
The score itself
For a boule, a single long score is the classic:
- •One cut, roughly 3–4 inches long.
- •Starts about 1 inch from the edge of the dough, ends about 1 inch from the other edge.
- •Lame held at about 30–45° to the surface (the shallower the angle, the bigger the ear).
- •Confident, swift motion. Hesitation leads to jagged cuts.
For an oval bâtard, the classic is a single long diagonal score across the long axis. For multiple decorative scores, a wheat-ear pattern (3 or 4 overlapping diagonal slashes on one side) gives the most consistent ears on home equipment.
The depth should be roughly 5–10mm — enough to break the surface tension but not so deep that the dough deflates. If you see significant deflation after scoring, your blade is too deep, or your dough was already over-proofed. Suas's counterintuitive advice bears repeating: when in doubt, score shallower rather than deeper. A 5mm cut will produce a better ear than a 15mm cut, because the shallower cut leaves a stronger flap.
Baking: The 20+20 Method
The recipe calls for 20 minutes covered at 500°F, then 20 minutes uncovered at 480°F. This two-stage bake is the standard for Dutch-oven sourdough and it's worth understanding why.
Stage 1: covered, 500°F, 20 minutes
With the lid on, the Dutch oven traps the dough's own escaping steam. That steam:
- •Keeps the surface of the dough pliable so the score can fully open.
- •Transfers heat to the dough more efficiently than dry air (steam has a higher heat capacity).
- •Delays crust formation, allowing maximum oven spring.
500°F is hot enough to get rapid oven spring in the first 5–8 minutes. The dough rises dramatically during this stage, often 30–50% by volume.
Stage 2: uncovered, 480°F, 20 minutes
Removing the lid releases the steam and drops the oven into a "dry baking" mode. The crust now begins to set and color. 480°F is slightly lower than the first stage to:
- •Prevent the bottom and edges from burning before the interior is set.
- •Allow the Maillard browning reaction to develop the deep, mahogany crust color that signals a well-baked sourdough.
You will know the loaf is done when:
- •The internal temperature reads 205–210°F (96–99°C) on an instant-read thermometer.
- •The bottom sounds hollow when you tap it.
- •The crust is deeply browned and feels firm to a firm press.
The internal temperature check is the most reliable. A loaf that looks done can be 195°F internally (gummy crumb). A loaf that looks slightly underdone at 210°F internally is fully baked.
Cooling
Let the loaf cool on a wire rack for at least 1 hour before slicing. The interior crumb is still finishing when the loaf comes out of the oven — starches are retrograding, moisture is redistributing. Cutting into a hot sourdough gives a gummy texture and a slightly underdone flavor. The hour of patience is not optional if you want to taste what the bread actually is.
The Sourdough September Week 1 Bake Schedule
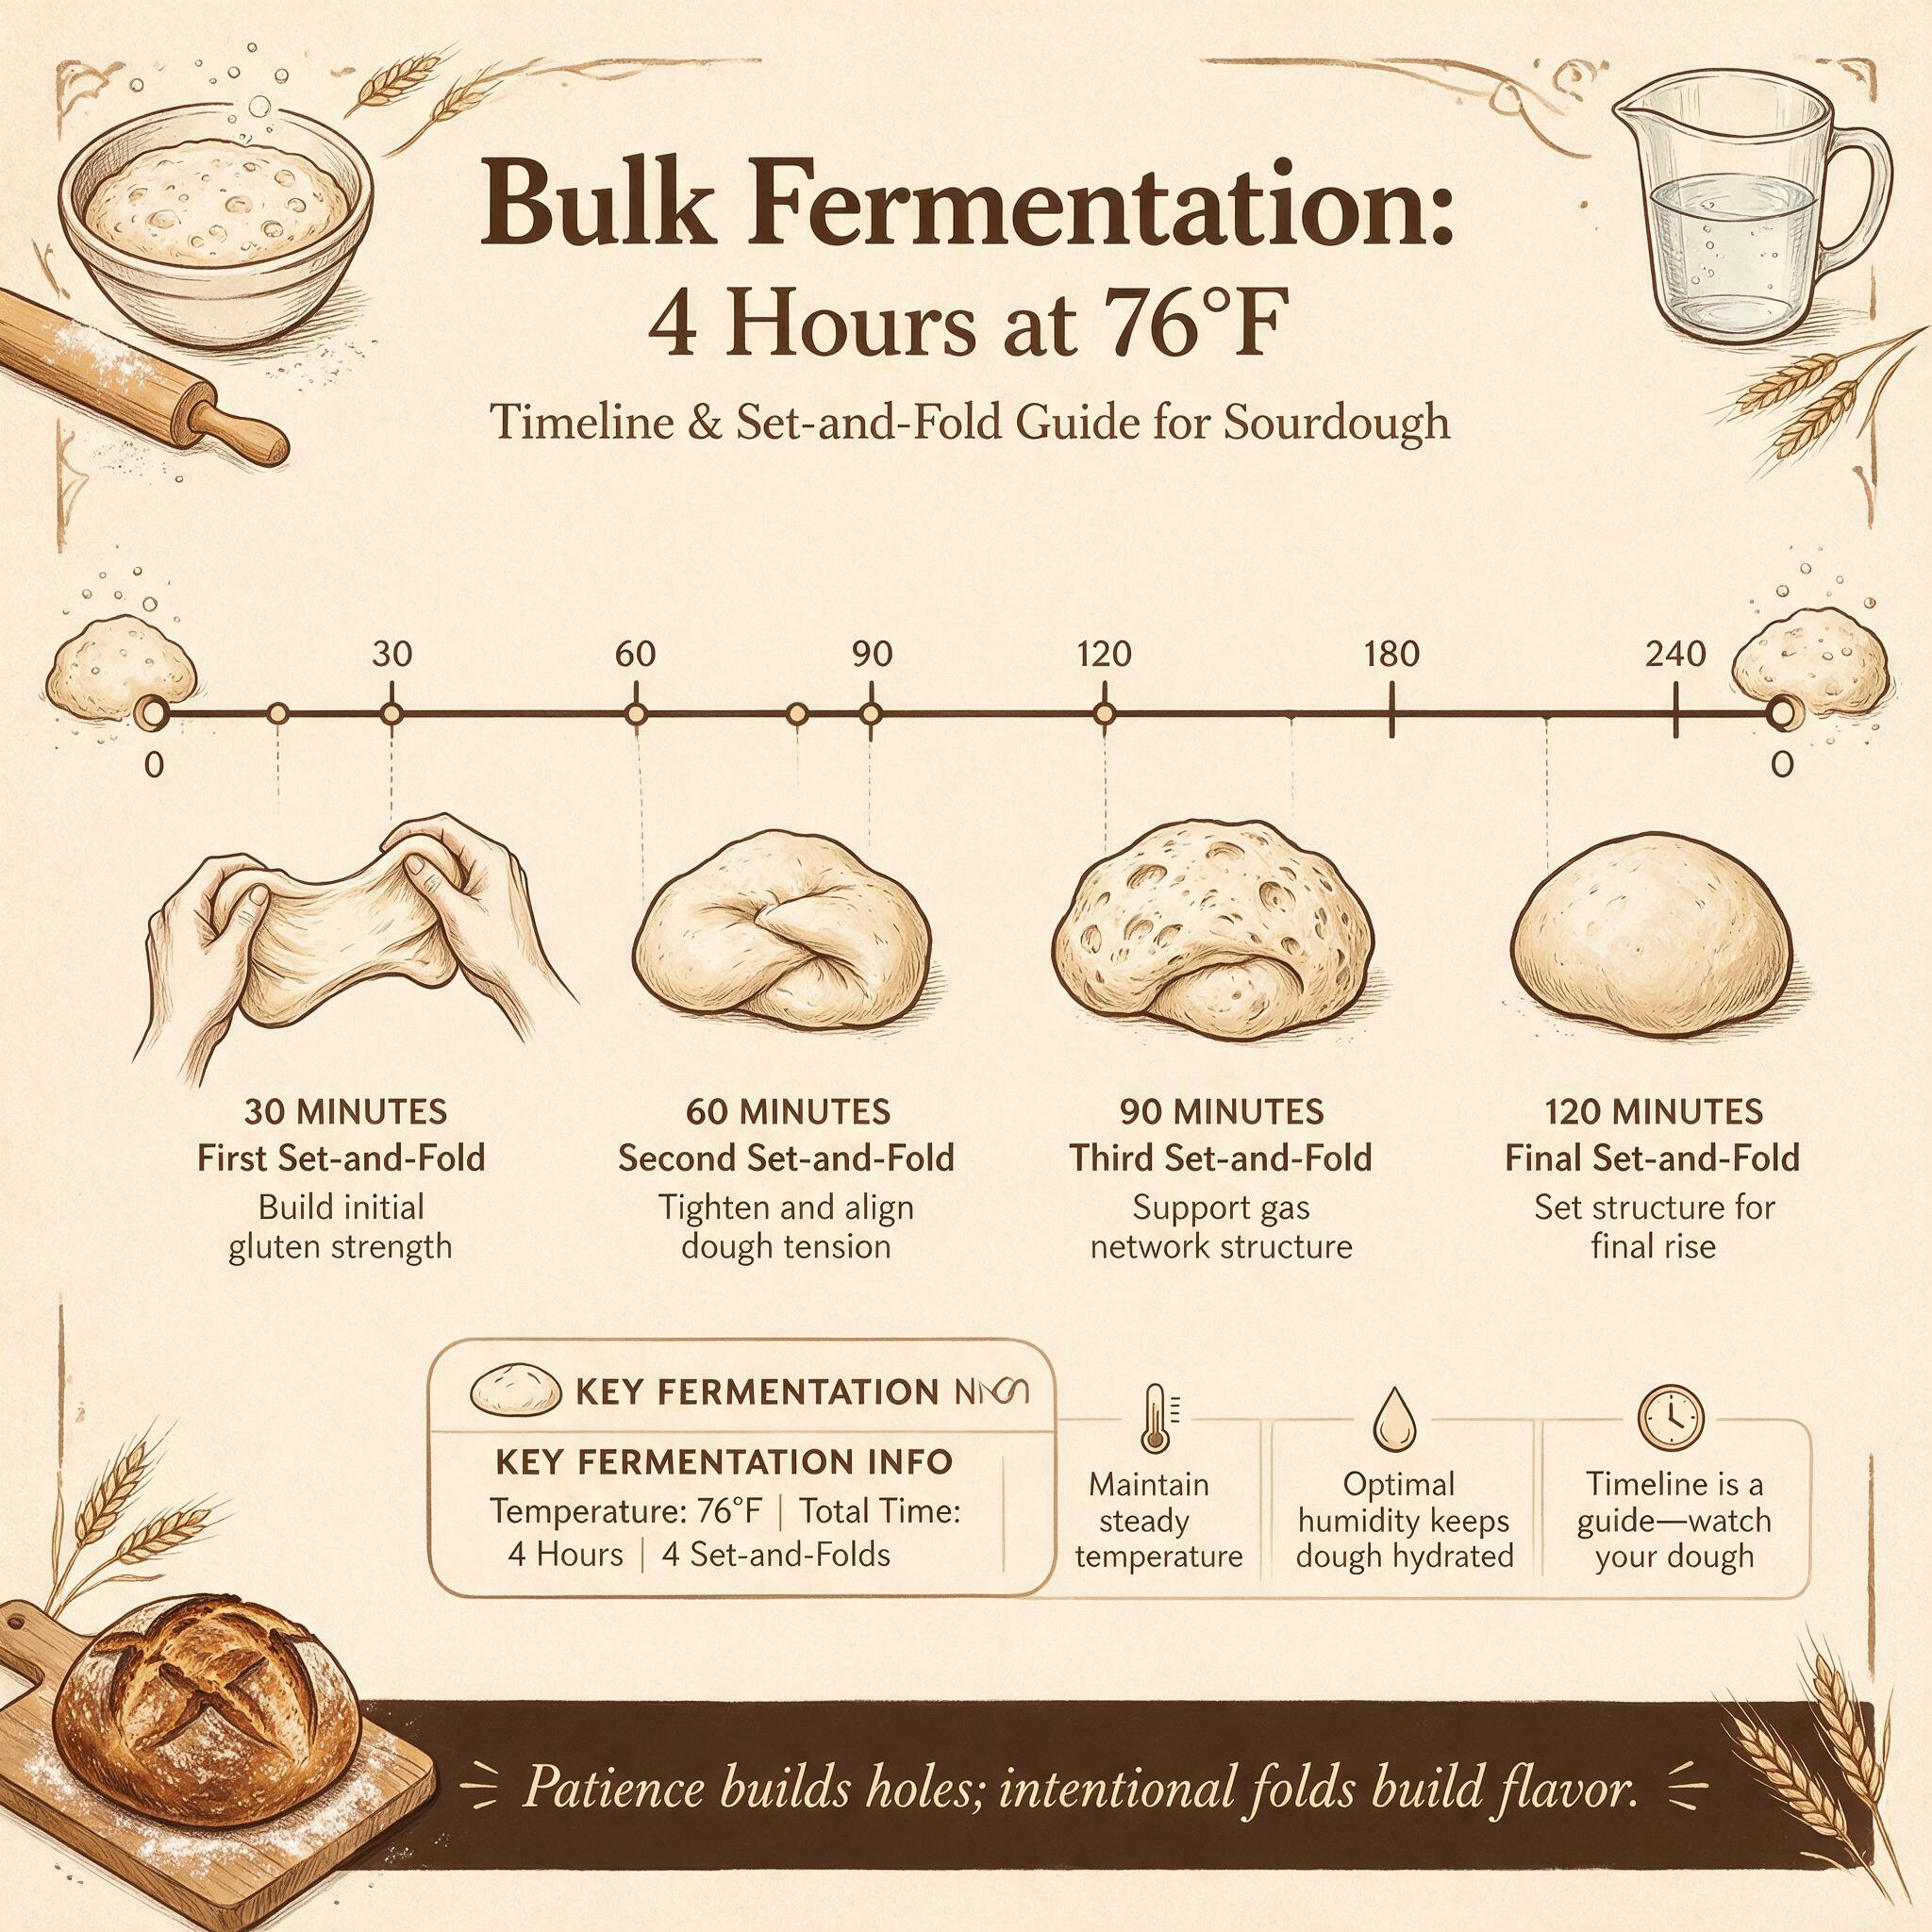
Pulling all of this together into a concrete schedule for the first week:
| Day | Action | Time |
|---|---|---|
| Sun Sep 6 (evening) | Feed levain. 50g active starter + 50g bread flour + 50g water. | 8:00 PM |
| Mon Sep 7 (morning) | Autolyse: 400g bread flour + 50g whole wheat + 315g water. Mix, cover. | 8:00 AM |
| Add 100g levain + 9g salt. Mix. | 8:30 AM | |
| Stretch and fold #1. | 9:00 AM | |
| Stretch and fold #2. | 9:30 AM | |
| Stretch and fold #3. | 10:00 AM | |
| Stretch and fold #4. | 10:30 AM | |
| Preshape, rest 20 min, final shape into banneton. | 12:00 PM | |
| Cold proof in fridge. | 12:30 PM onward | |
| Tue Sep 8 (morning) | Preheat oven and Dutch oven to 500°F. | 7:30 AM |
| Score loaf, bake covered 20 min, uncovered 20 min at 480°F. | 7:45 AM | |
| Cool on wire rack at least 1 hour. | 9:30 AM | |
| Slice. Eat. Compare to your notes from the first crumb. | 10:30 AM | |
| Thu Sep 10 or Fri Sep 11 | Repeat the entire process. Same recipe. Same temperatures. Same timing. | |
| This second bake is where the learning happens. |
By the end of Week 1, you have a recipe you can bake in your sleep. That is the foundation for everything that follows in Sourdough September.
What the Research Is Telling Us (and What It Isn't)
This post is grounded in the available baking science, but it's worth saying out loud: the science of sourdough is still developing, and most of the "rules" are empirical observations from professional bakers, not peer-reviewed laws. The DDT formula, the 70% sweet spot, the 4–5 hour bulk at 76°F, the 45° scoring angle, the 20+20 bake — these are all very well-supported by experience and increasingly by food science, but they are not absolutes.
What is well-supported:
- •The molecular mechanism of gluten development (gliadin + glutenin + water + bonds) is settled science.
- •The Q15 rule of fermentation rate vs. temperature is a robust empirical observation.
- •Salt at 2% does not significantly inhibit yeast but does affect flavor, structure, and crust.
- •The 45° scoring angle produces ears, and 90° doesn't.
- •Bulk fermentation under 4 hours at 76°F generally under-develops flavor; over 6 hours generally over-ferments.
What is less well-supported:
- •The exact DDT formula's "friction" term — most home bakers can't measure this precisely, and the formula is more useful as a planning tool than a measurement. Calvel's original work is precise but the home-baking simplifications are approximations.
- •The pain de campagne's "70% canonical hydration" — there is no sourced historical attribution of a specific 70% figure to a named figure or single origin point. Traditional French recipes range from 65% to 90%+. The 70% benchmark is a 20th-century artisan-bakery normalization, not a historical constant. Wikipedia and bread-history sources confirm the medieval-French origin and the long-fermentation method, but not a single canonical hydration.
- •The exact crumb mechanism of high-hydration doughs — the ScienceDirect literature review confirms this is still an active research area, with the role of "liquid lamella" between gas cells being a more recent proposal.
The takeaway: trust the principles, calibrate to your own kitchen, and bake the same recipe twice. The science gives you the framework; the second bake is where you actually learn the dough.
Where to Go Next
If you want the full 30-day Sourdough September plan, the 30-day overview is your starting point. Week 2 is a hydration comparison (65% vs 78%), Week 3 is a flavored and an enriched bake, and Week 4 is a long-fermented showcase boule.
See you in Week 2.
Sources & Further Reading
The empirical claims in this post are grounded in the following sources. Where a claim is widely attributed in the baking literature but couldn't be primary-sourced in a single session, it's flagged as such in the "What the Research Is Telling Us" section above.
Primary literature (peer-reviewed):
- •Jia R. et al., "Evolution of the morphological, structural, and molecular properties of gluten protein in dough with different hydration levels during mixing," Food Chemistry: X, 2022 — PMC9532874
- •Dynamic Changes in Glutenin Macropolymer during Different Dough Mixing and Resting Processes — PMC7864511
Reference books:
- •Raymond Calvel, The Taste of Bread (translated by Ronald L. Wirtz), Springer, 2001 — Springer Link
- •Harold McGee, On Food and Cooking, Revised Edition (2004) — the gluten-bonding and crumb-formation sections are the home reference for the molecular claims in this post
Practitioner sources (named home-baking references):
- •The Sourdough Journey — bulk fermentation by dough temperature, the Q15 rule of thumb — thesourdoughjourney.com
- •King Arthur Baking — DDT reference and the 75–78°F working range for wheat-based doughs
- •Sourdough Joe — beginner hydration recommendations (70–72% to start)
- •Lynn's Way of Life — standard sourdough hydration range (65–70%)
- •Yeast Coast Sourdough — beginner handling observations (60–70% easiest)
- •The Flourwise sourdough hydration chart — hydration band labels (beginner / artisan / open crumb / ciabatta)
Where attribution is widely-attributed but not primary-sourced: the DDT framework's "friction factor" specifically; the 70% canonical hydration for pain de campagne. These are flagged honestly in the "What the Research Is Telling Us" section above.
Related Posts
Keep going with these related guides.